

How to shoot the Oct 14 Ring of Fire Solar Eclipse
I fell into a burning ring of fireeeeee…….. Look I don’t really listen to any country but that song is a BOP. Shoutout Jcash.
While I do have an overview of how to shoot a Solar Eclipse here on my ultimate astrophotography guide, this tutorial will focus on the Oct 14 annular eclipse specifically and how to prep for it starting today by breaking practicing basic Solar photography.
This tutorial uses a few free and paid apps available on the computer or iOS. There are a few workaround for Android users. More on that below.

Above is a rendering I have created using my images of what a “Ring of Fire” Annular eclipse will look like at maximum annularity.
SAFETY FIRST
It goes without saying, but I have to say it. DO NOT look at or point a camera/lens at the Sun without the proper filters. Filters needs to be placed at the front of a lens/telescope/binoculars. They cannot be placed behind. Standard ND filters are NOT safe for cameras and visual use. You must use a proper solar filter or Baader film. Only use ISO certified solar sunglasses when viewing the night. If any filter or glasses are damaged, discard and buy new. If you have glasses from the 2017 Eclipse, it is recommended you buy a new pair.
I recommend purchasing filters and glasses through Thousand Oaks Optical, Daystar, Lunt, Baader Astronomy, B&H Photo, Agena’s Astro, and High Point Scientific. Amazon tends to be a crapshoot for legitimate glasses and filters so I would try to avoid them if you can. I am not affiliated with any website listed here. Be sure to accurately measure the outside diameter of your lens/lens hood or filter threads prior to purchase.
I take absolutely no responsibility if you damage your vision or equipment due to improper technique.

ISO certified solar glasses
White Light Solar Photography 101 & Choosing a Solar Filter
There are two types of white light solar filters you will want to use for this eclipse. Dedicated hydrogen alpha filters and telescopes are a bit more sophisticated and are difficult to find this close to the eclipse, so they will not be covered in this tutorial.
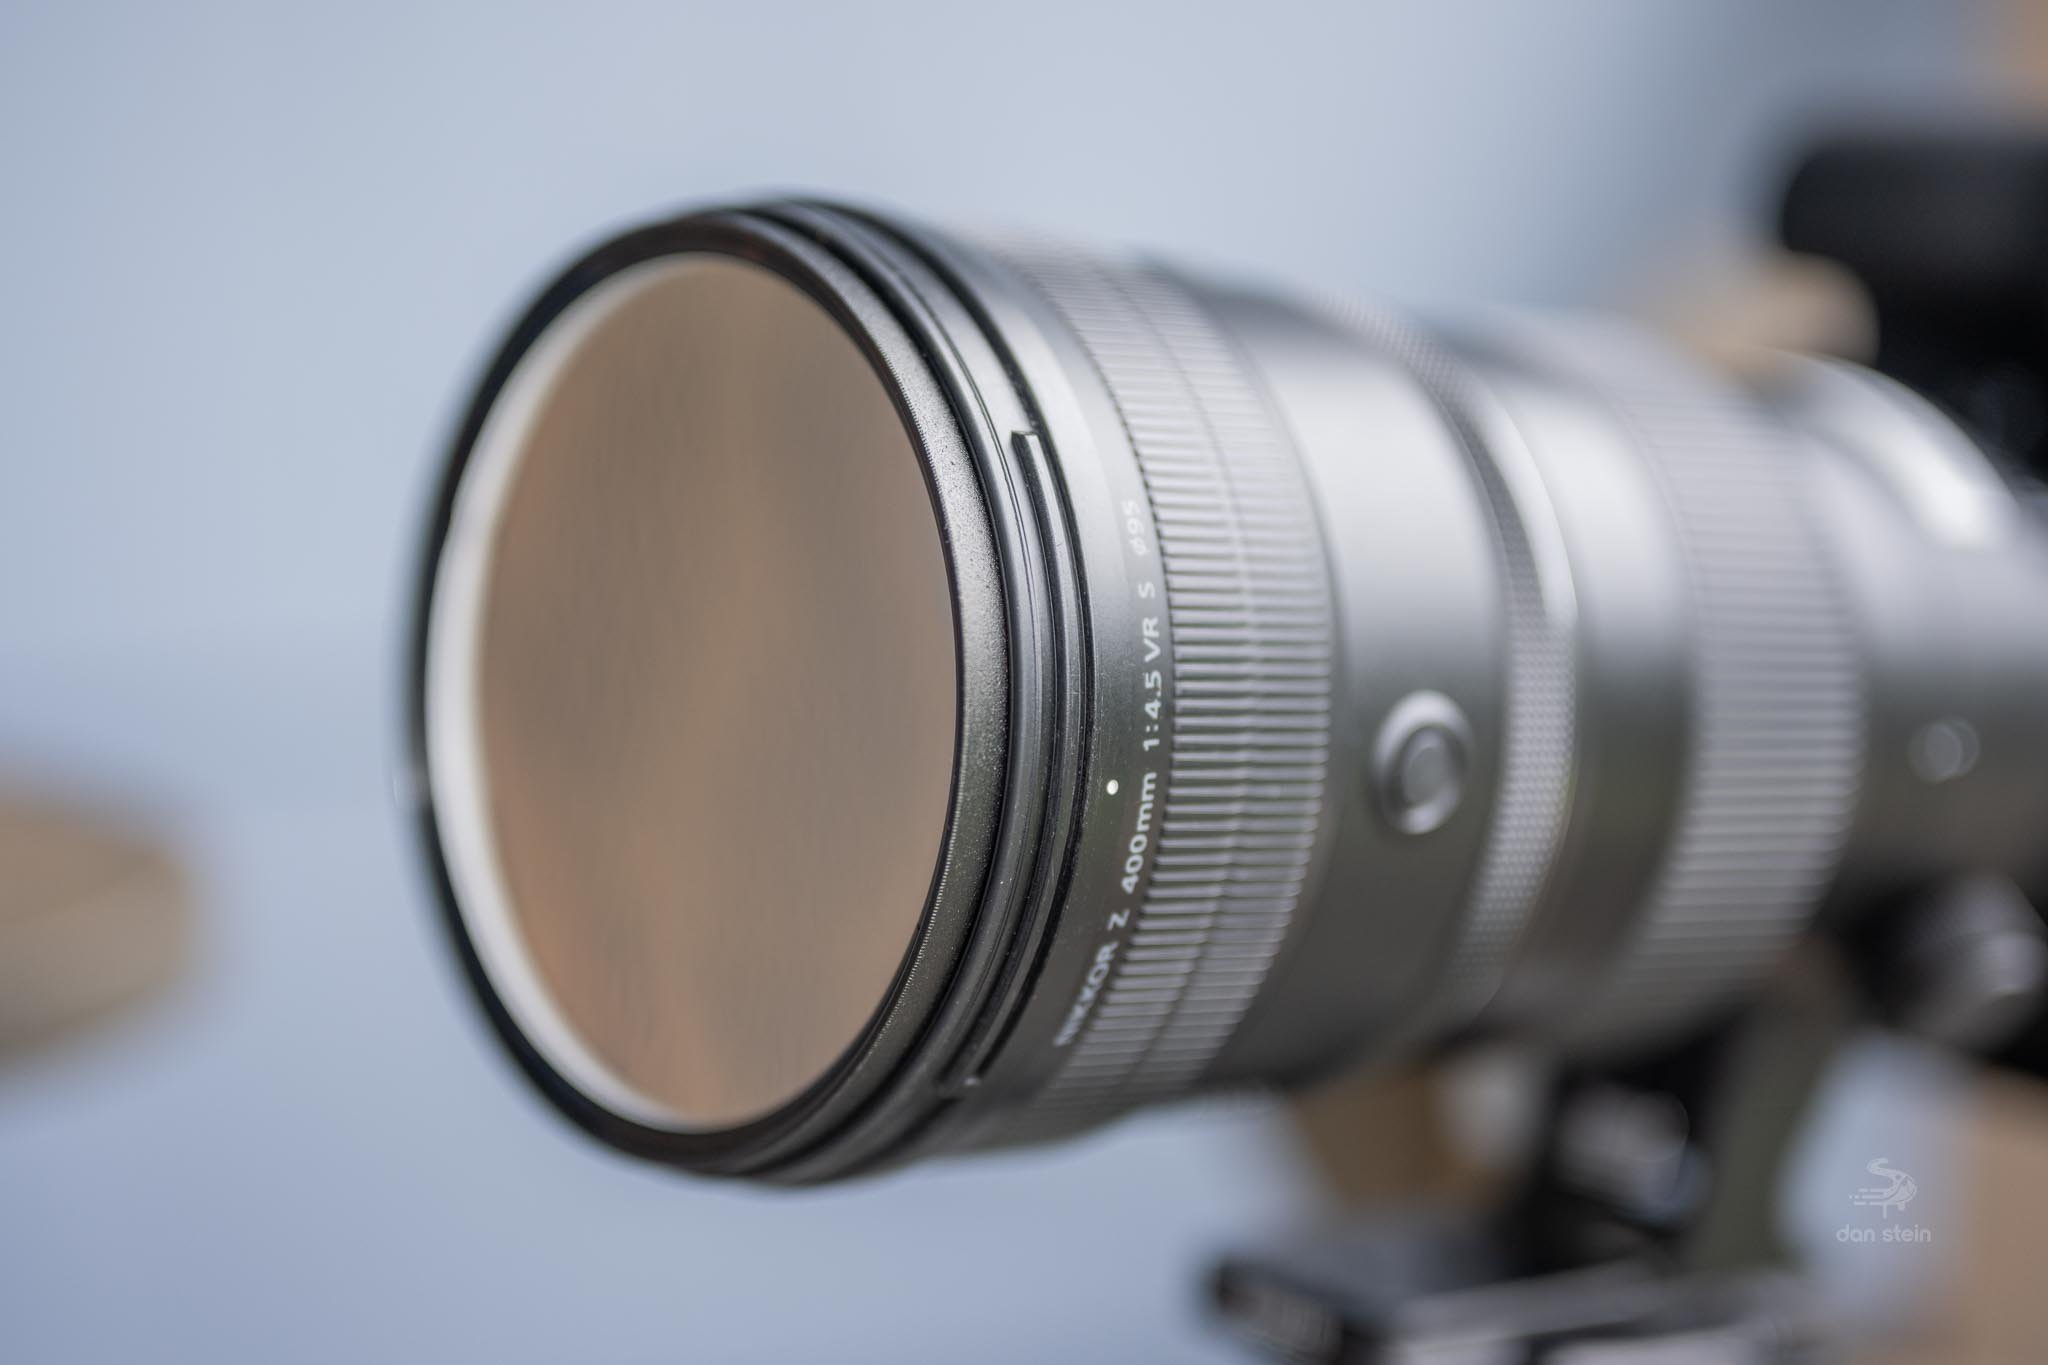
The first is a typical thread in type of filter which will work just like any other camera lens filter. These come in either glass or film vacations. Not only is the film cheaper and lighter, but it also offers a bit more contrast and detail than the glass, so I recommend going that route. Simply look at the filter thread dimensions of your lens and purchase the correct size.
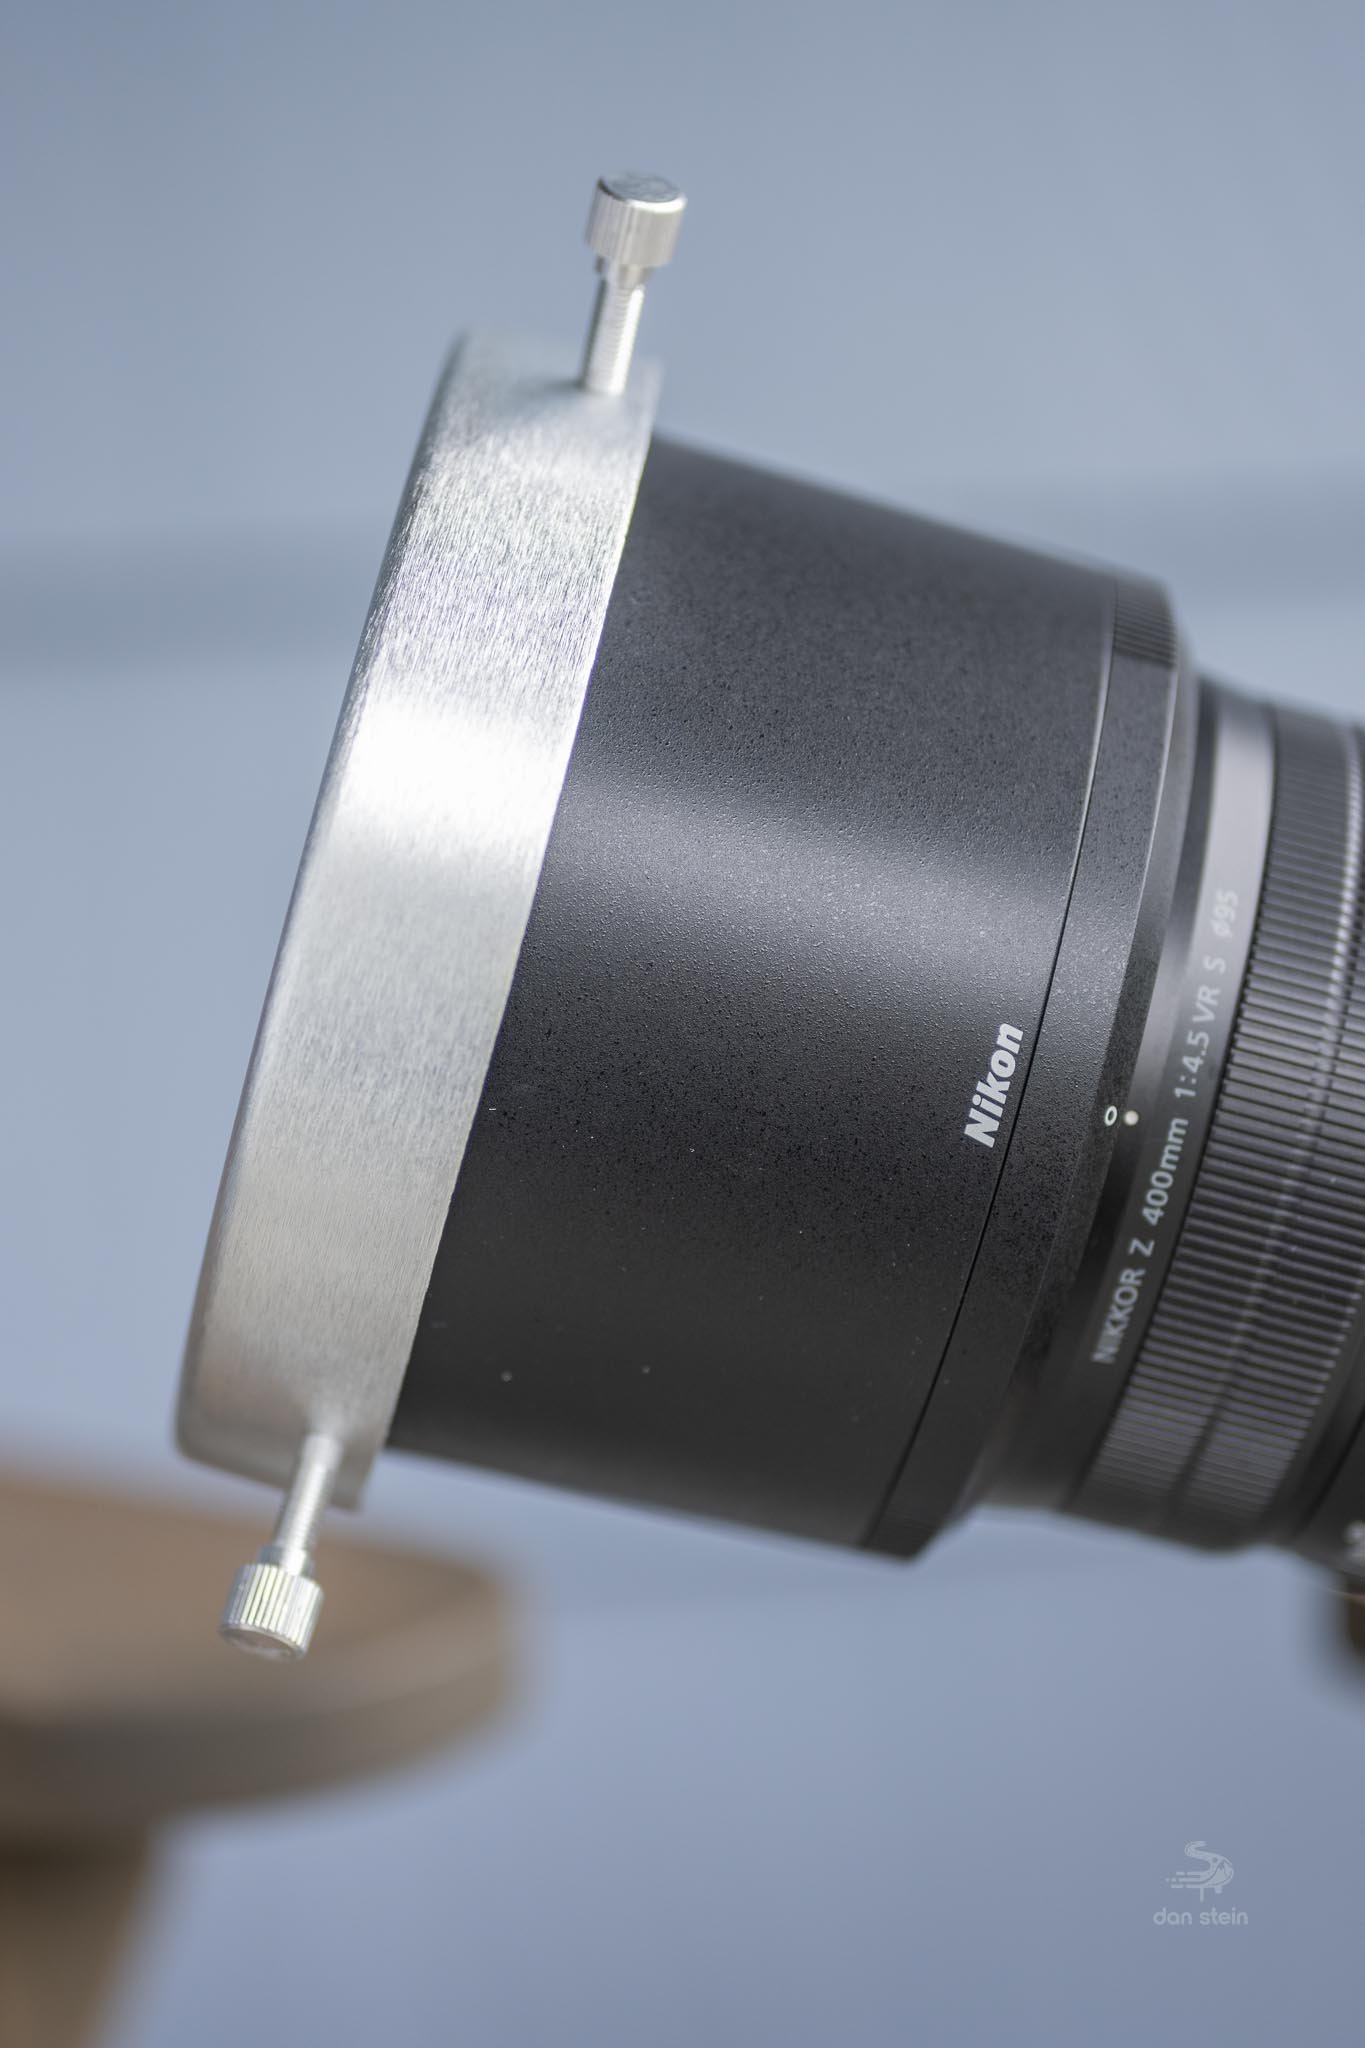
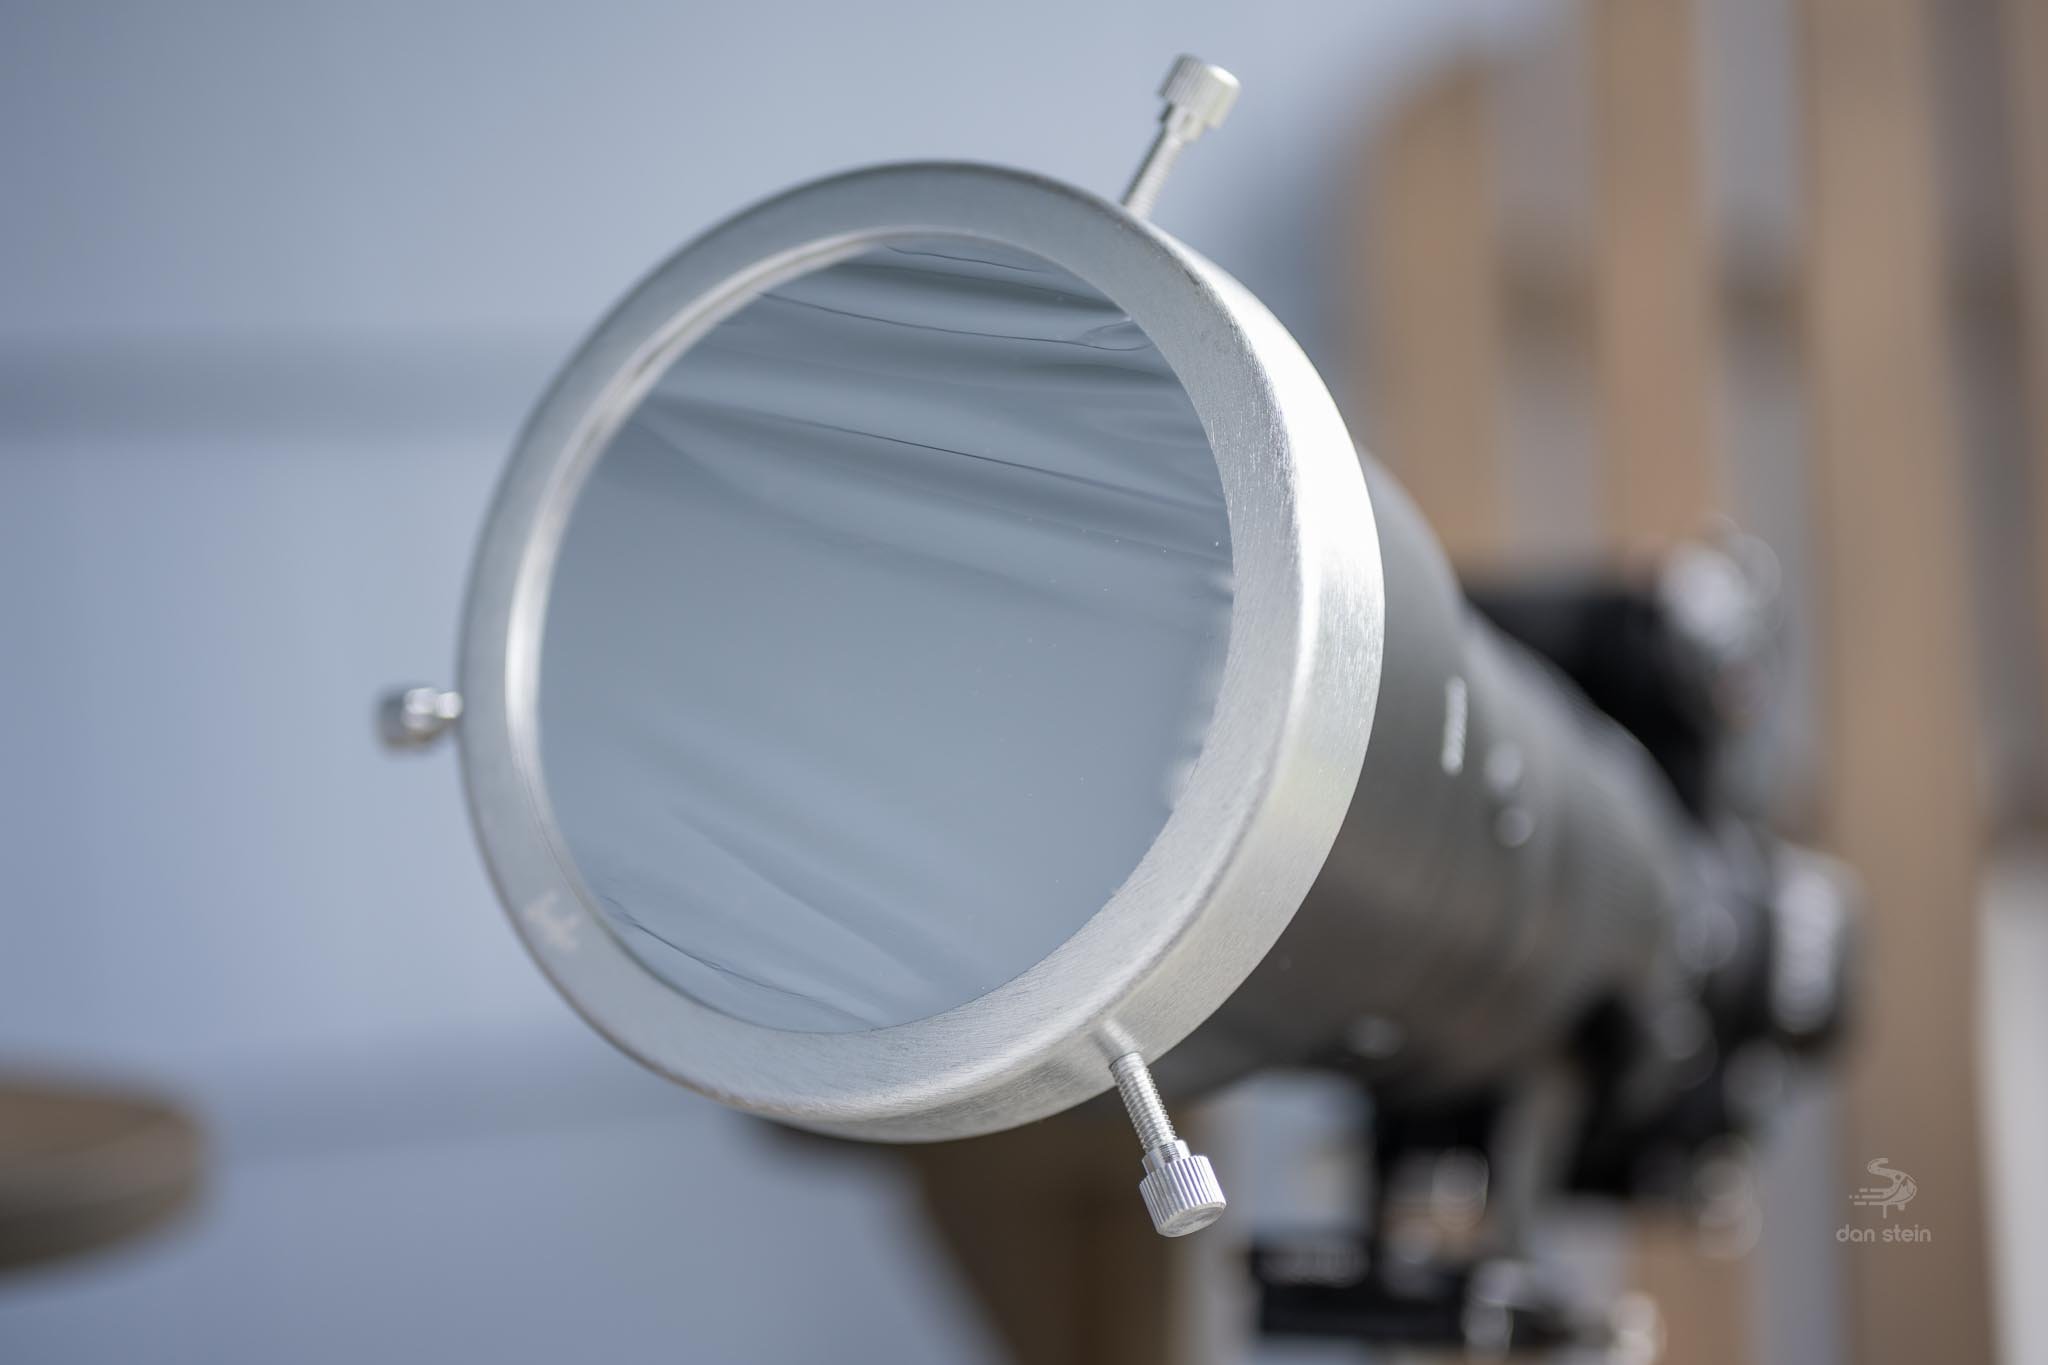
Next is the type of filter that slips over your entire lens hood. To size these accordingly, measure the outside diameter of your lens hood, and order the size that fits. These typically come with three grub screws around the circumference of the filter, therefore allowing you to securely fasten them to your lens.
What is an Annular Eclipse?
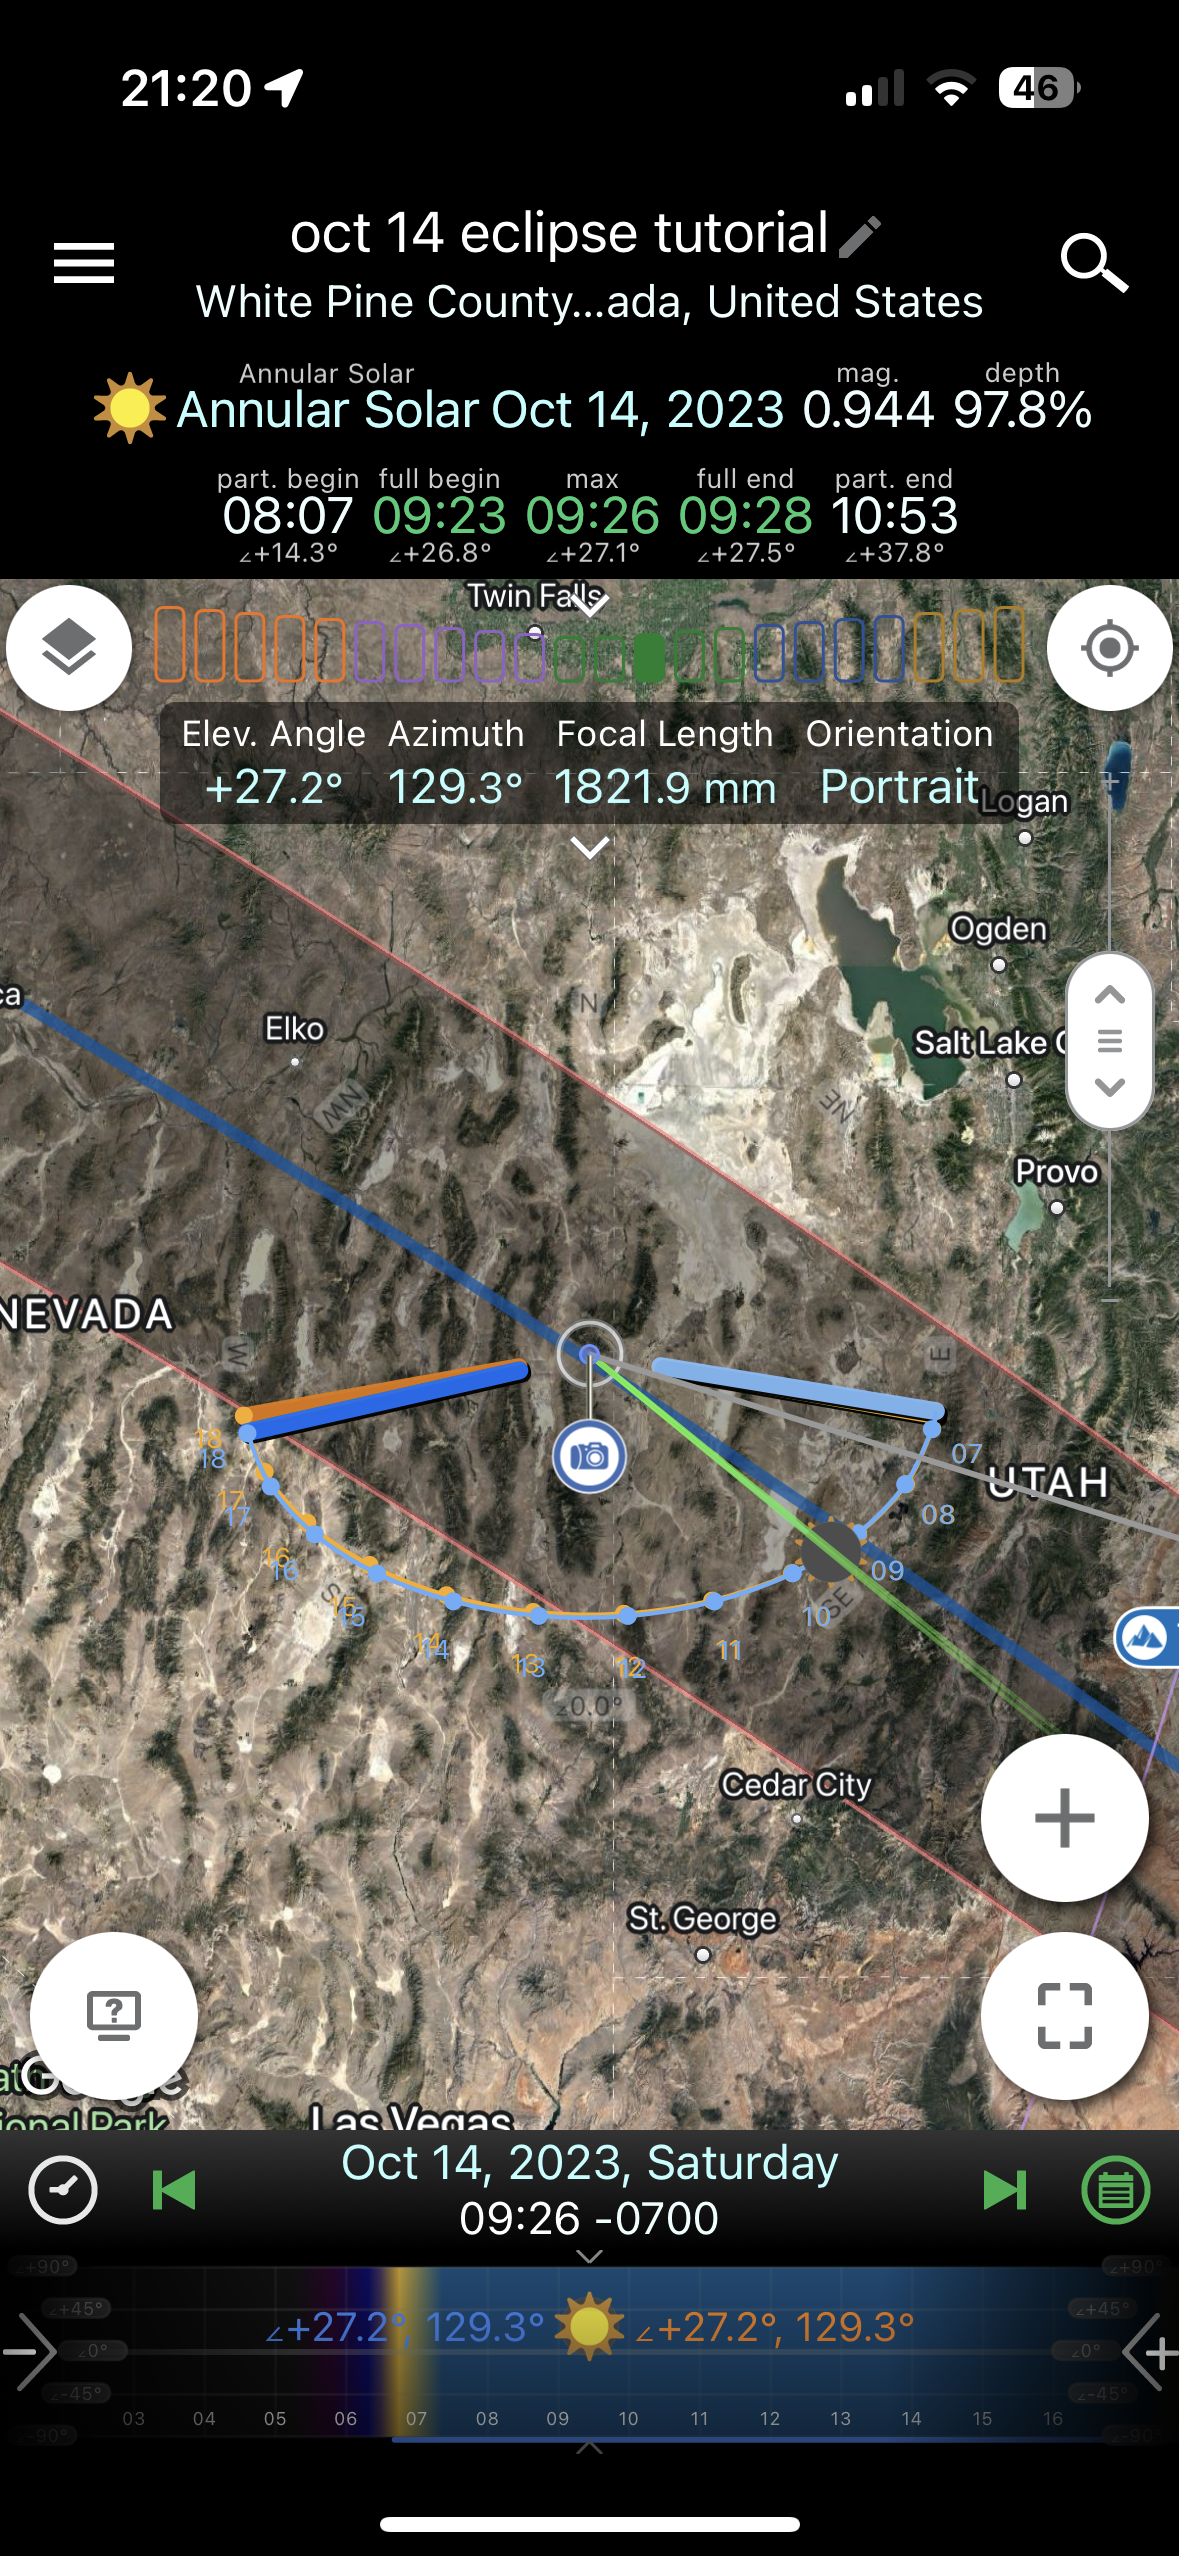
You may have heard of a Total or Partial Eclipse. I like to refer to an Annular as a quasi-total. Just like a total, there is a “path of annularity” that you would need to travel to in order to order to witness the eclipse at its maximum. If you are outside of this path, you will only see a partial eclipse. However, there will not be a portion of this eclipse where you will be able to see the Solar Corona, as the Moon does not perfectly cover the Sun, hence the term “annular eclipse.” Instead, the Moon will cover the Sun just enough such that if you are within the path of annularity, it will appear as giant ring in the sky. That is why annular eclipses are commonly referred to as a “Ring of Fire” and also why I threw in the Johnny Cash reference. Here is a screenshot from Stellarium which illustrations the eclipse at its maximum. Note that your position on the path of annularity will determine how centered the Moon is. With that being said, annular eclipses require that you keep the solar filter on for the duration of the eclipse.

Using Stellarium to check my framing for the eclipse, as well as timing at maximum annularity.
Planning & Avoiding Clouds
Start with the Eclipse path here on timeanddate.com. You can also access the map built into apps like Planit Pro and Astrospheric, which are specifically designed for photographers. This will tell you where you need to go if you want to see the “Ring of Fire” as well as how much of a partial eclipse you will see if you do not plan to travel.
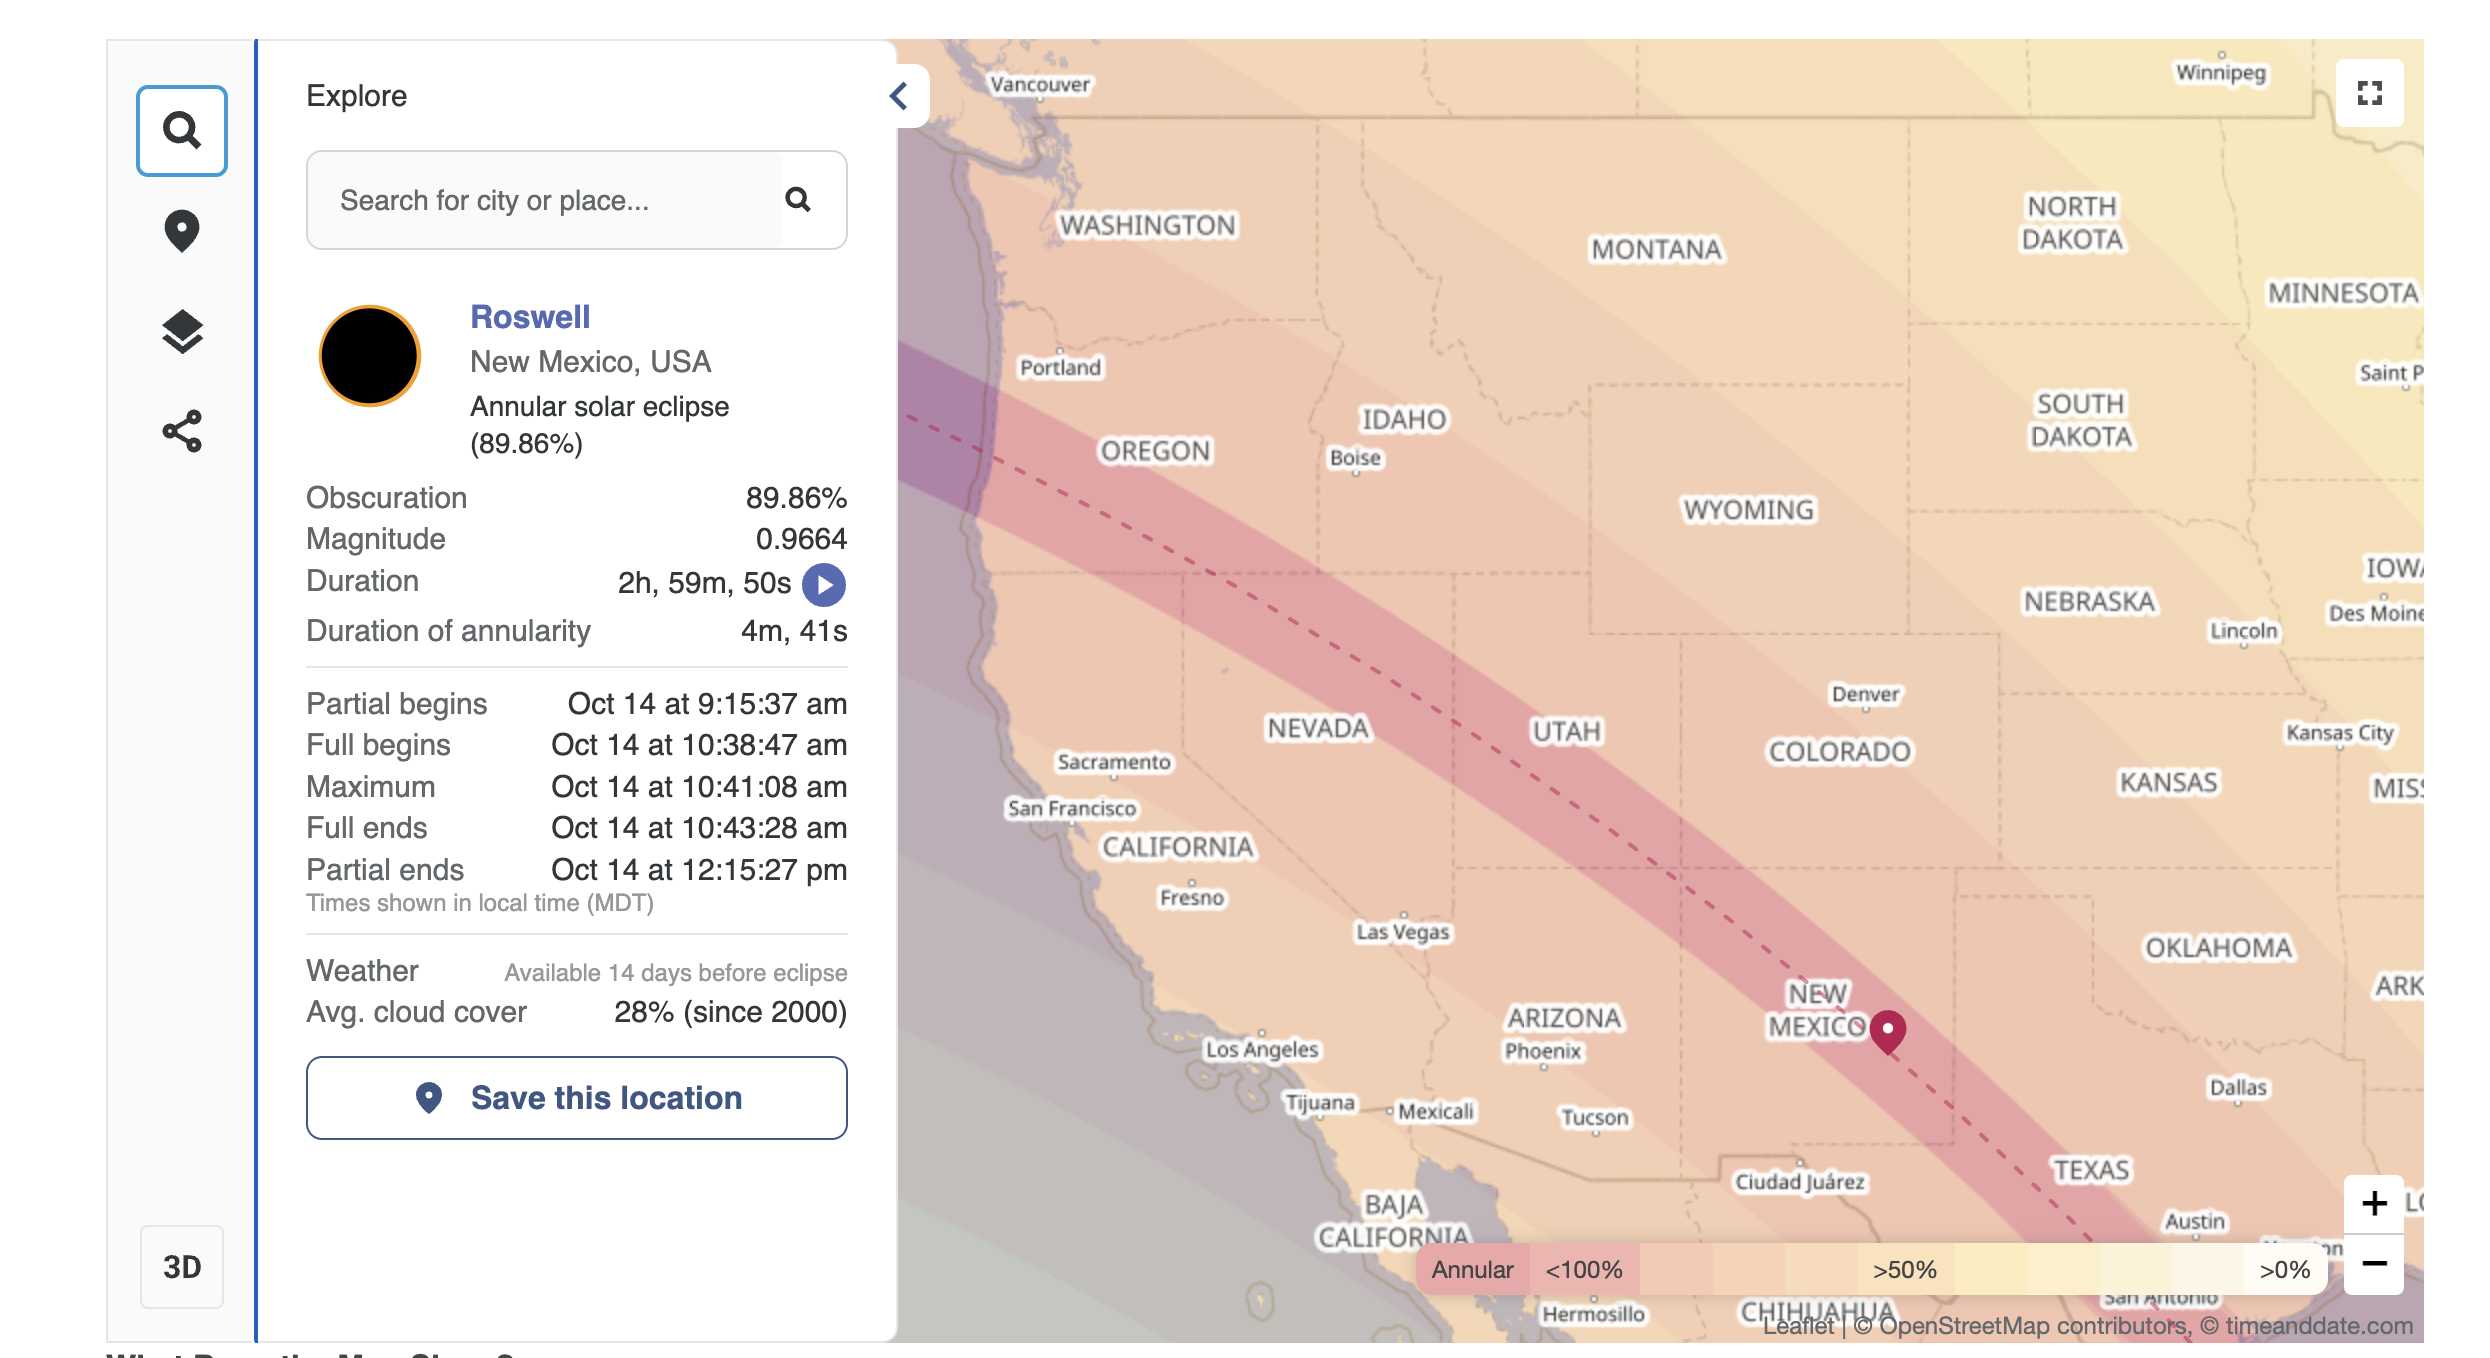
The eclipse map as seen from the link above.
Planning using Planit Pro
Timeanddate also offers statistics of how often the skies were cloudy on Oct 14 over the past 22 years. This is a good indicator to determine on whether the spot you want to go to is worth the drive. Use these tools to figure out 2 locations where you want to view the eclipse. Shoot for a main location, then have a backup within a reasonable driving distance away just in case eclipse day is looking cloudy.
This is where an app like Planit Pro comes in super handy, as you can use a tool like the VR mode to figure out where the eclipsed sun will be in the sky, which will help you determine what direction in the sky you need to have a clear view of, as well as if you want to incorporate a foreground element.

Using the Planit Pro VR mode to view the entire eclipse path with a would-be landscape.
Research nearby accommodations close to, but not within the path of annularity. Given how close we are to eclipse day, you will have a better chance of finding something available and cheaper if you are willing to drive an hour or two after the eclipse.
Be sure to use a few weather sources to keep track of weather leading up to the eclipse. Sources like Astrospheric and the National Weather Service tend to be among the most accurate.
Manually Finding and Tracking the Sun
Now that you have put together a plan for where you want to go for the eclipse, you can practice shooting the Sun locally in the days leading up to the eclipse.
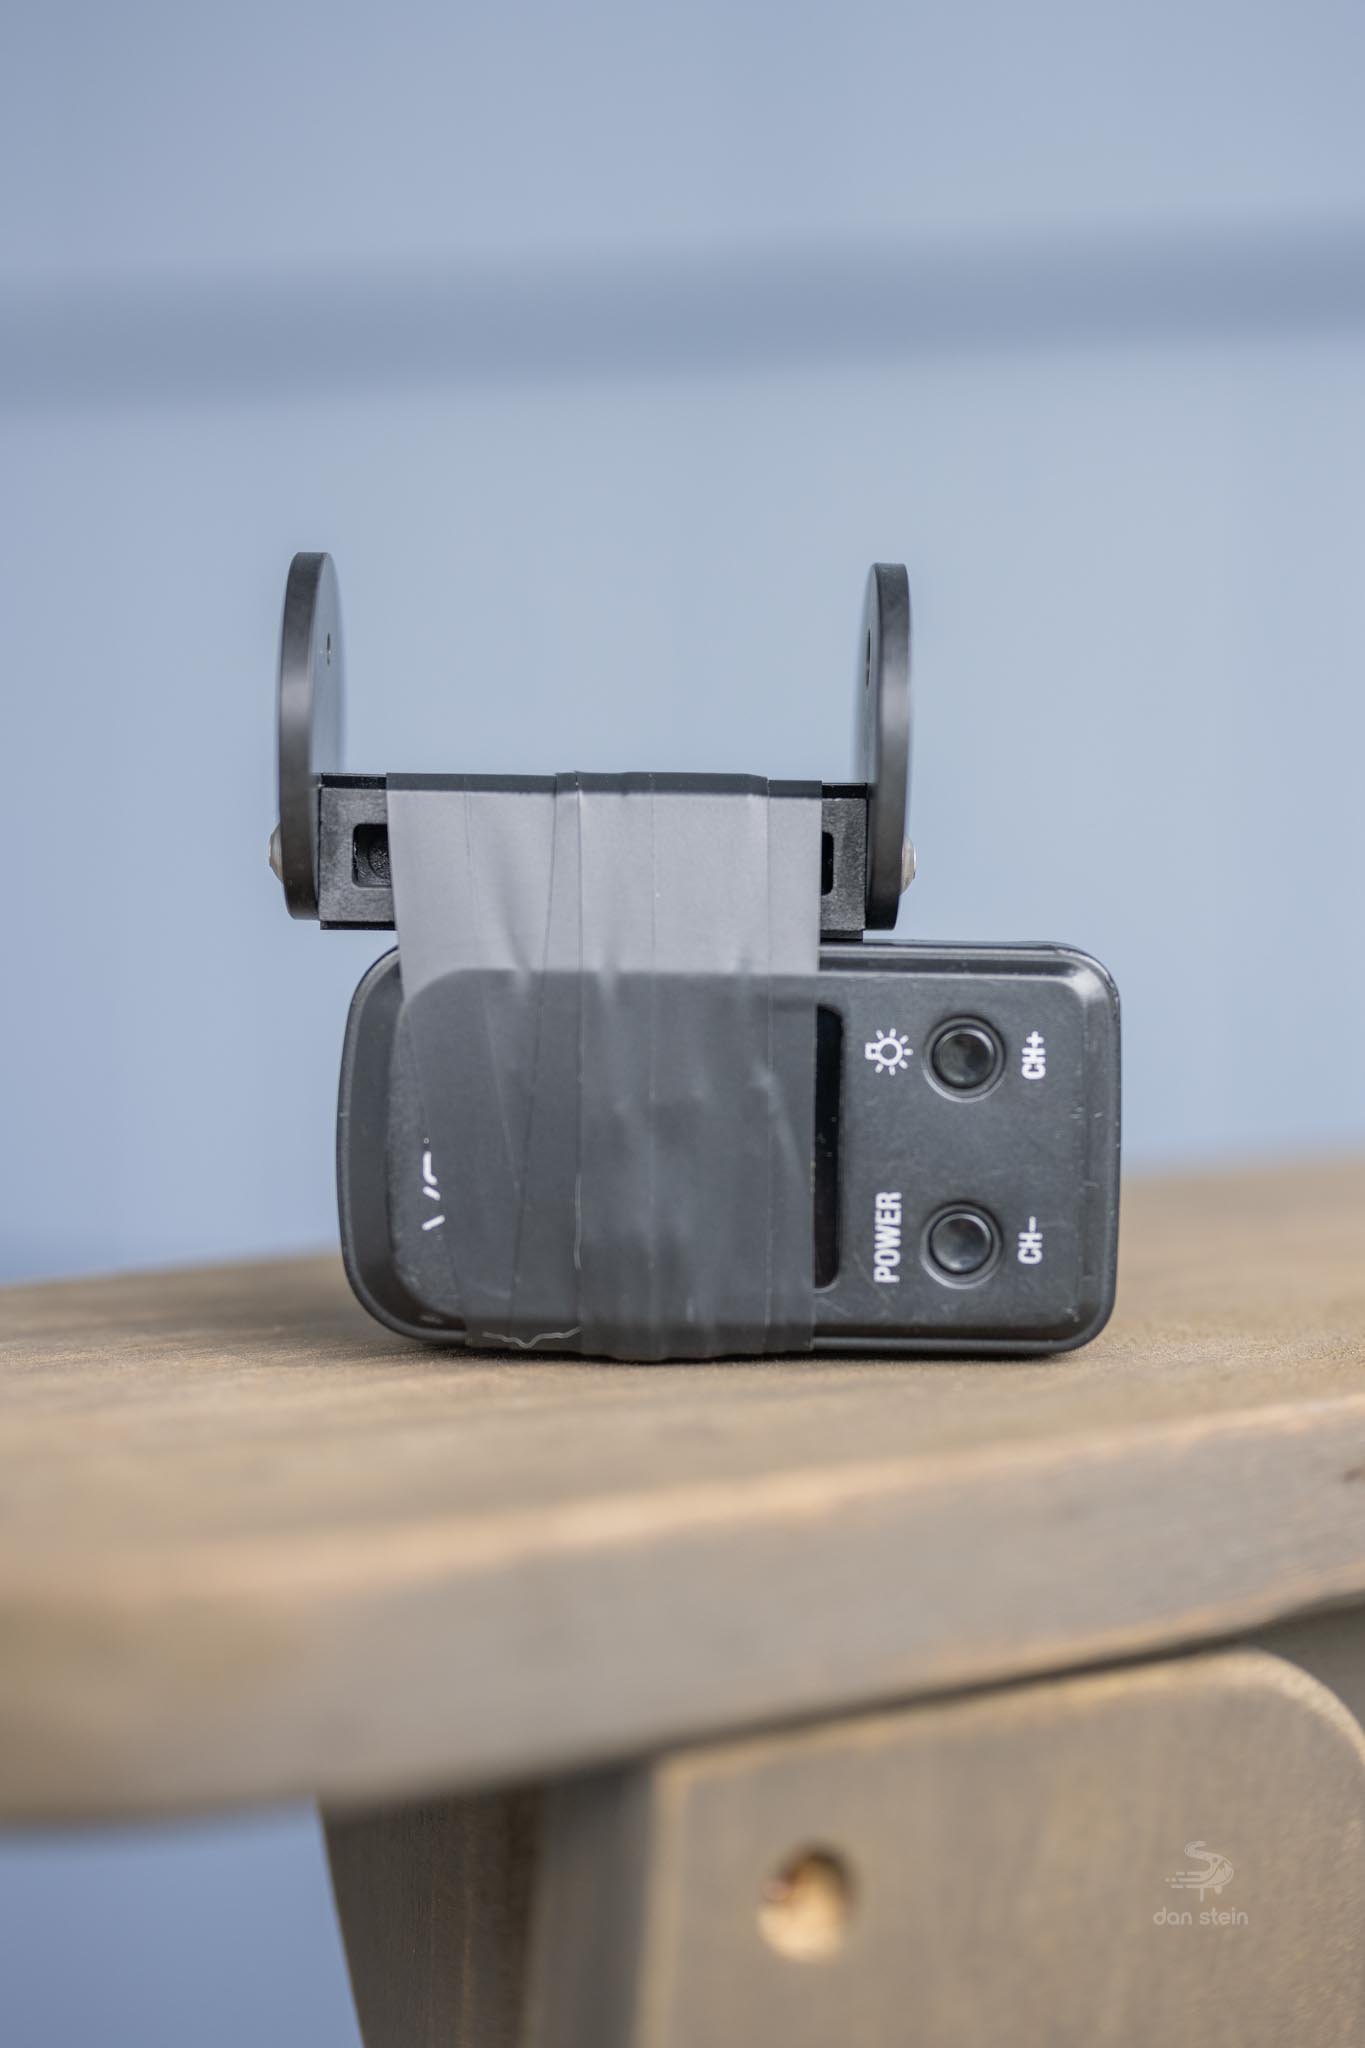
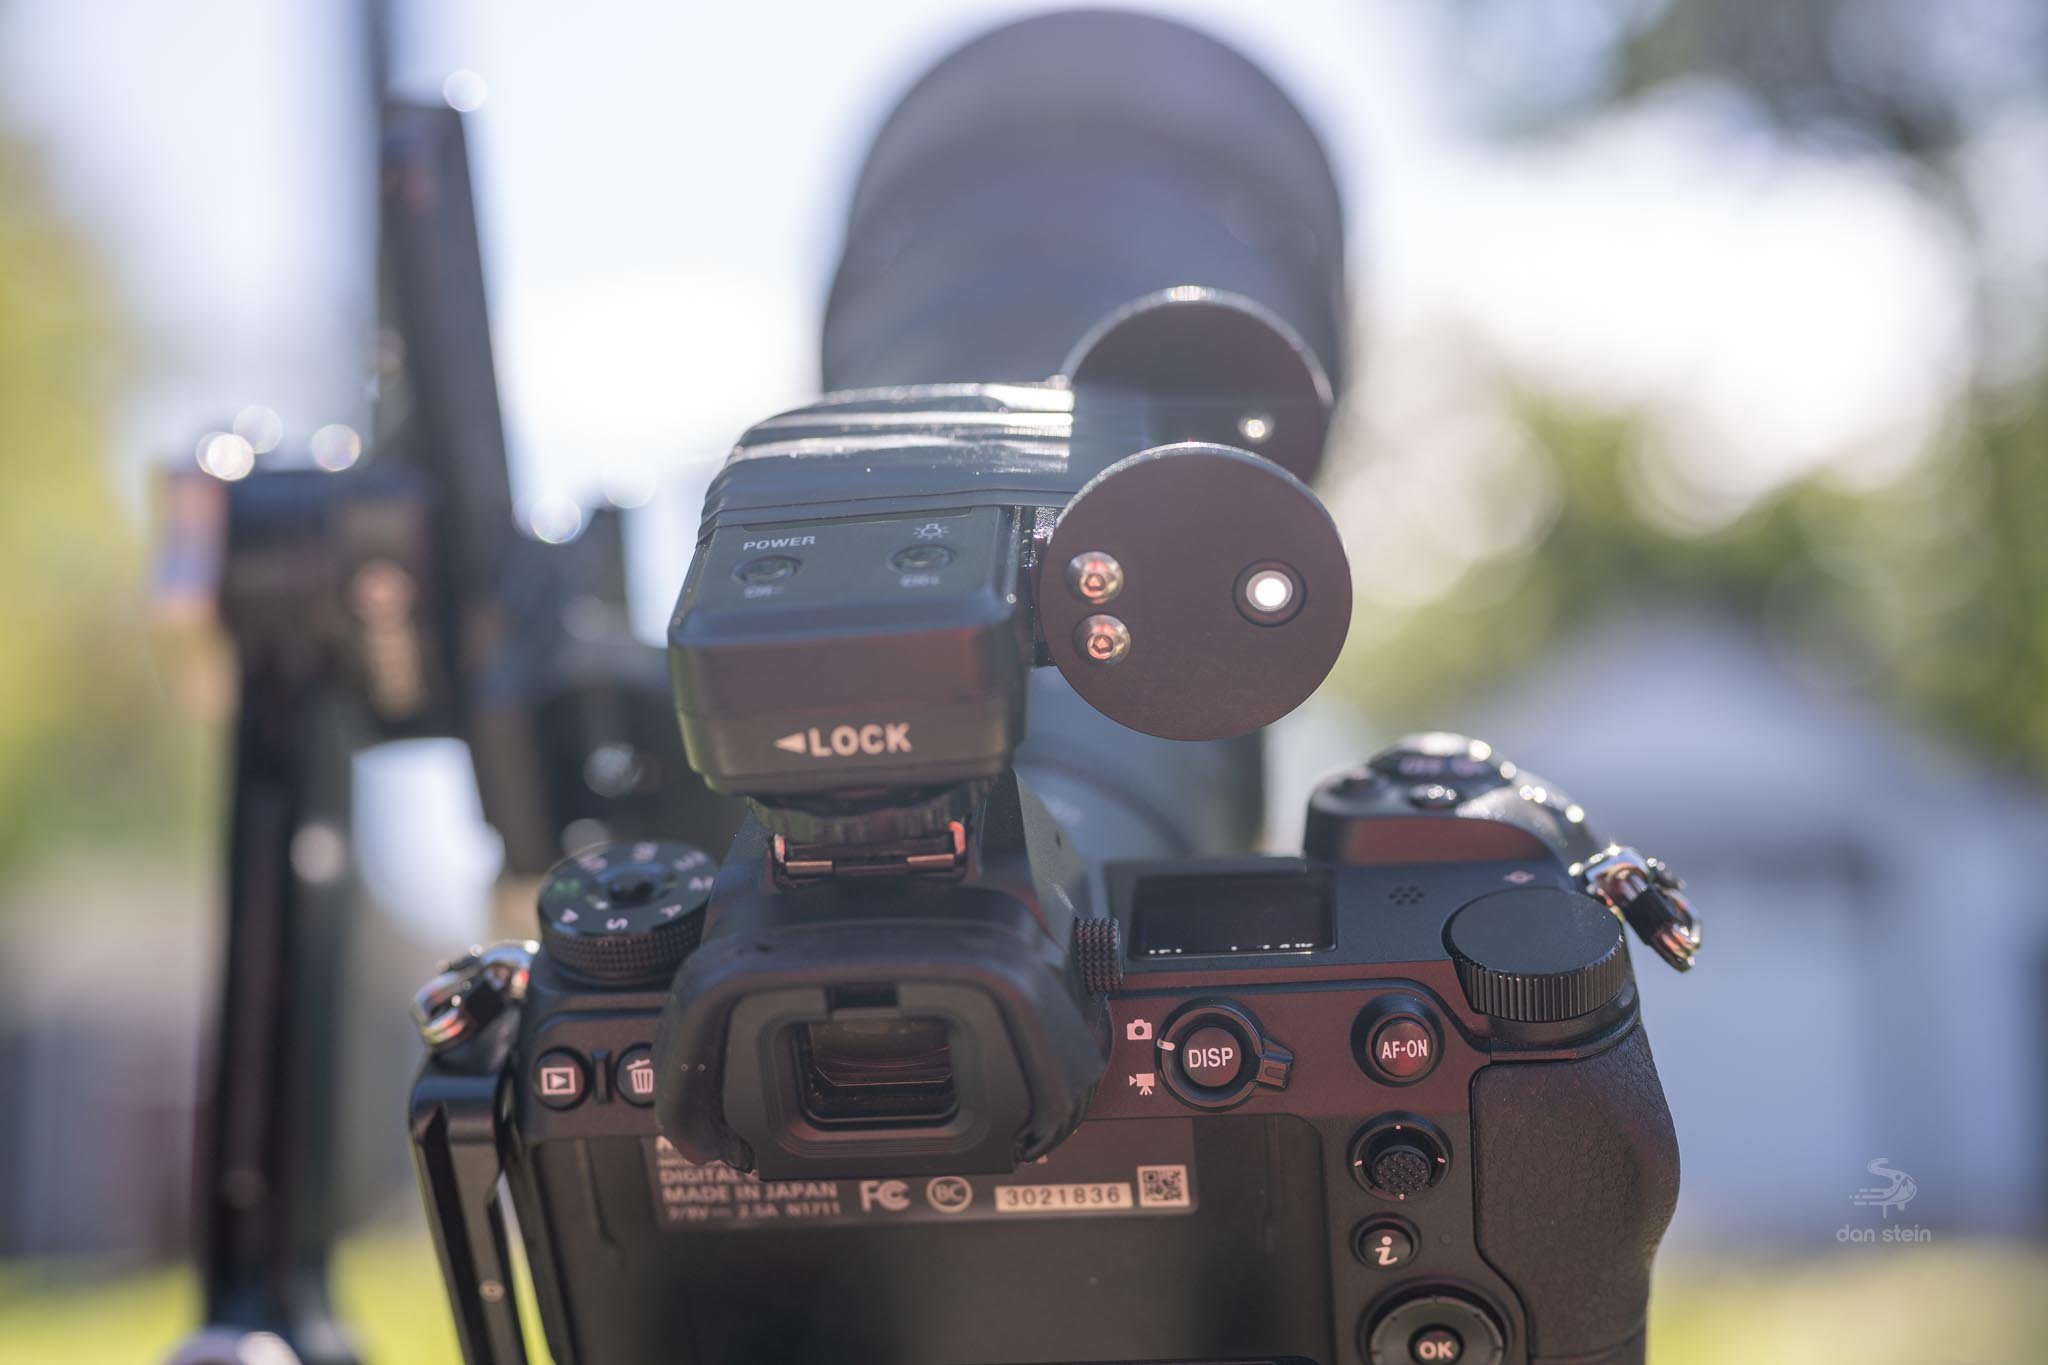
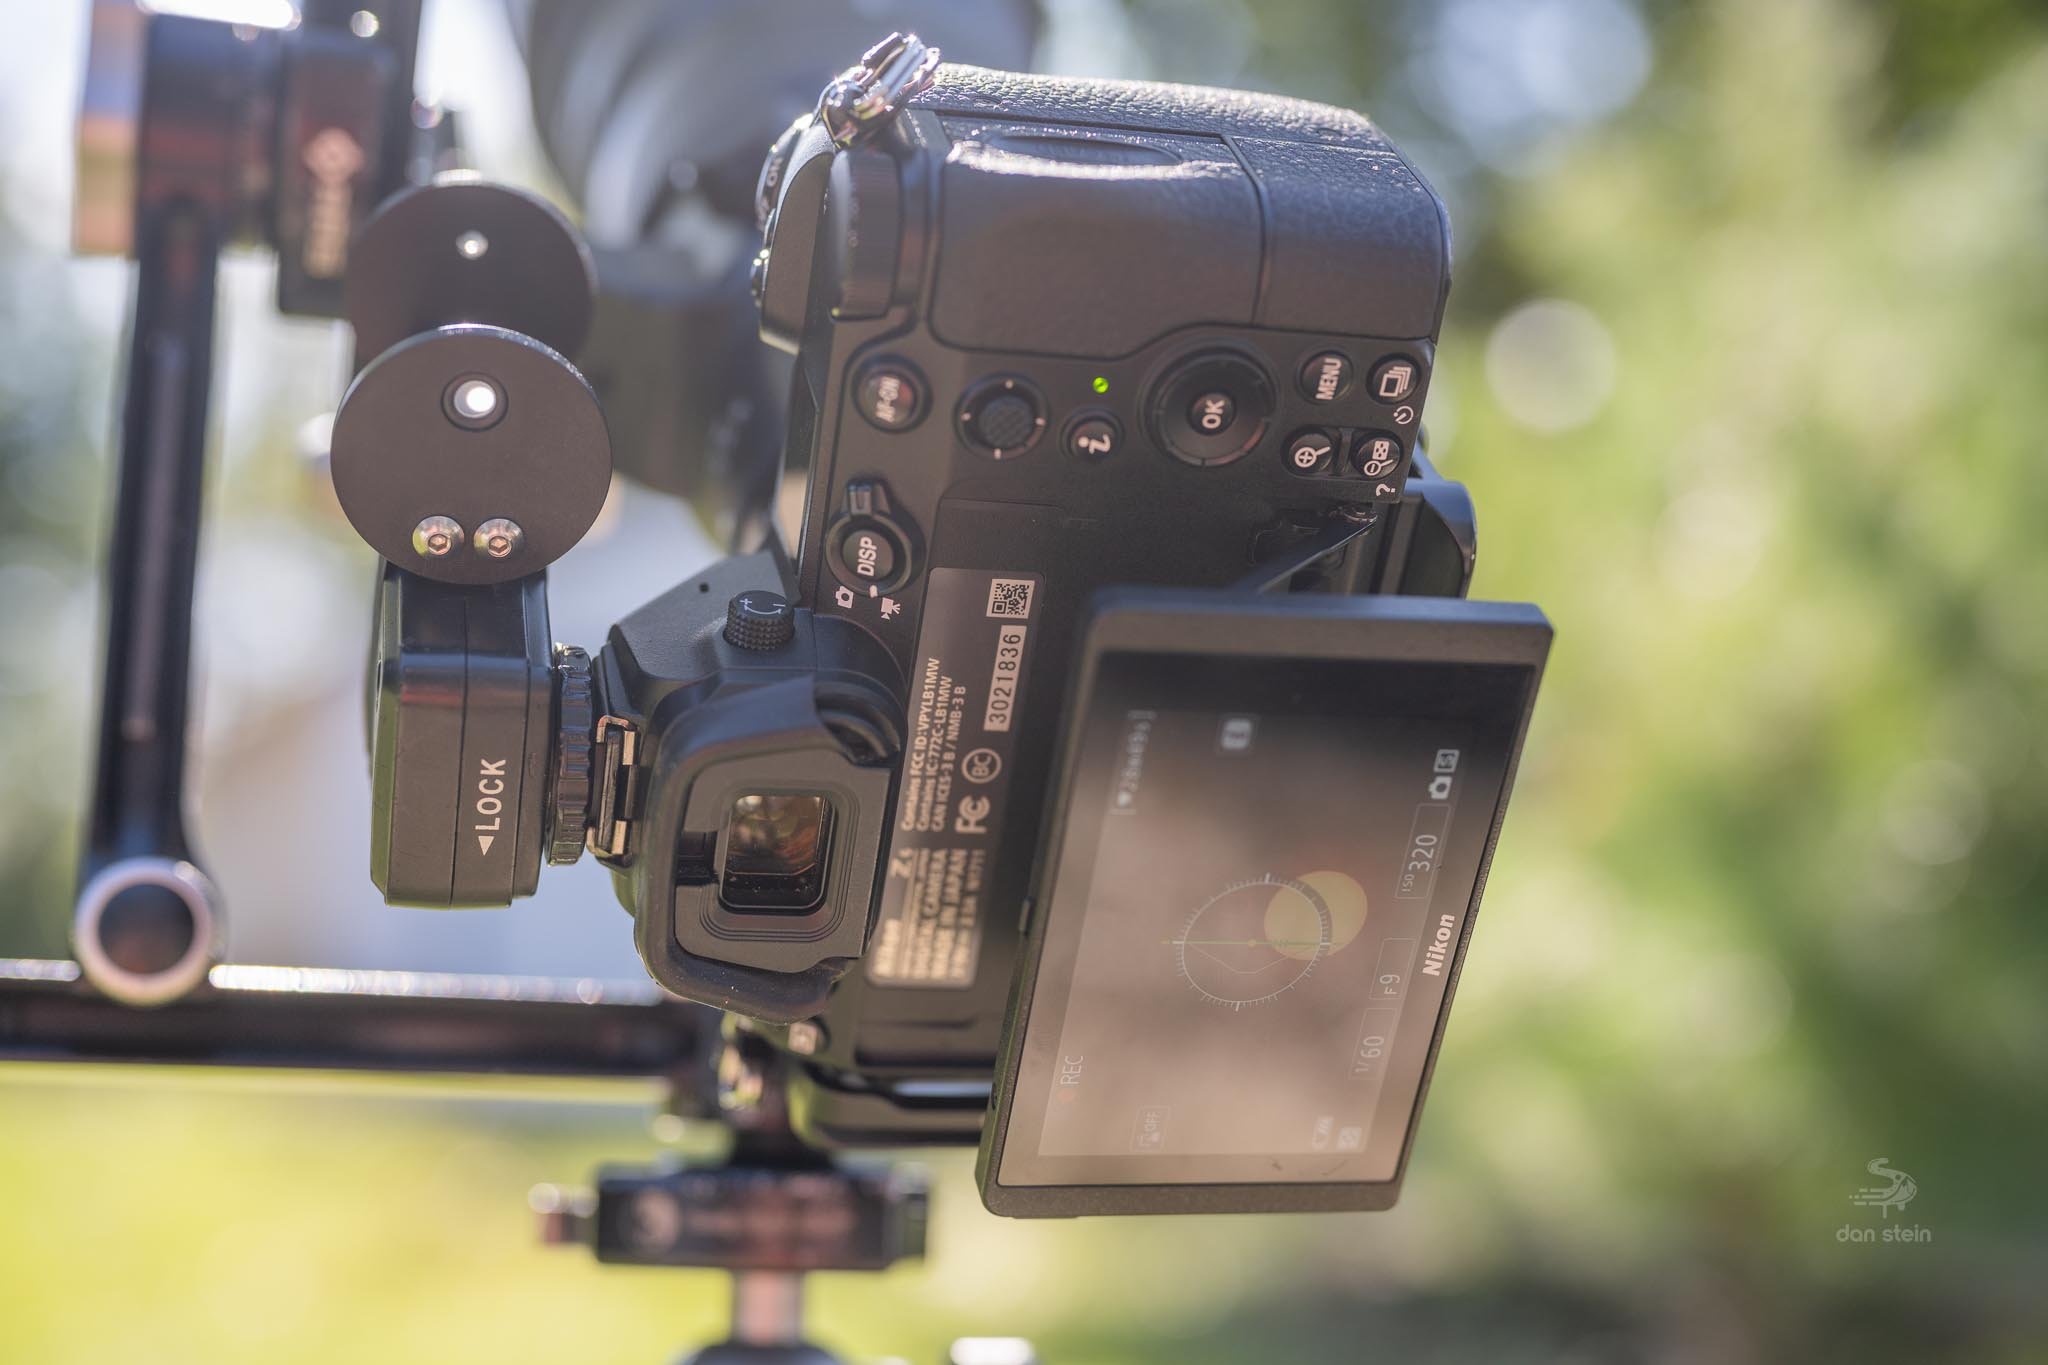
It sounds dumb, but you will be surprised to learn how frustrating the sun can be to find with a telephoto lens once your filter is installed, especially if you have a prime lens or telescope. For that reason I recommend picking up a Tele-Vue sol searcher. I usually rig up a way to mount mine to my camera hot shoe or telephoto lens. It makes finding the sun a breeze.
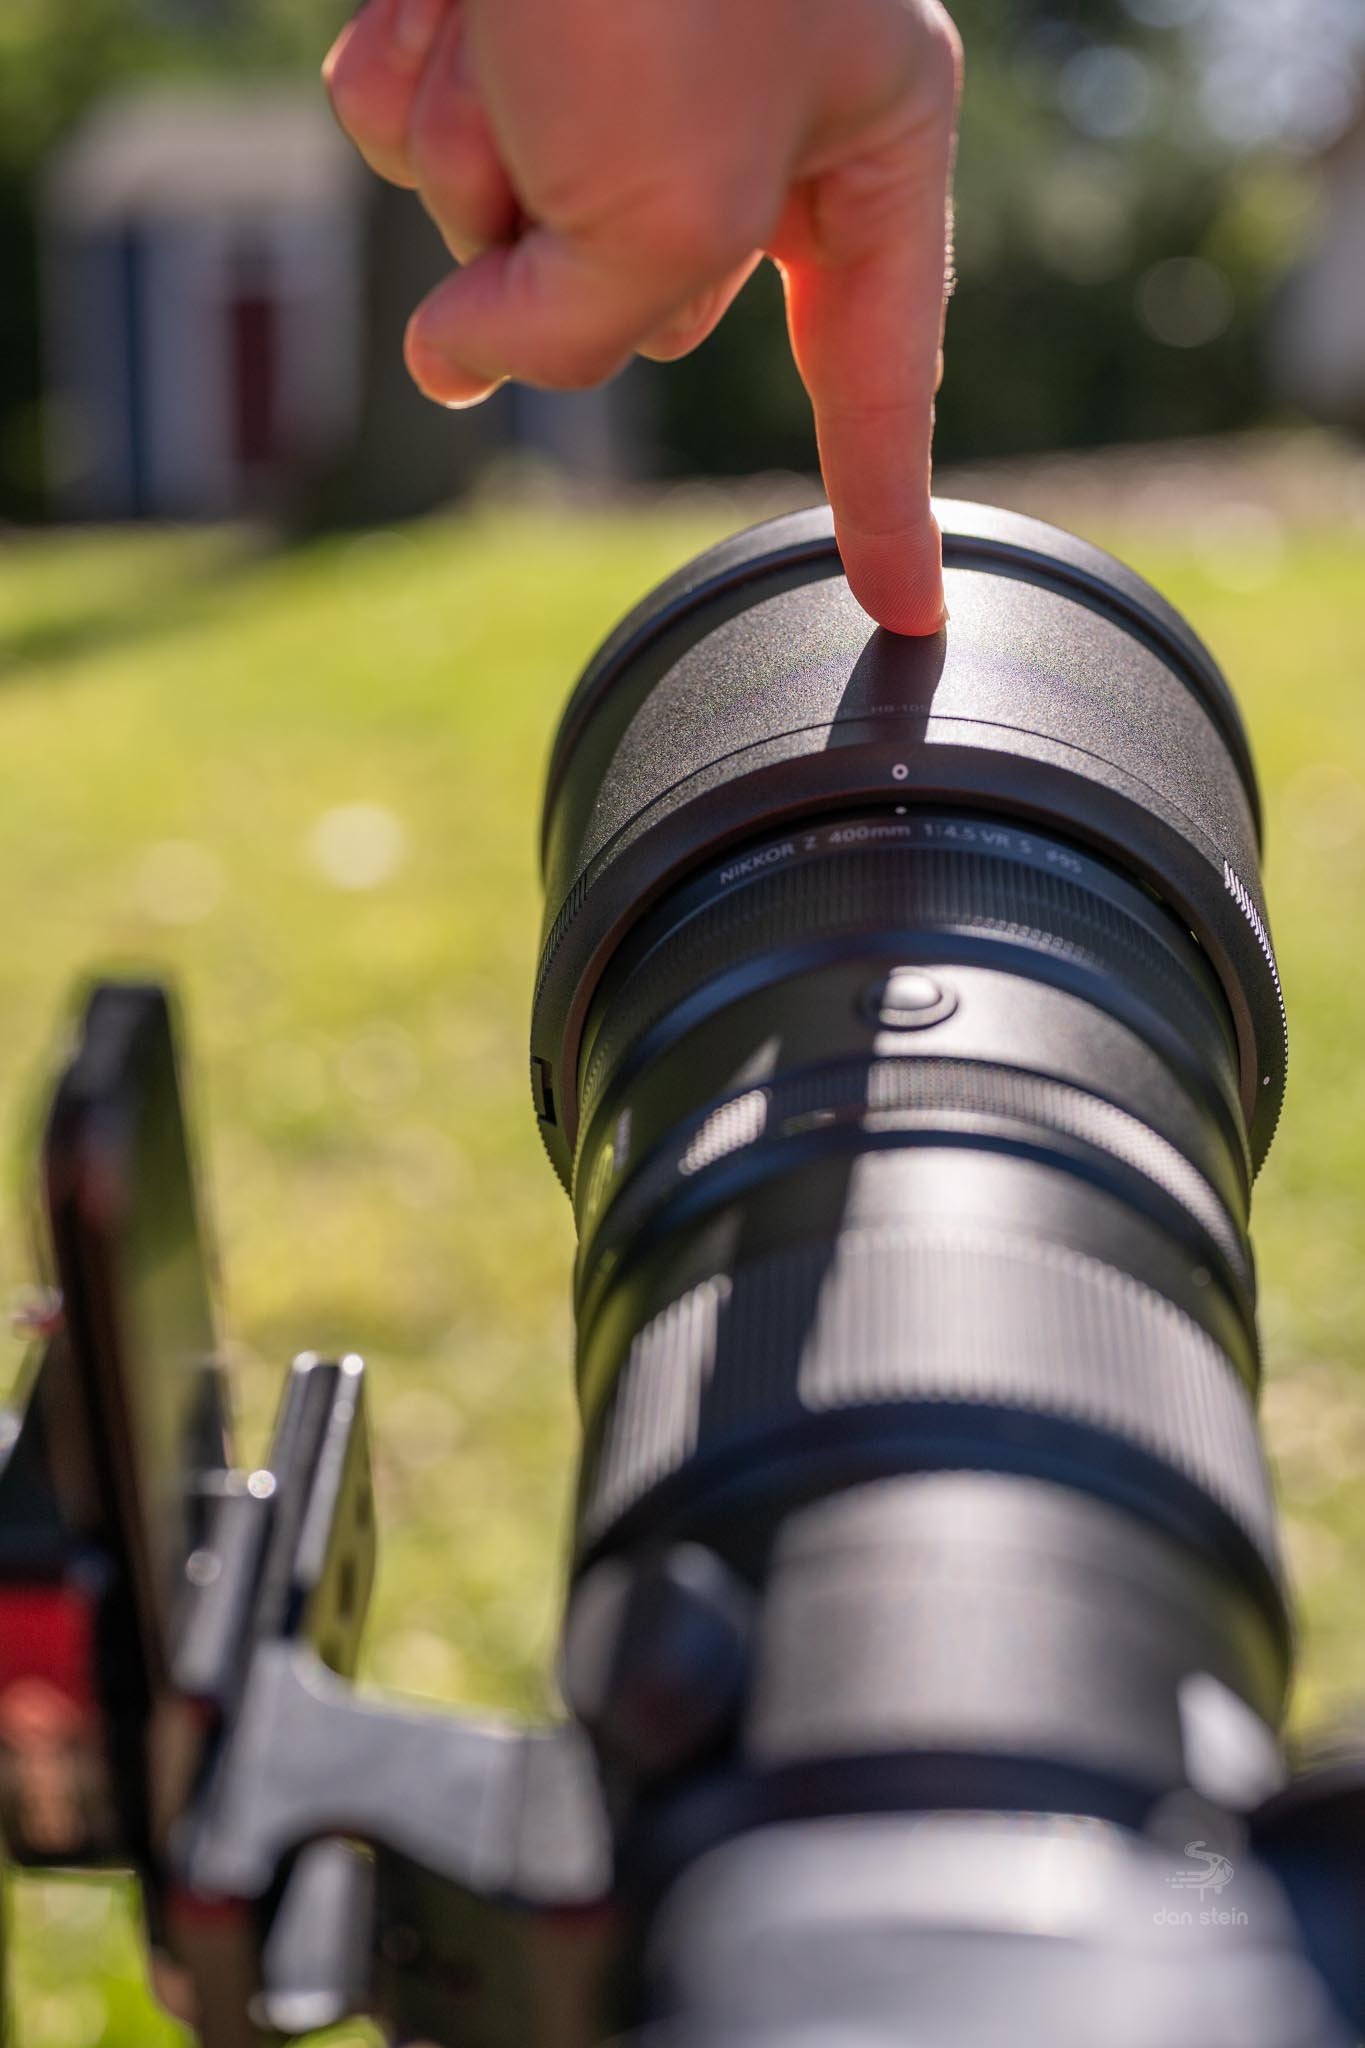
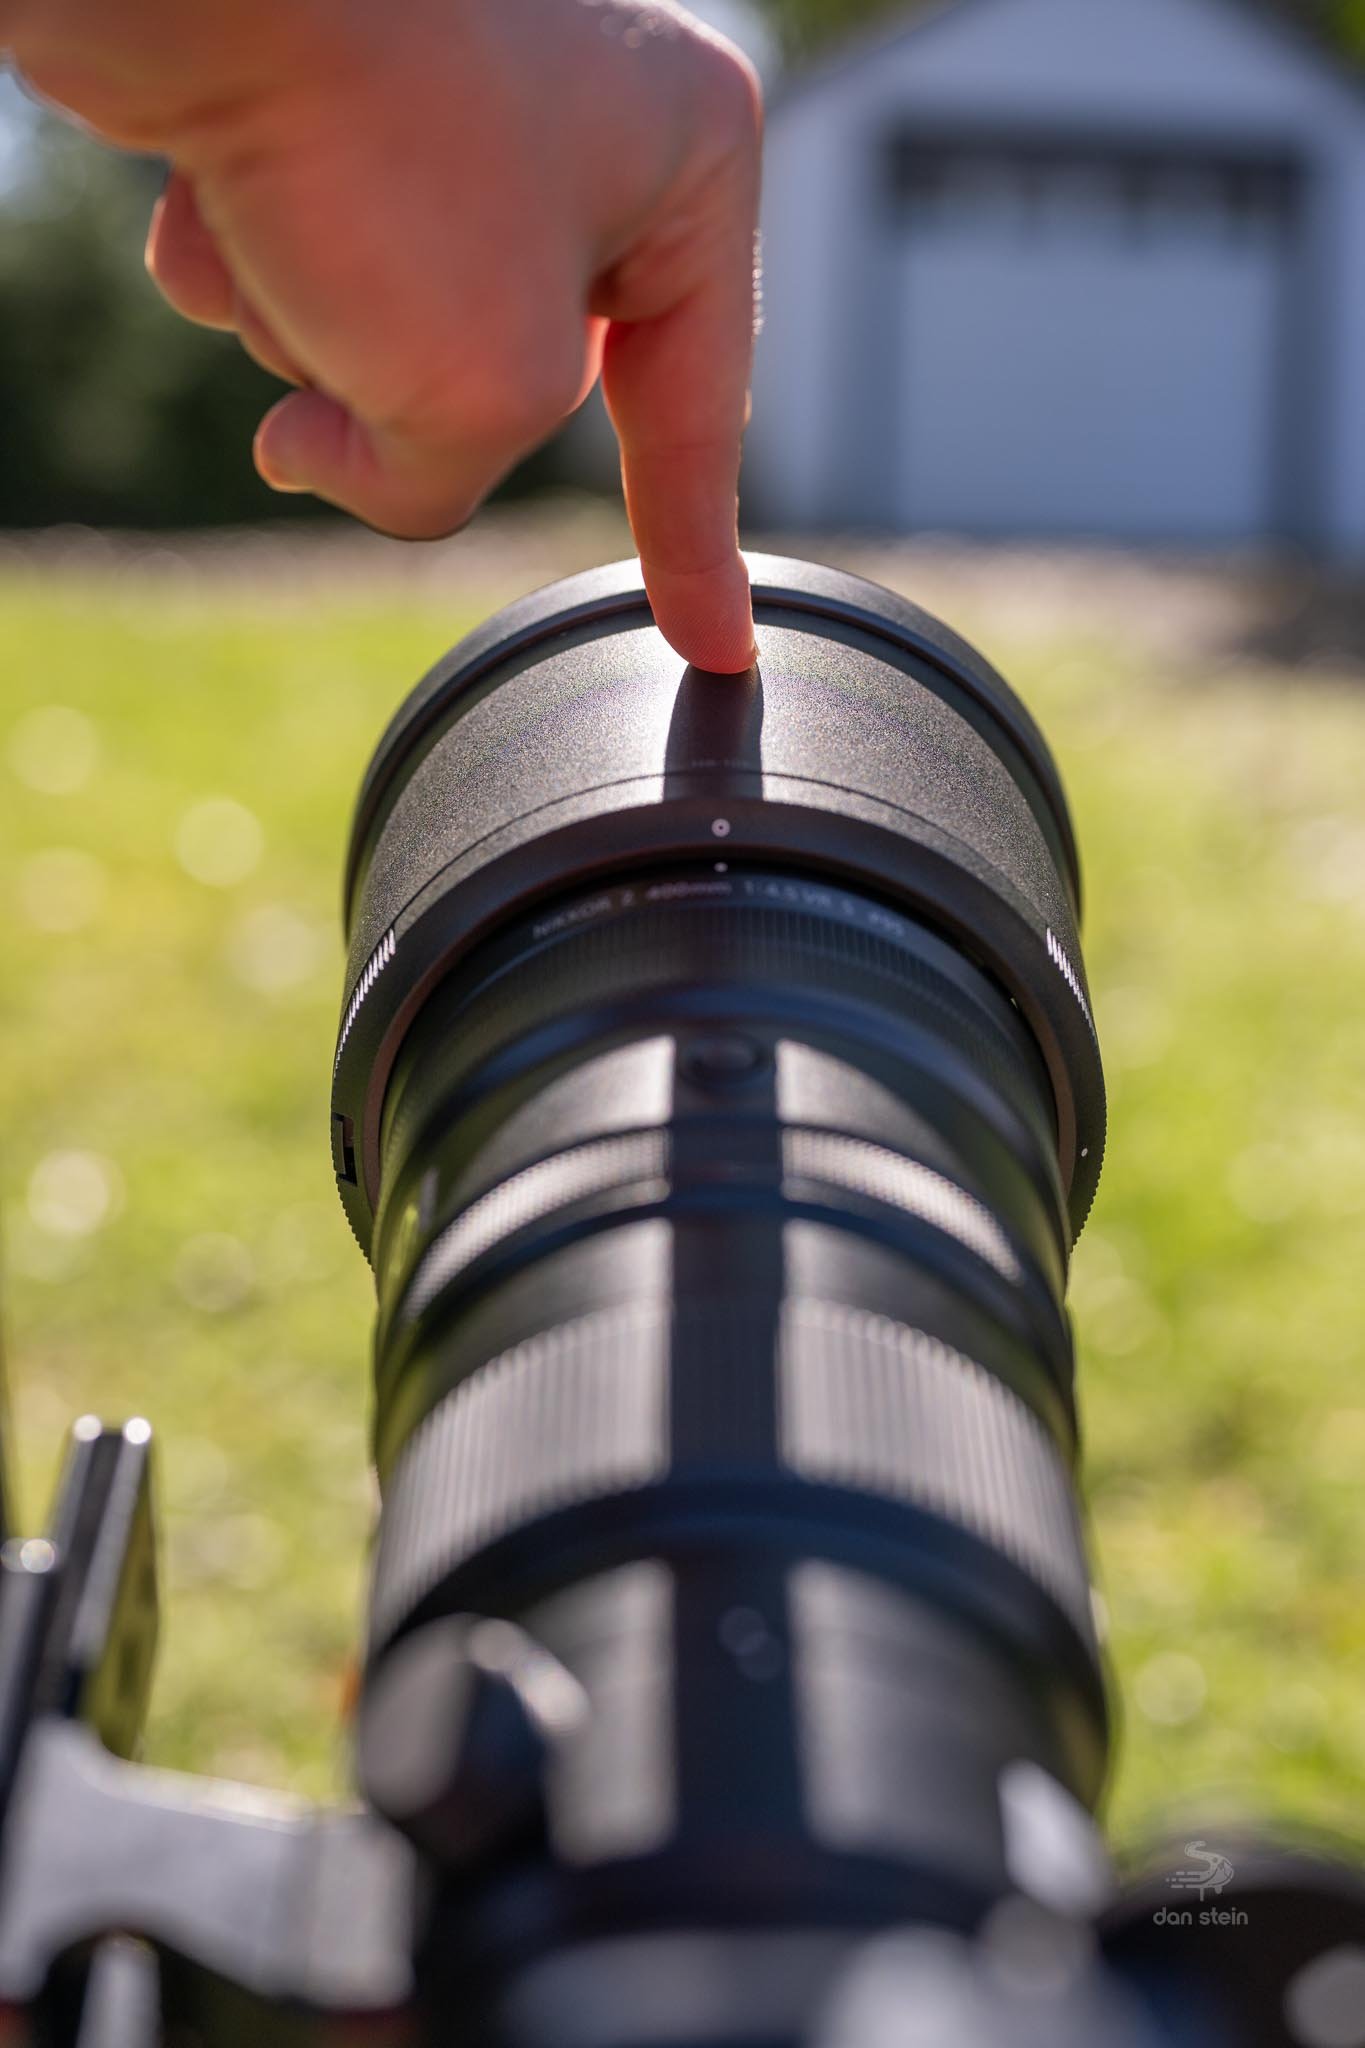
If you don’t have the time or money to get the solar spotter, there is another trick I found to roughly aligning the Sun in your camera that doesn’t require any extra gear. All you need is a finger. Simply just point your lens roughly in the direction of the Sun, but of course don’t look at the Sun itself. Then, place your finger on the top center of your lens hood. Notice what direction the shadow of your finger is casting on the rest of the lens. Just rotate the lens left and right until the shadow of your finger is directly centered over the lens. You can then do the same thing with your finger on the side of the lens to correct for up and down alignment. This trick should get you close enough to then finish framing on your camera.
Tripod heads such as ball heads can also be a little cumbersome to use, as each time you loosen the head, your composition may change ever so slightly. If you have a gimbal head such as a Wimberley, these will make manually tracking the Sun a lot easier, but it is not necessary. You will need to continuously recompose your shot as the Sun drifts out of your frame.
Camera settings and shooting
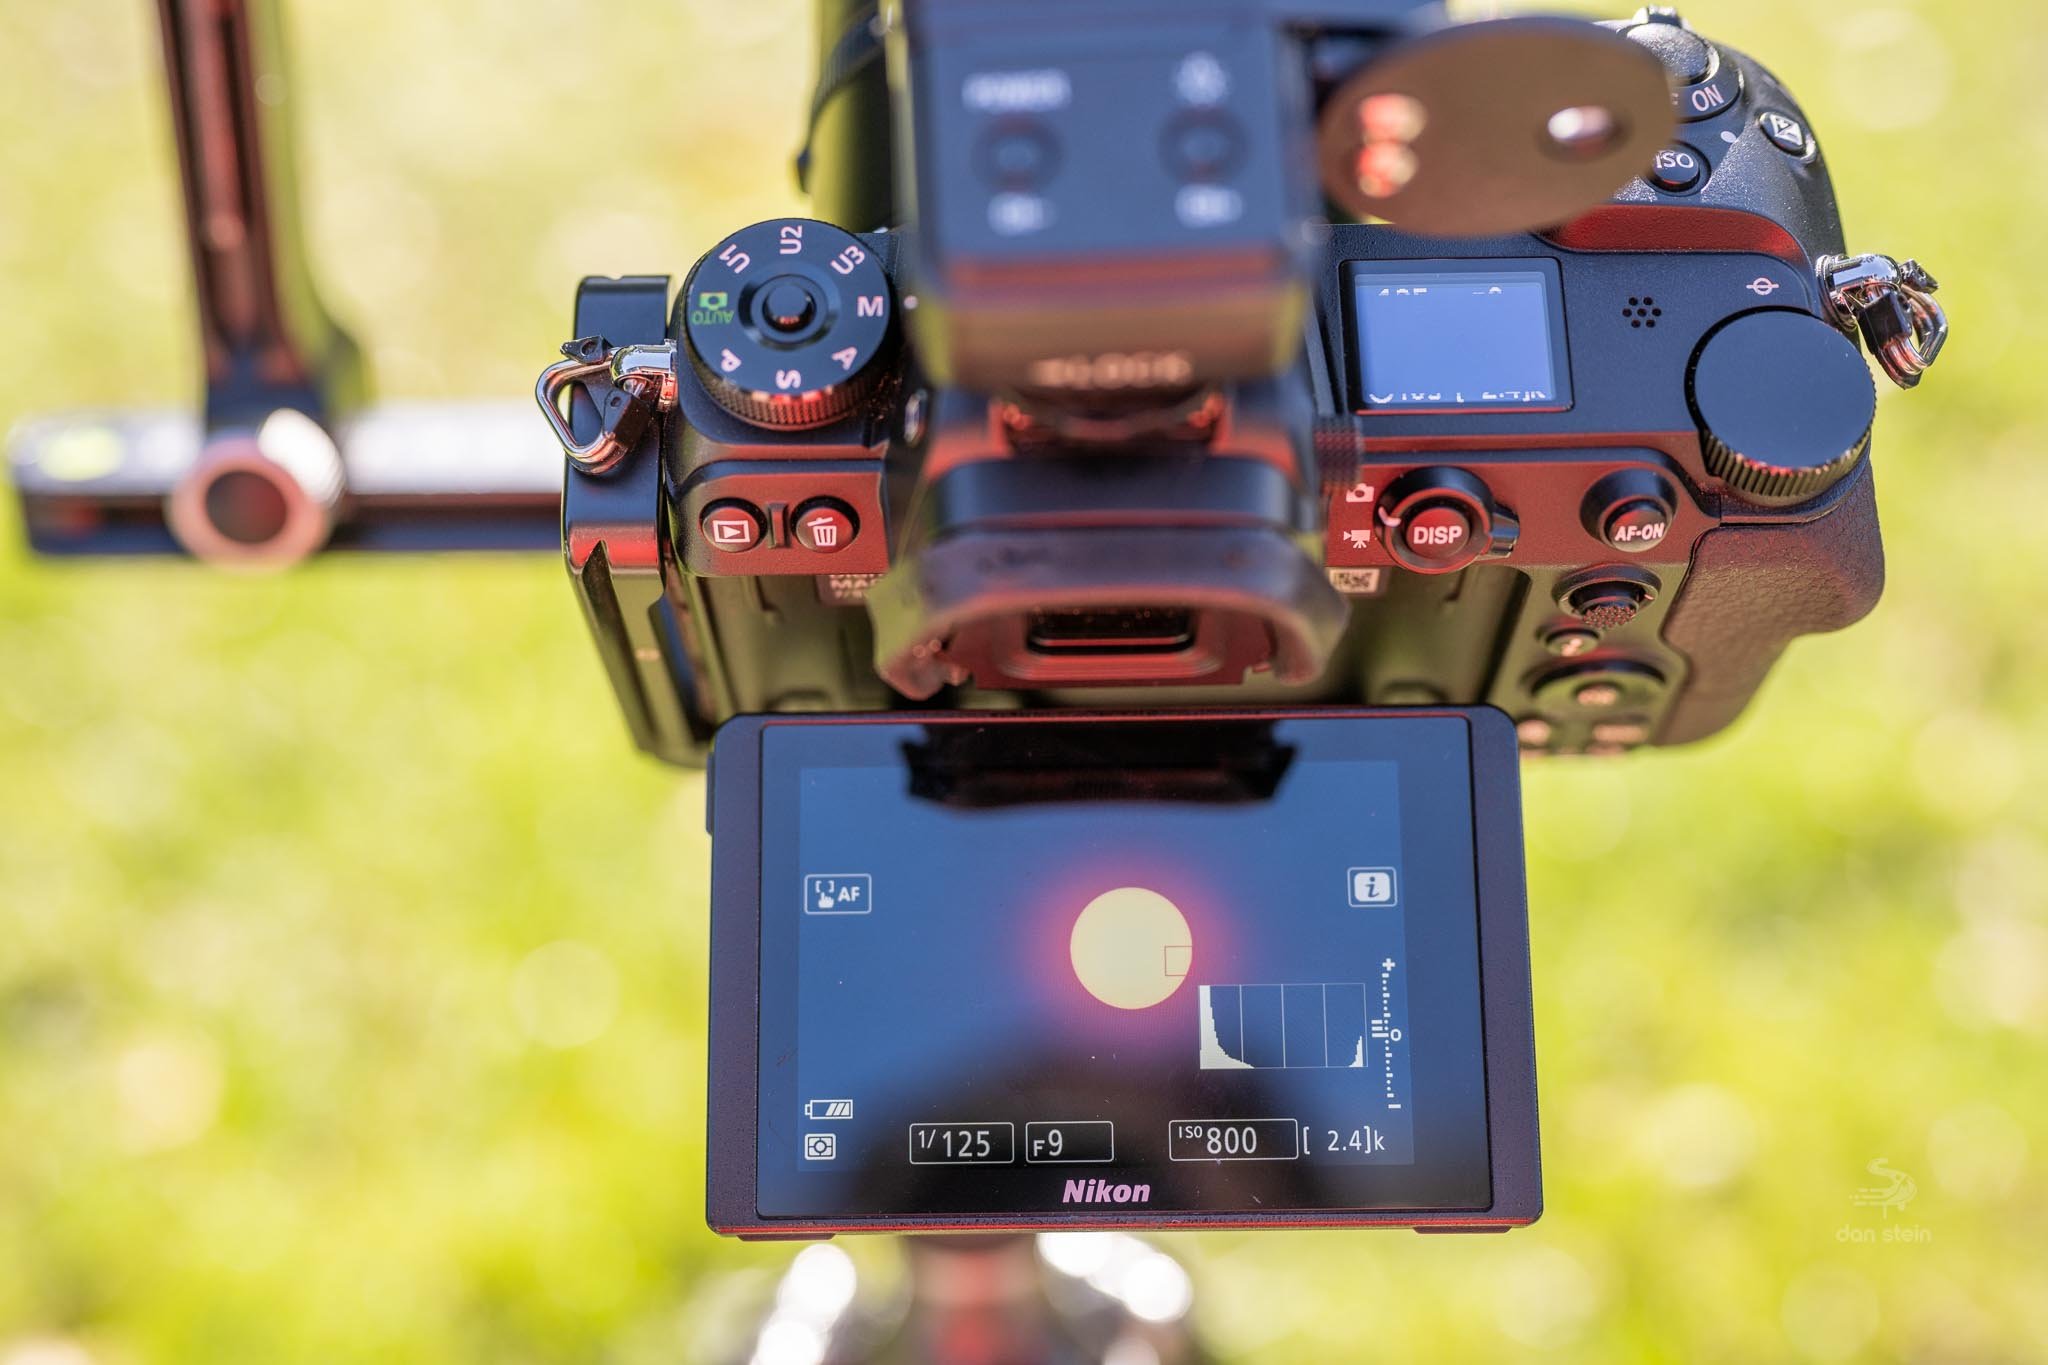
When you find the Sun, it obviously makes sense to practice shooting as well, that way you have an idea of what camera settings you need to use to get a clear shot without much frustration. Shoot in manual mode and use RAW. Color balance should also be set to daylight or direct sunlight, whatever your camera calls it. Autofocus may or may not work depending on your camera, so it is worth a shot to try. If not, use manual. An external remote is also a good idea here. If you don’t have one, use the timer delay release built into your camera.
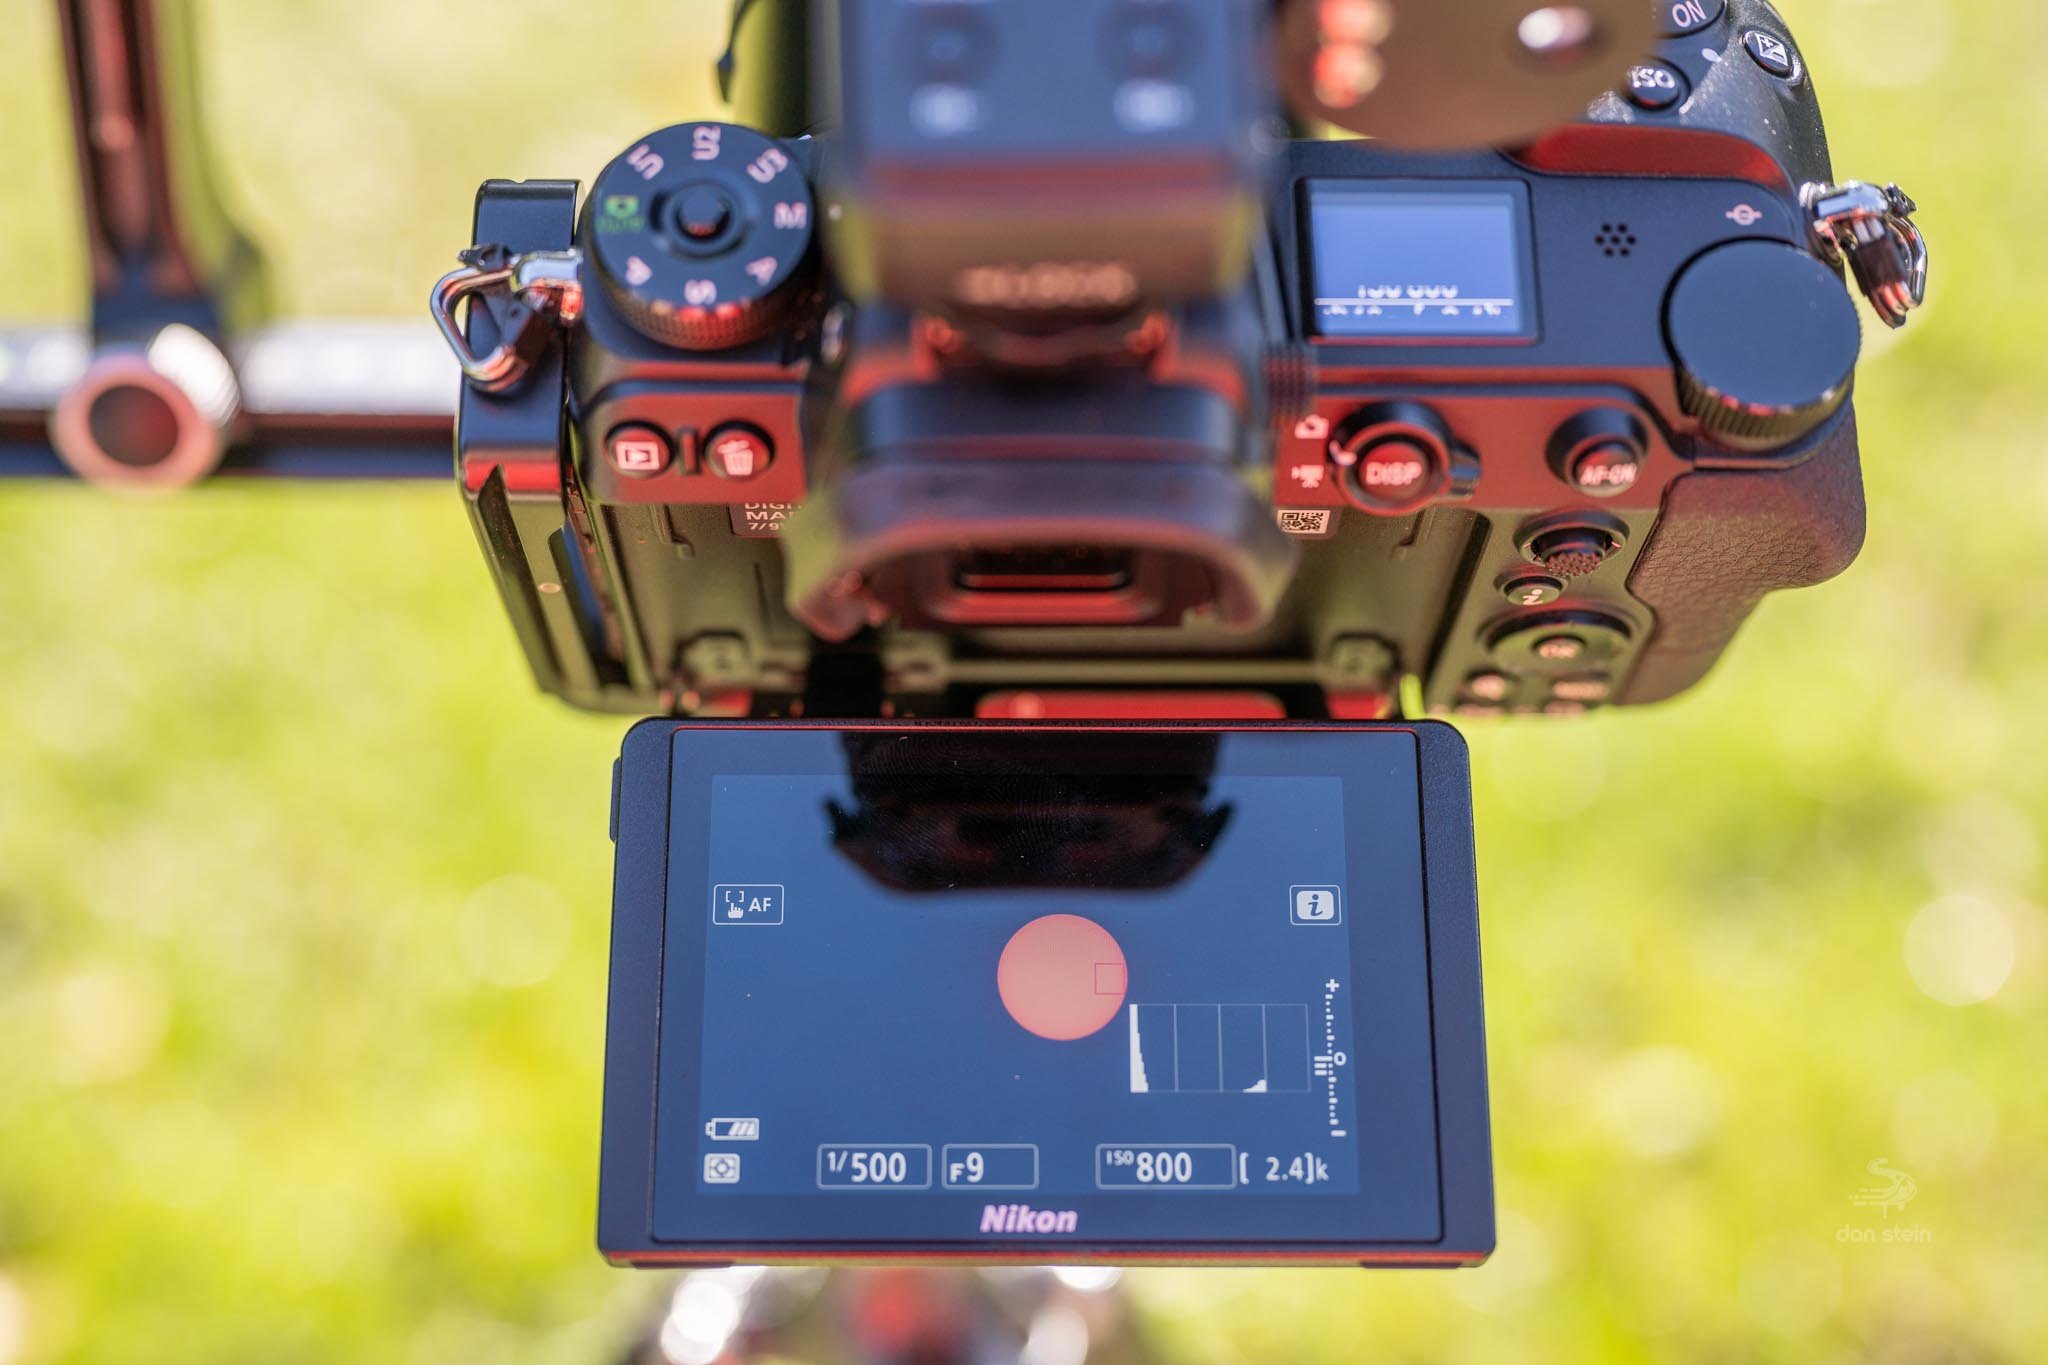
If you are manually tracking the Sun, it is important to realize just how quickly it moves when zoomed with a telephoto. For that reason, I would start off with a faster shutter speed, perhaps 1/500. I would also try not to open the aperture too much as you want to maximize sharpness, I would say don’t go any wider than f/5.6. That just leaves ISO, which normally this is where I would go on a long and boring technical discussion on how ISO doesn’t effect exposure. In this case because the aperture and shutter speed are set first, let’s ignore the technical jargon and say just use the ISO to center the histogram on your exposure. You don’t want the Sun to be over or under exposed.
Keep in mind these are mainly guidelines, so while you are practicing in your backyard, just know that these settings will likely be changing as the Moon starts to obscure the Sun. You can also play around with exposure bracketing.
Recap
To summarize shooting the eclipse with this type of setup, here is what you need to do:
Purchase a solar filter matching the correction dimensions of your lens
Practice finding the Sun with your camera in your backyard or in a park somewhere
Play around with settings, using 1/500 for shutter speed and f/5.6 for aperture, then referring to the histogram to dial in your ISO
Use autofocus or manual focus, whatever works best for you
Use a remote release or the self timer mode on your camera
Observe how quickly the Sun drifts out of frame and understand what you need to do to reframe it
At this point, you should be all set for the Eclipse. Only read on if you plan to use a star tracker.

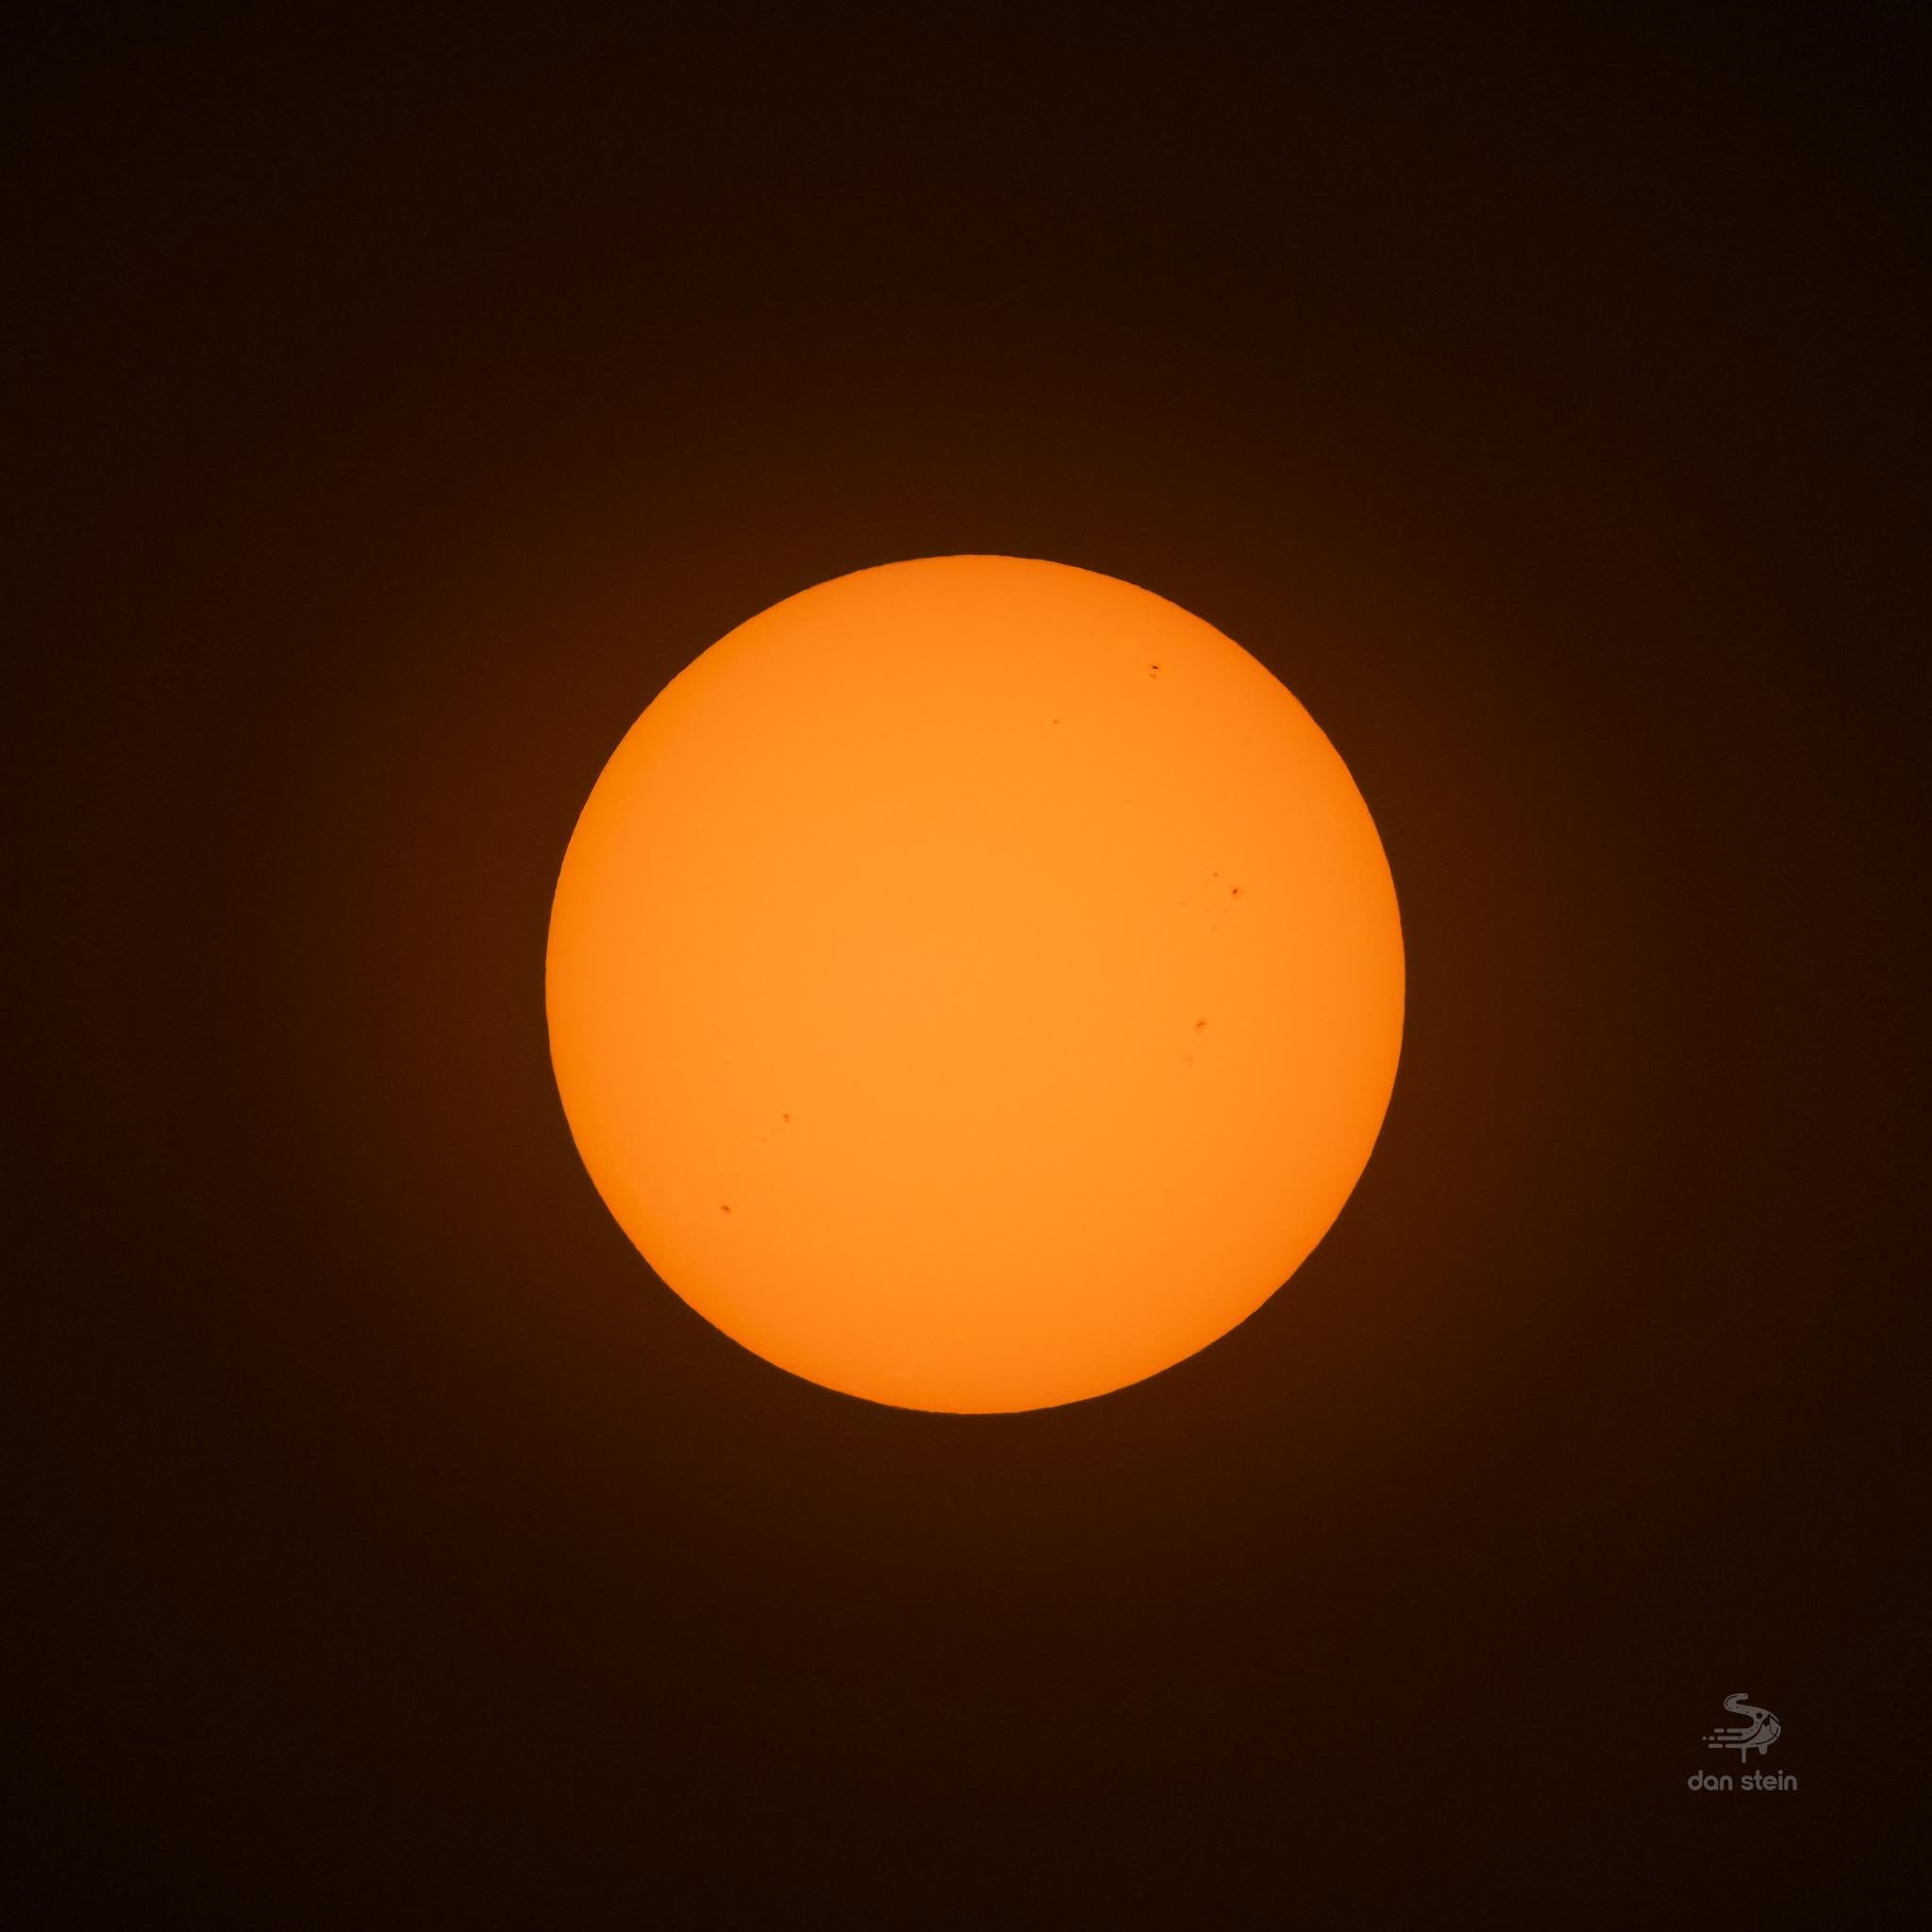
Overall your shot should look something like this. The Sun is nice and sharp and in focus, and you can clearly see Sunspots. This was taken with just a tripod and ball head at 400mm, then cropped down. Pretty easy right?
Using a Star Tracker
This next section gets a little more advanced. I am sure a number of you wish to use a star tracker setup for the eclipse. While the setup is a bit trickier, it cuts out much of the reframing you would have to do if you are manually tracking the Sun. To get started, you will need to figure out a way to polar align your mount. There are two good methods that work.
The first is to get to your eclipse spot the night before and polar align the traditional way. Then, leave your tripod/mount setup overnight and simply turn it on for the eclipse. This is the most accurate way, especially because you can perfectly align Polaris in your polar scope’s reticle, and even go a step further and use plate solving in apps like Sharpcap or the ASI Air to be dead on. The only problem with this is if you are in a heavily trafficked area, this may not be the safest idea. I would only recommend this method if you are at your house or are in an area with little to no foot traffic.
The second is to use an app called PS Align Pro. This nifty little app has a daytime alignment feature which has worked well for me even on night shots where Polaris was obscured. Unfortunately this app is iOS only. So if you have an android device, you will need to use the first option or see if you have a friend with you that will let you borrow their iPhone or iPad.
Tracker setup and finding the Sun
If you are shooting with a telephoto lens, you should use your tracker setup as if you were to be shooting a deep space object. Rather than using a ball head, instead mount the declination bracket with counterweight. The Tele-Vue Sol searcher will also be super handy here too, so be sure to secure it to your camera or lens in some fashion. Mount your camera directly to the declination bracket, and use the counterweight to balance it.
If you are unfamiliar with using your tracker in this fashion, again I want to reiterate that you should be practicing from now until Eclipse day so you have everything dialed in.
At this point you should be polar aligned and ready to find the Sun. Use the shadow trick described above or your Sol Searcher to find the Sun.
Camera settings and shooting
Camera settings will be a bit different because of the tracker. Depending on your polar alignment, you should be able to open up the shutter for a little longer and still have a sharp image. You can also drop the aperture down to something super sharp like f/8 or f/11, but I wouldn’t go past that as then you can introduce diffraction. You may at this point play around with dropping the ISO down to one of your dual-gain values if your camera is ISO invariant. If not, just use the histogram to ensure you are exposing correctly.
At this point, you can also play around with bracketing and verify what the slowest shutter speed you can go is before the Sun starts to streak. I would venture to say you might even be able to get down to 1 second or so. Don’t go too long!
Recap
To summarize shooting the eclipse with this type of setup, here is what you need to do:
Purchase a solar filter matching the correction dimensions of your lens
Practice daytime alignment with your star tracker or EQ mount.
Get used to using the right ascension and declination axis to frame the Sun if you aren’t already.
Use autofocus or manual focus, whatever works best for you
Use a sharper aperture such as f/8 and a slower shutter speed, but not too slow! Change your ISO value based on the histogram.
You may still have to reframe the Sun every now and then if your polar alignment isn’t perfect.
At this point, you should be all set for the Eclipse. Only read on if you plan to use a star tracker.
Using a Phone
Believe it or not, phones can shoot the eclipse, but just like our eyes and real cameras, they do need to filtered as well. To create a solar filter for your phone, you really just need to get an extra set of ISO certified eclipse glasses or Baader film.
Since phones look like that one dude with a thousand eyes from monster’s inc, you need to find which camera is the telephoto lens. Grab some electrical tape and tape up the other lenses, then grab your extra set of eclipse glasses and cut out just one of the lenses, but leave in the cardboard frame surround.

Cut the lens with cardboard frame out of an extra set of Eclipse glasses.

Tape up the other cameras you will not be using to shoot the eclipse if your phone has multiple lenses.
Next, use the electrical tape to secure the eclipse film to the back of your phone, ensuring light can’t get into the other cameras in the assembly. It is possible the Sun still could damage these smaller phone cameras, especially because they can still get hot and you will be pointing your phone camera at the sun for a bit.

Work of art
At this point the operation is pretty straight forward. Since the telephoto phone lenses aren’t as powerful as traditional camera lenses, finding the sun should be easy. Just be sure to only keep your eyes on the phone screen. Never look at the Sun without the Eclipse glasses on.
Most phones let you adjust the exposure in camera, so if you are struggling with an under or overexposed sun, tap and hold the screen to bring up your exposure controls.
I am not sure if using things like night mode are good idea here, as the Sun may become blurred, but it is worth a shot. Having a tripod for your phone will help as well.
On Eclipse Day
Now that you have practiced how to shoot the Sun with your filter, you are ready for Eclipse day. There are a few extra things to consider when shooting the eclipse itself.
If you plan to shoot a video timelapse from start to finish, some simple math will help you figure out how many shots you need to take. For example if you want to create a 10 second video at 30 FPS, you would need 300 frames. If the duration of the Eclipse lasts about 2.5 hours in your location, that would be about 1 image every 30 seconds. (300 frames/150 minutes)
Timelapse compilations are also easy to put together. You can even shoot less shots if that makes your workload easier.
As the Moon begins to cover the Sun, be mindful of how your exposure changes. You may need to increase your exposure time so everything stays evenly lit. Be mindful not to drop it too low if you are not shooting with a tracker, as the Sun can then blur.
If you are not shooting with a tracker, you will need to keep consistently reframing the Sun. The Longer the focal length, the more you will need to recompose.
Traffic into/out of the Eclipse path will most likely be a nightmare before and after the Eclipse. Plan to arrive much earlier and have everything setup and ready to go by Sunrise, then plan to stay a little later after the Eclipse while the traffic settles. Bring a laptop if you have one, and start processing your images while you wait.
Final reminder… Solar filters and glasses must remain on the entire time for this eclipse. There is no totality phase, only a max annularity phase.

Eclipse timelapse compilation from Aug 2017
Final Thoughts
Like I said I wanted to keep this brief, and that is pretty much it. Once you get the hang of your setup, shooting the Eclipse should be a breeze. The whole point of planning and practicing is to make the special moments during Eclipse time feel both fun and effortless. If you find yourself struggling with any equipment during the Eclipse, it may just be best to put it all aside and enjoy. At the end of the day, you will want to remember the moment itself, not any sort of bad experiences or difficulties because you couldn’t get a shot. There is the Total Eclipse on April 8, 2024, so if you don’t get it this time, stick around for that one.
Feel free to send me your shots after Eclipse day as I would love to see them. I will be out west for this, so it may take me a while to respond, but go ahead and please DM me or email me.
-Dan