

What is Image Stacking and Why it is a Game Changer for your Astro Shots? [Intermediate]
Aloha and welcome back to my derpy site for another round of my tutorials. Today I am going to tell you about a game changing technique that you have probably maybe have already heard about. It is known as “image stacking.” The idea is to take several images over time out in the field and then use processing software later on to reduce the noise as a result of a darker, higher ISO image. This tutorial uses a program called StarryLandscapeStacker. It is a paid Mac app. Rest assured, a Windoge version is coming soon, as is a version to do this in Photoshop. Plus, the most important part of stacking starts with getting it right when shooting.
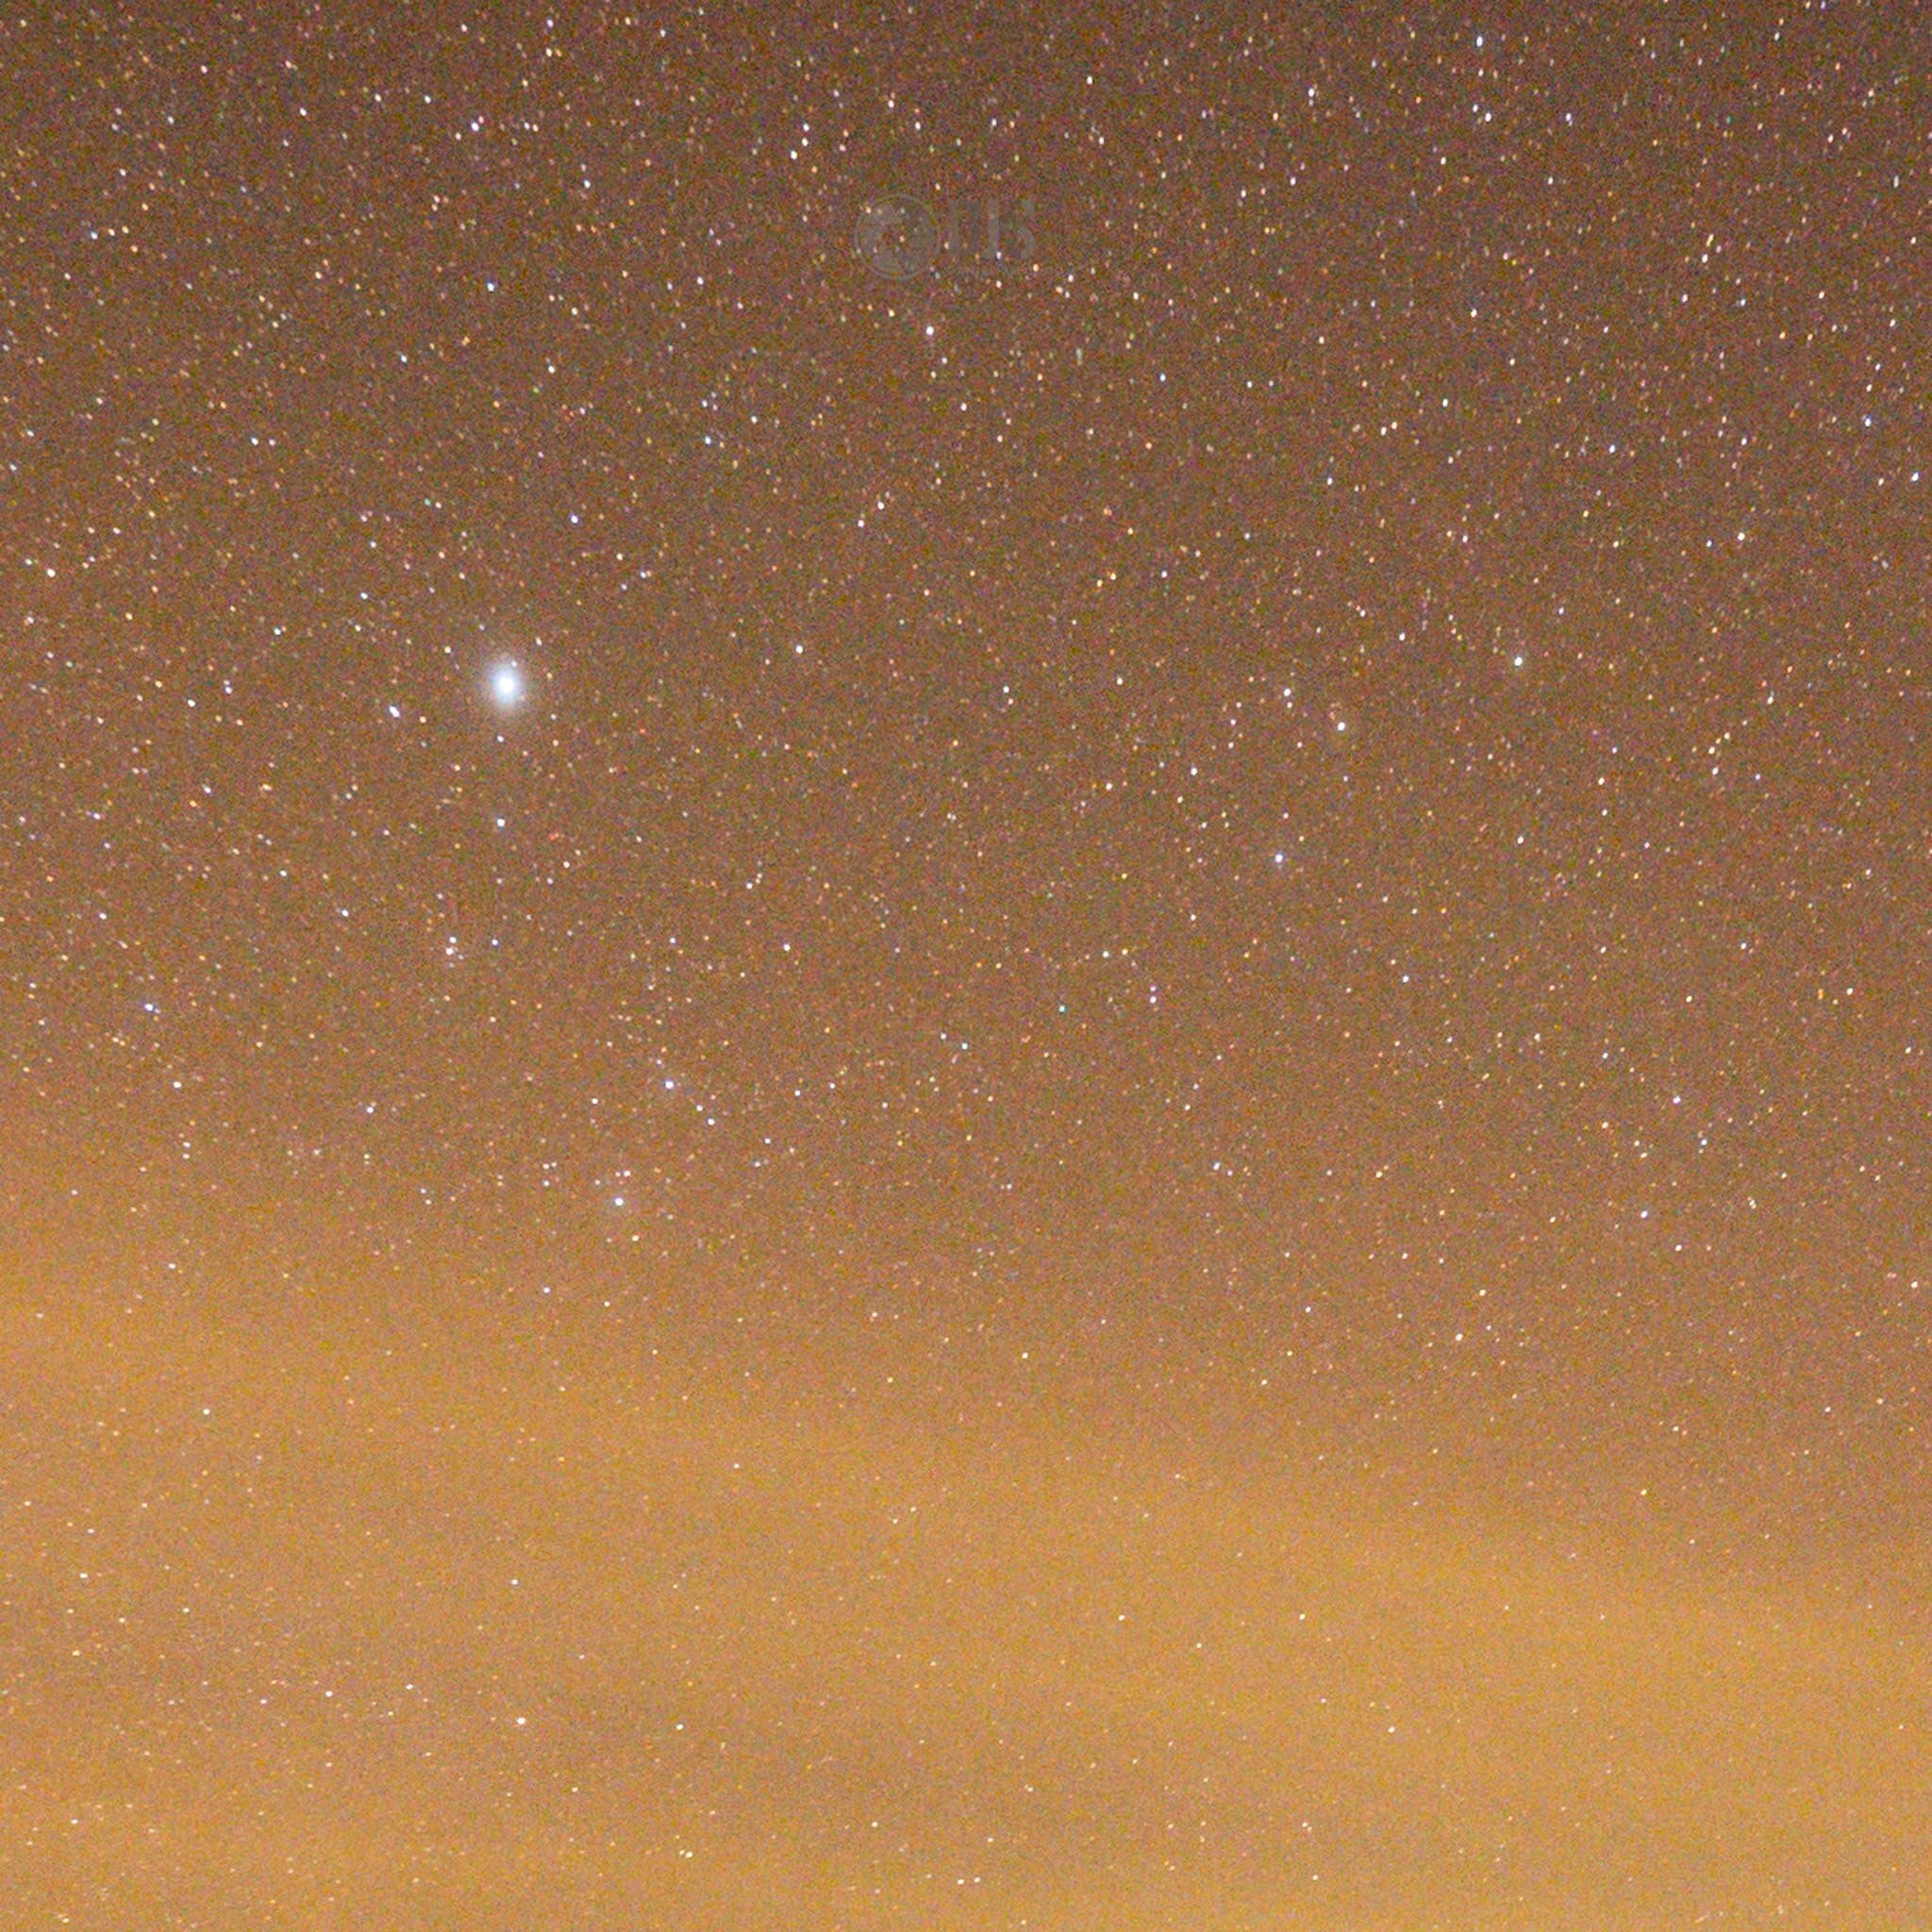
Take a look at the below example of a 1:1 crop of what an image looks like before and after stacking.
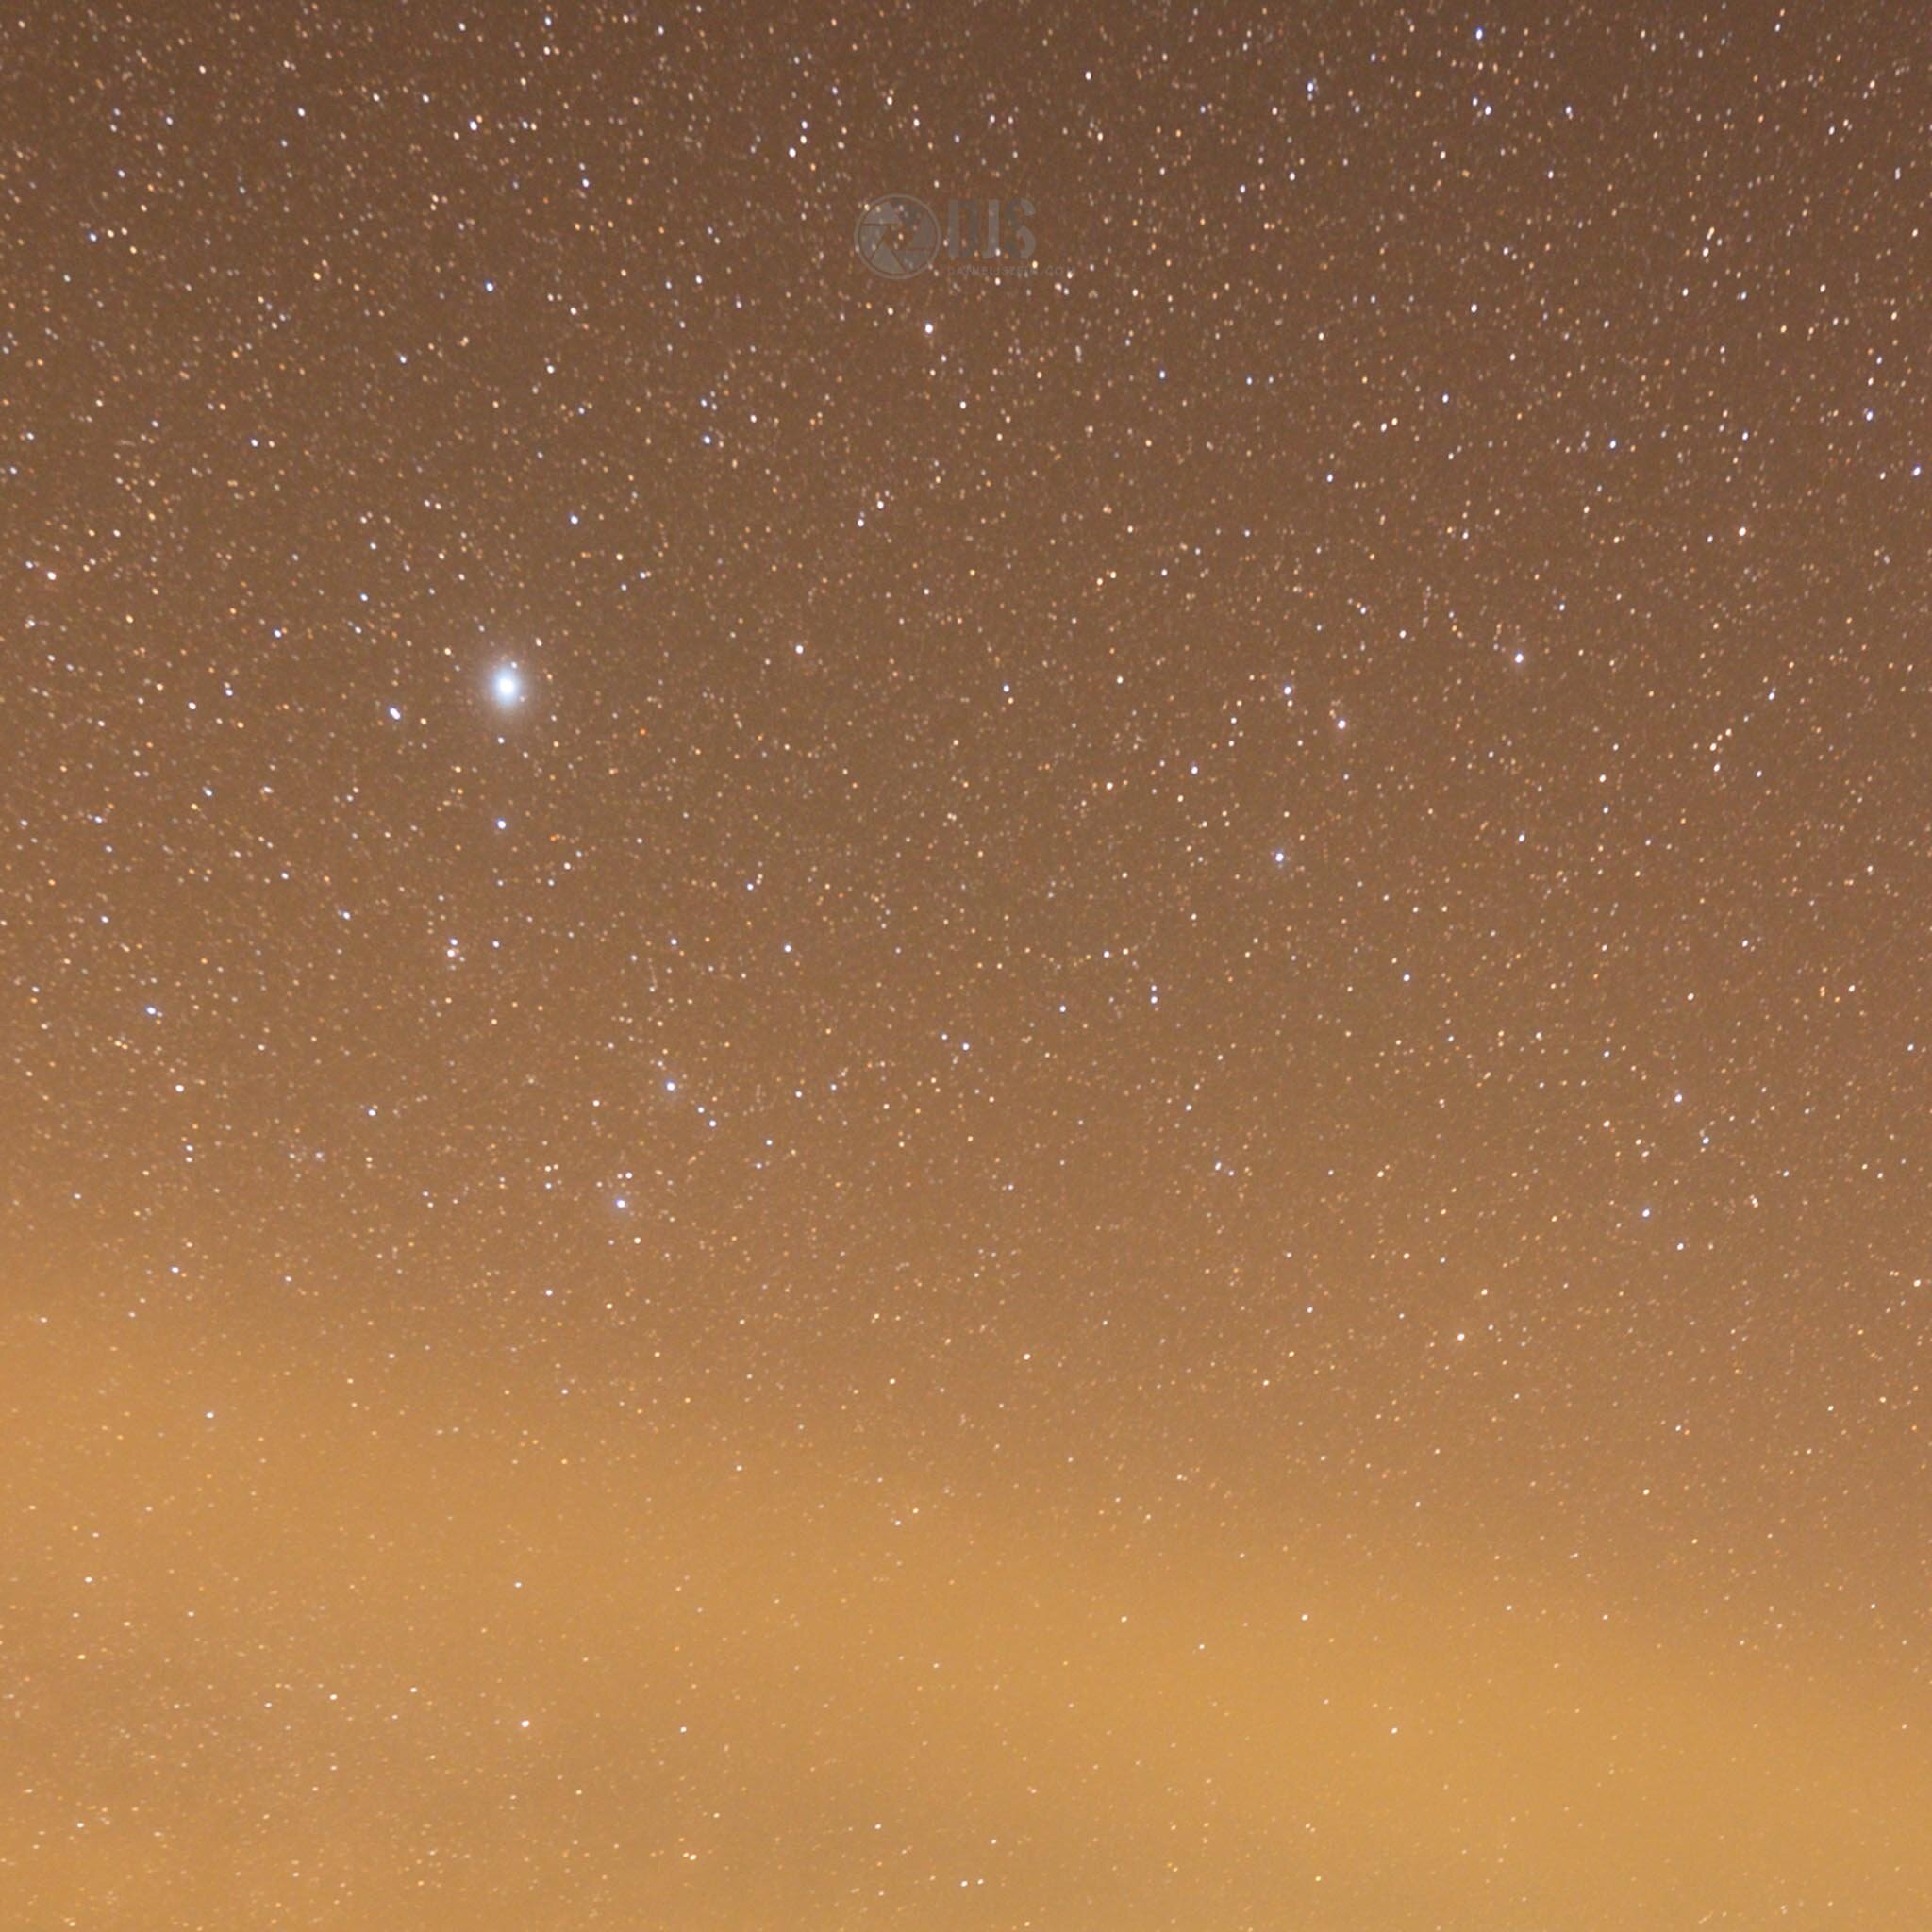
The technique requires more work, but as you can see the results speak for themselves. Some phones even have sophisticated programming to compute this process for you. Stacking is becoming more common with computational photography today, but it has been around since the film days of astrophotography.
First of all, if you have not done so already, please read my post on how to find and shoot the Milky Way to familiarize yourself with the techniques we will be discussing here. (Oh yeah and pls shoot RAW ok) Now, let’s move onto stacking, from start to finish. I will first be going over the core basics and describing parts of the process, then I will put everything altogether and summarize. Here we go00oo0000ooo:
Planning
Stacking requires you stick to a shot for a few minutes. In other words, with single exposures, you can shoot one composition and move on to another immediately thereafter. But with stacking, you will need to setup your shot and shoot several exposures of it over time. This means leaving your camera in the same position for minutes at a time. It’s like standing in a line at a coffee shop or something.
You will really want to make sure you nail your composition before you begin this process, so take a few quick test shots before shooting your stack sequence to ensure you will be happy with the outcome. These don’t need to be long, just a few seconds with a ridiculously high ISO to understand your framing will do. Like crank it up to sandpaper levels and just do a 3 second shot.
You may have seen or heard of something called an “intervalometer.” Complicated fancy word I know, but basically this is just a programmable remote that can control your camera’s shutter. They come in all different shapes and sizes. #realintervalometershavecurves Some cameras today even have this built in. Having one of these will greatly assist in this process.
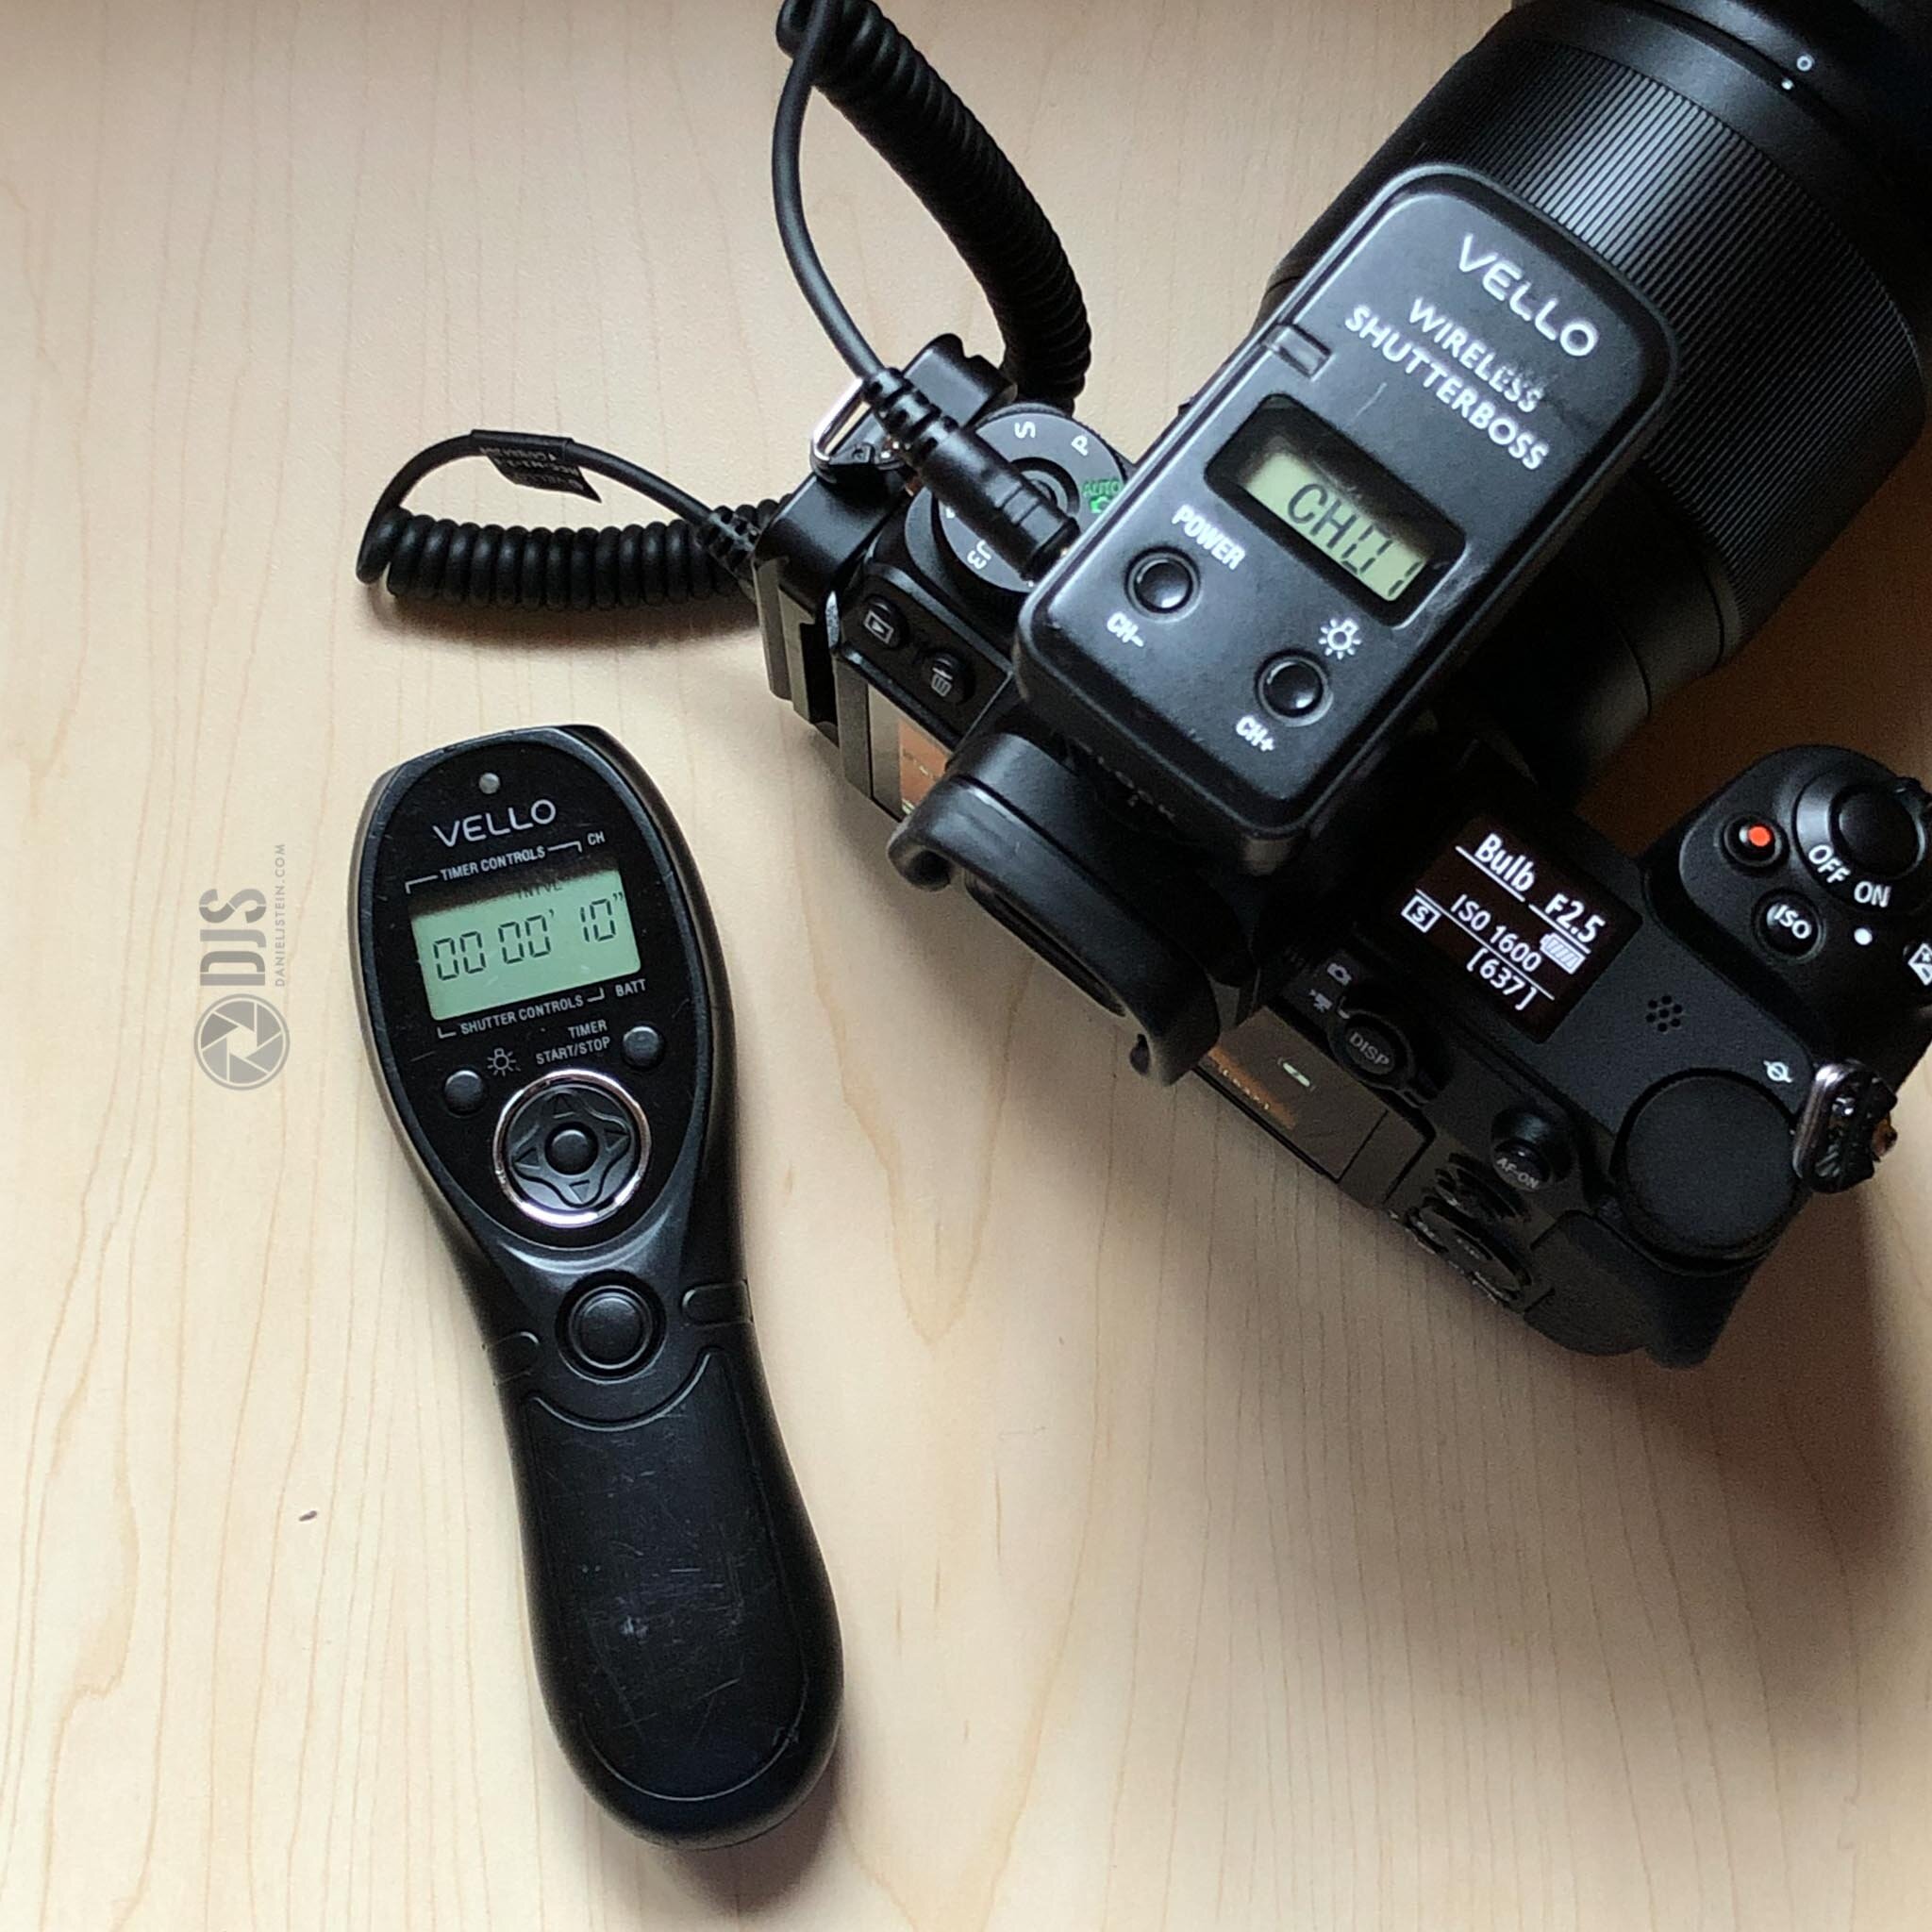
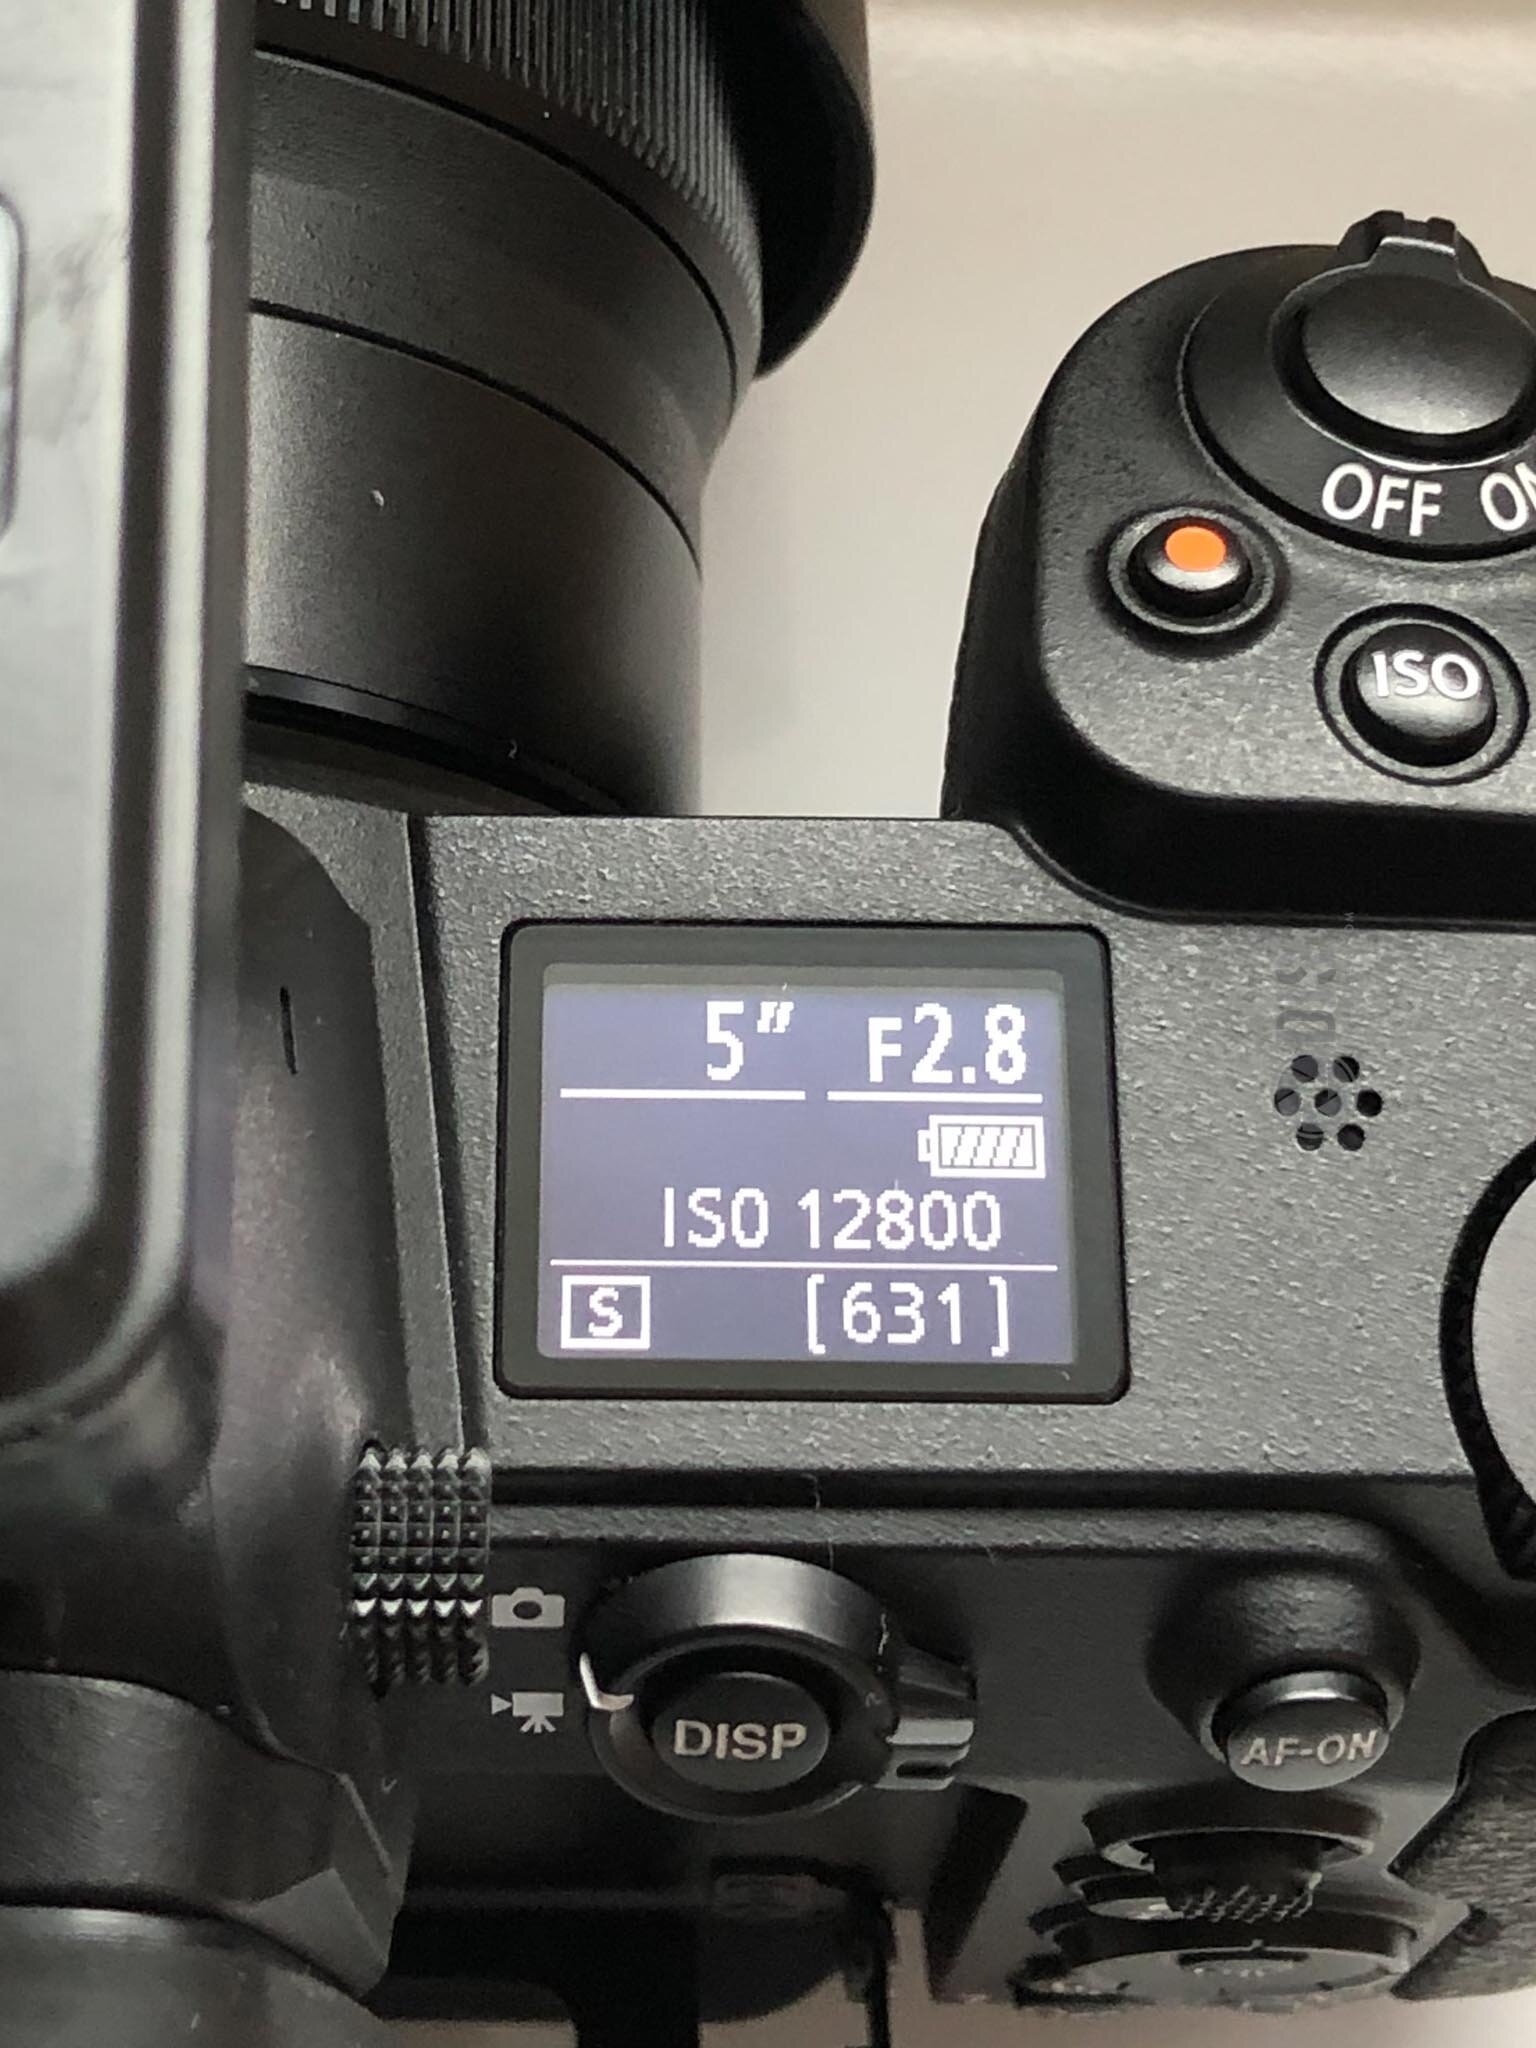
External intervalometer plugged into the camera.
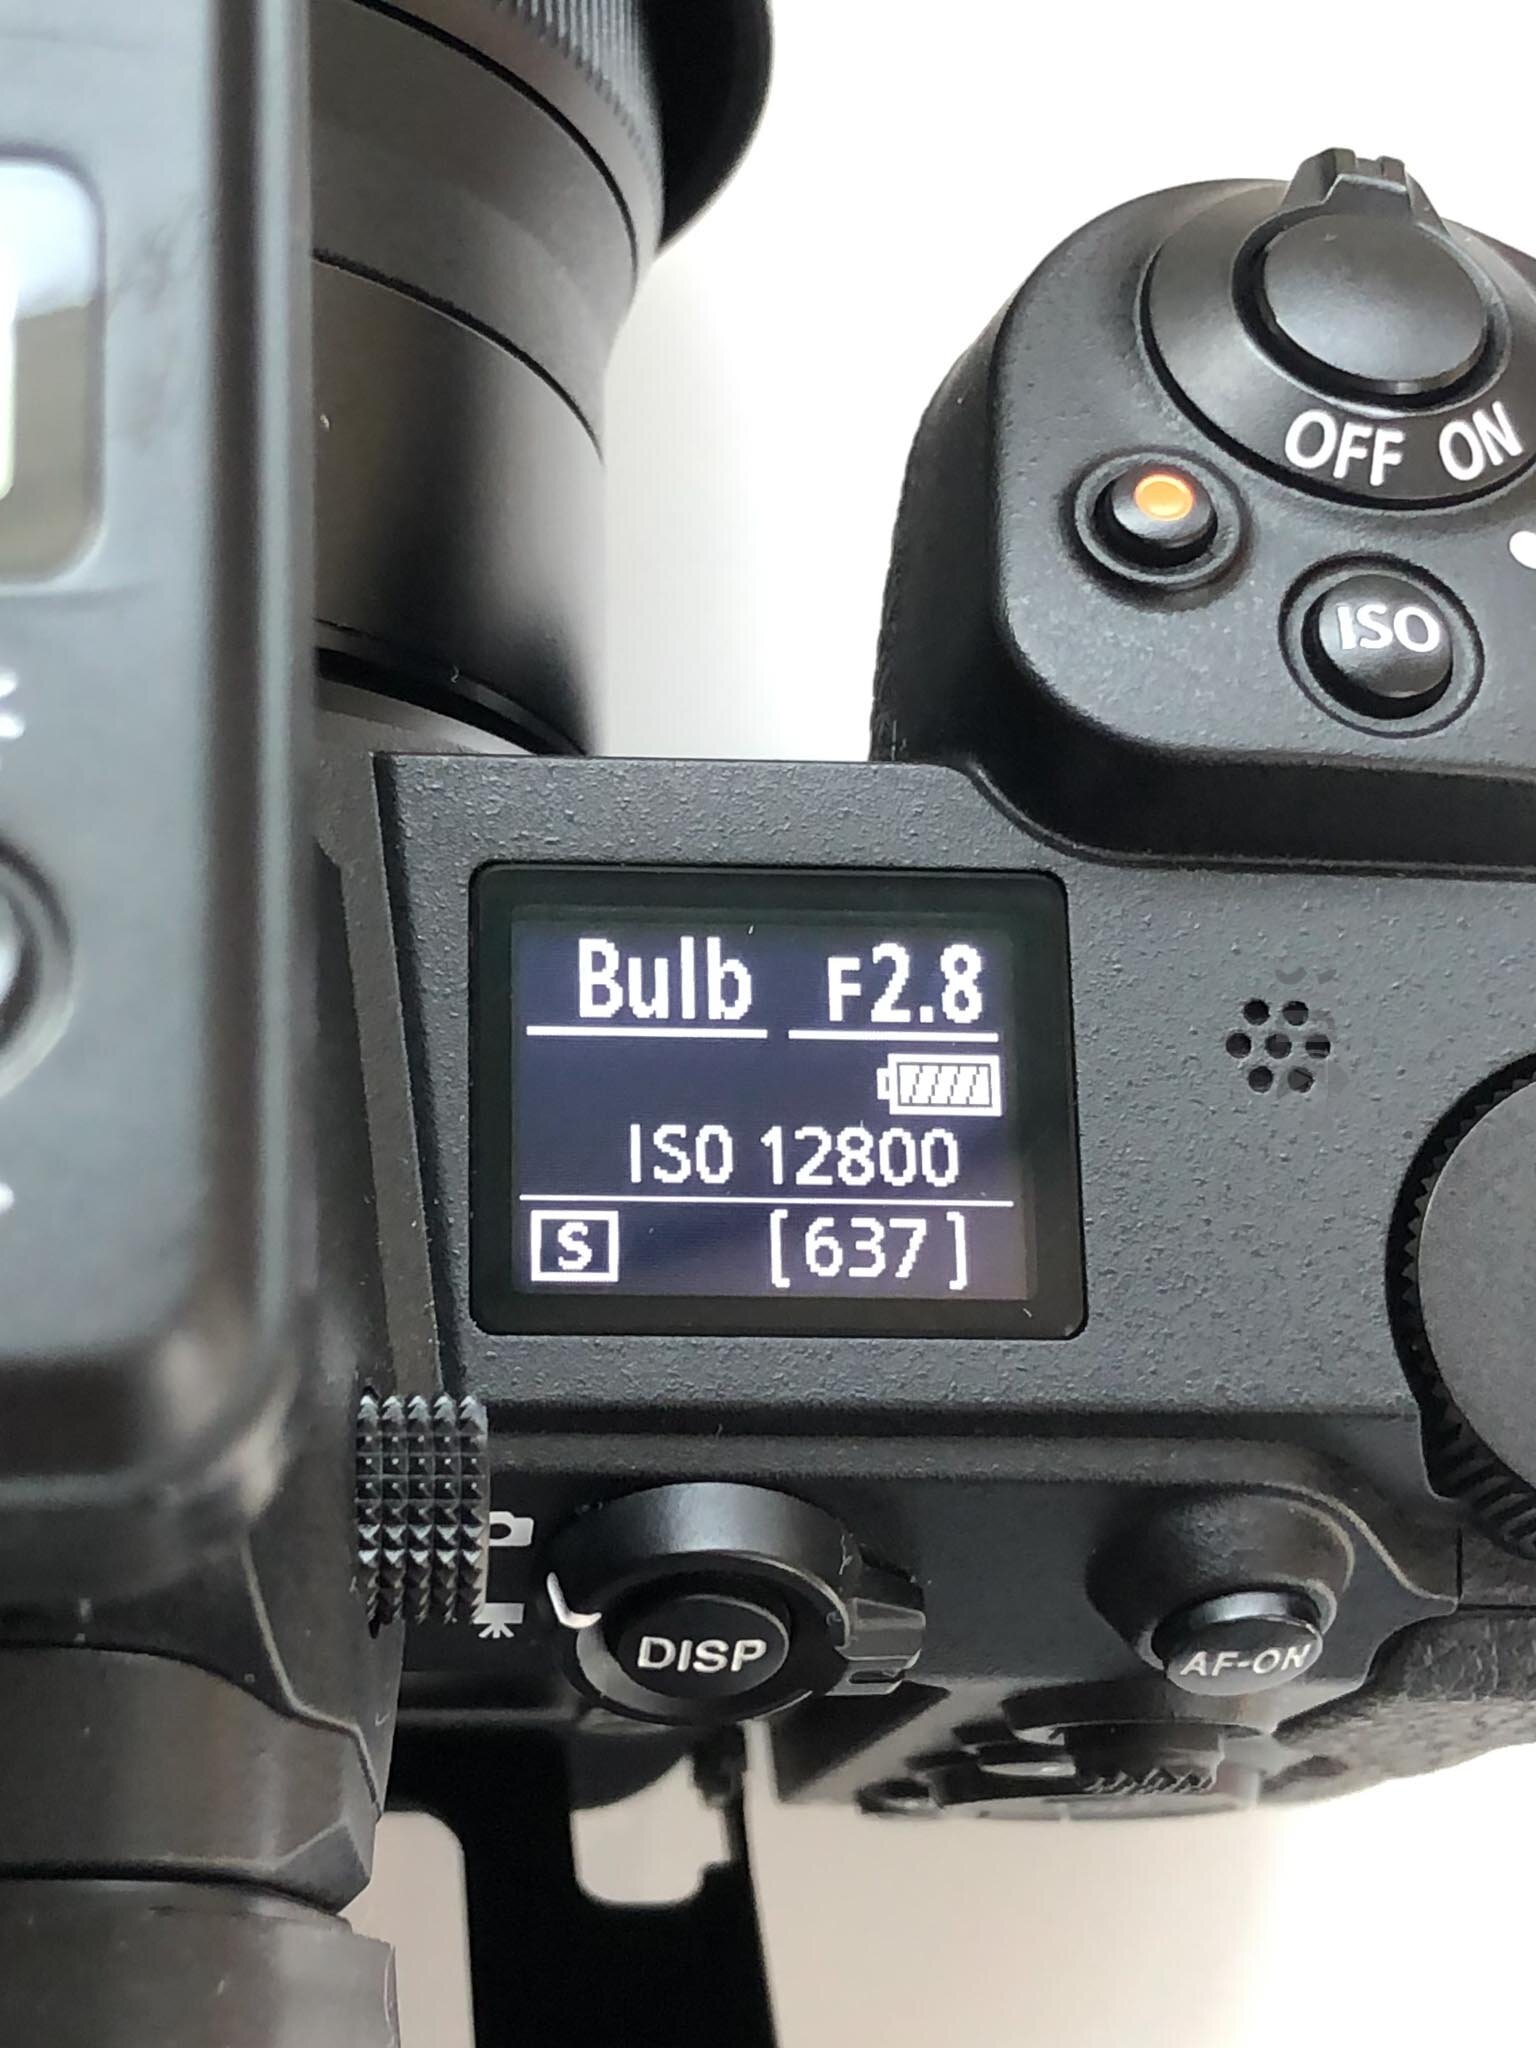
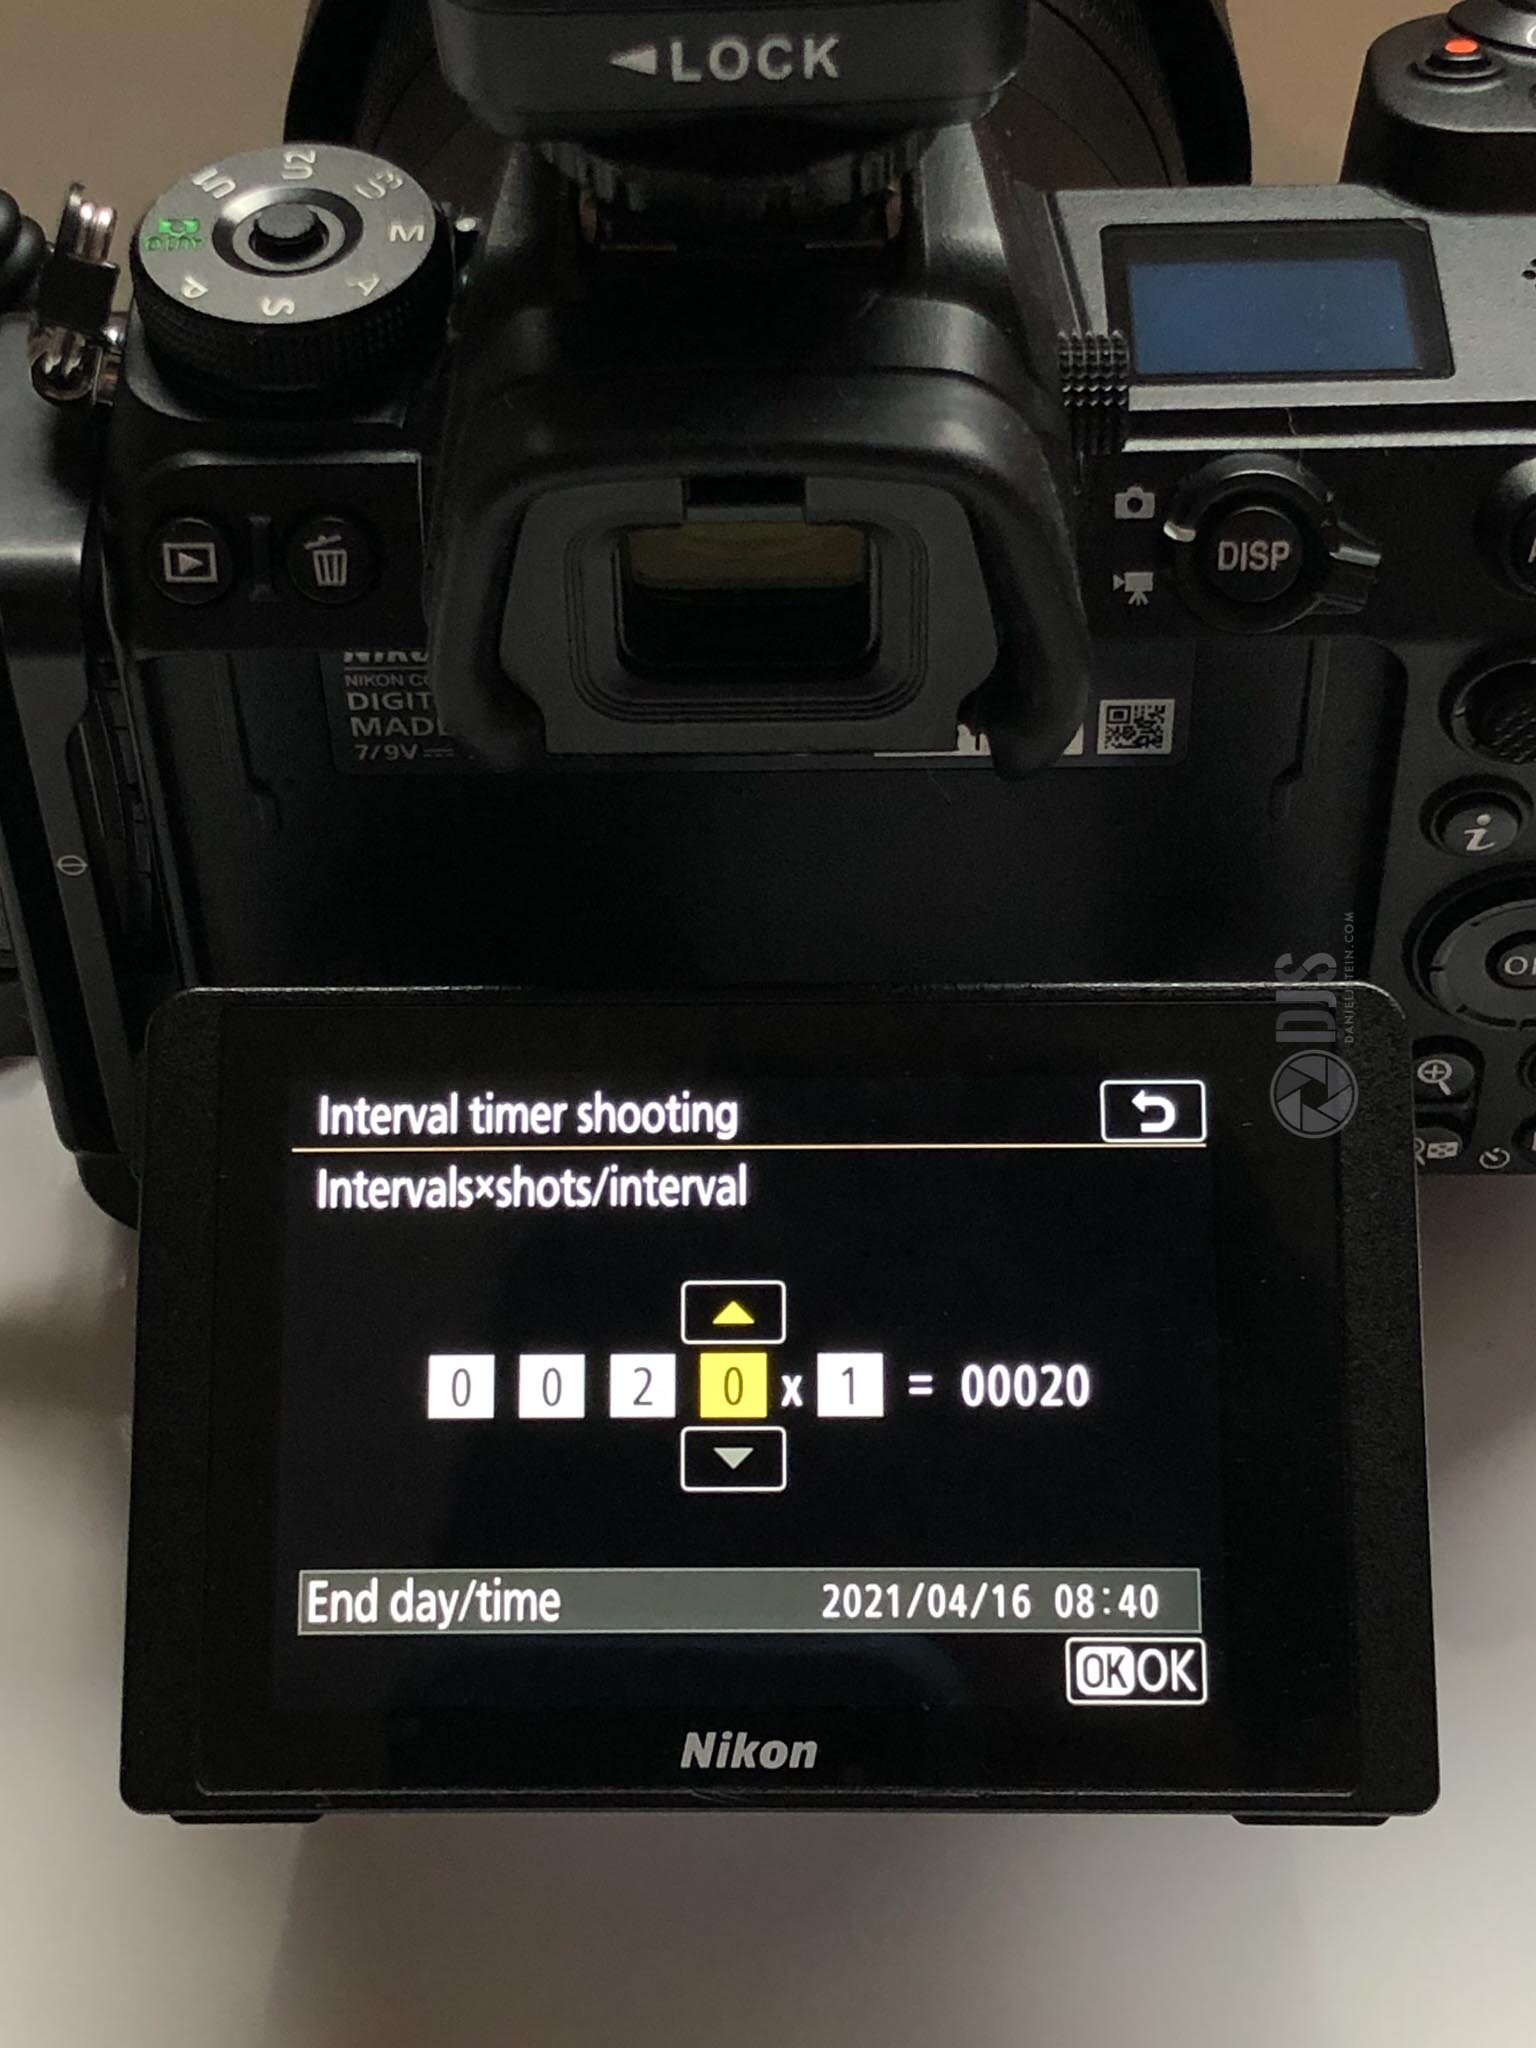
If your camera has a built-in intervalometer, it is best if you familiarize yourself with this function prior to shooting your stack. Most Canon’s and Nikon’s have this built-in, as well as some Sony’s (I think?). They all operate differently, so I suggest you consult your camera’s manual or some YouTuber tutorials on how to use yours.

Built-in camera intervalometer mode. Nikon is shown here.
I personally still prefer using an external intervalometer. I feel like the interface is a lot easier to control my camera versus the built-in ones. Plus, I can always see how many more shots are left in the stack. But, no pressure to get one of these if you have the function built in, use what makes you feel the most comfortable. If your camera does not have a built-in intervalometer however, I really do highly recommend getting one as it will make shooting stacks fully automated. Doing this process manually can be annoying af.
Calculating how many shots you need
The more shots you take, the cleaner the output stacked image will be. But, there is a point where diminishing returns kicks in. To keep things simple for this post though, I do not think that is something to worry about. Focus on shooting anywhere between 2 minutes to 30 minutes worth of shots, depending on what and how you are shooting.
Use your intervalometer to figure out how long the sequence will take. So let’s say according to the NPF Rule you are going to have a 15 second shutter speed at f/2.8 and ISO 3200. If you dial in that you want 7 shots with a 1 second interval in between, that would be 112 seconds spend shooting. That is a pretty good chunk of data, but you can still get some more and get an even cleaner shot.
A few hot notes:
Like I said, the more shots you get the better. If you find you are using a higher ISO like 6400 and above, it would be wise to get more shots.
If you are pressed for time in any way. For example clouds are rolling in, you gotta leave, you want to take other shots, you sandwich is getting cold, etc. then shoot less.
The tradeoff of shooting more shots is less noise and thus more detail.
If I personally am stacking I will usually go for 10-30 minutes of data for my nightscapes. Deep space is whole other ball game. For the purposes of this tut, we are focusing on nightscapes and the Milky Way with a wider lens.
Once you have toyed around with your intervalometer, shoot! Let the technology do the work for you. Set it and forget it. This is where not having the intervalometer will be dingly, because you will need to trigger the camera manually for each shot.
Now the biggy, programming your camera to shoot!!!1111!!!111!!1!11011001!!!!
There are two ways to do this as discussed. Either use your external intervalometer or your cameras built-in one. I will go over both, but just know that many intervalometers and cameras work differently. This is intended to be a guideline and the methods discussed here may not directly correlate to your setup. However, the concepts are very similar between cameras and remotes and this should help give you an idea of how to program.
Method 1: external remote:
Plug in your remote and set your camera to bulb mode. We want to give all shutter control to the remote.
Ensure long exposure noise reduction and self-timer are both off.
Dial in your other settings, such as ISO, aperture, white balance, and make sure your lens is in focus.
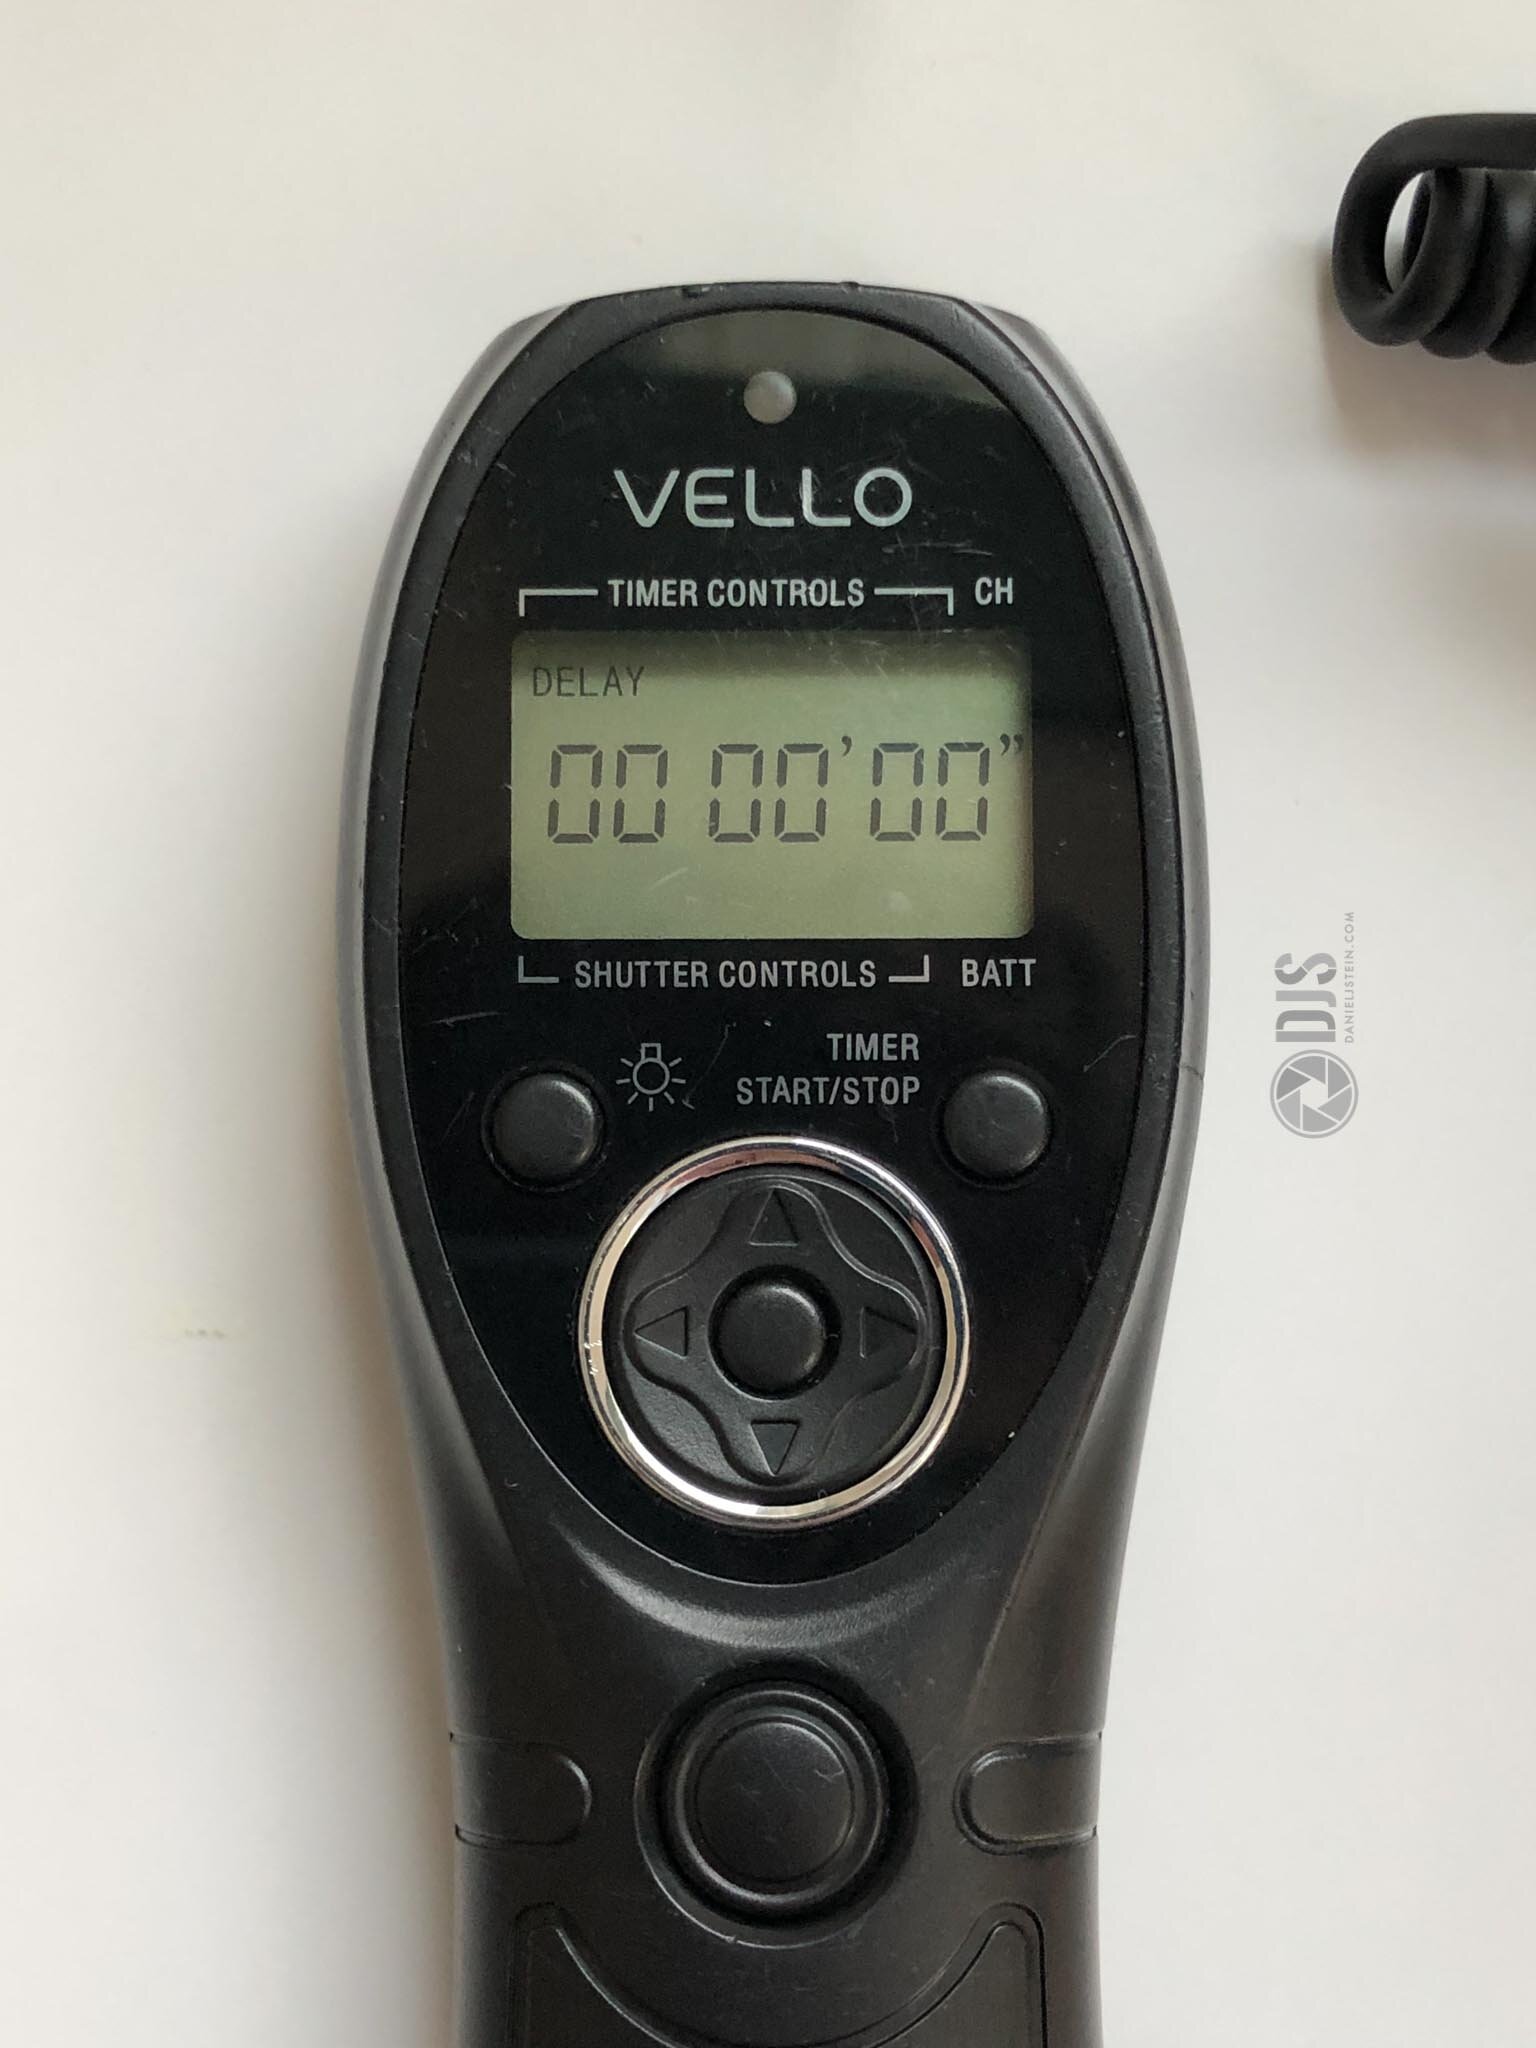
Head over to your remote and power it on. The first screen may indicate a delay. We do not need that for this so make sure everything shows a “0.”
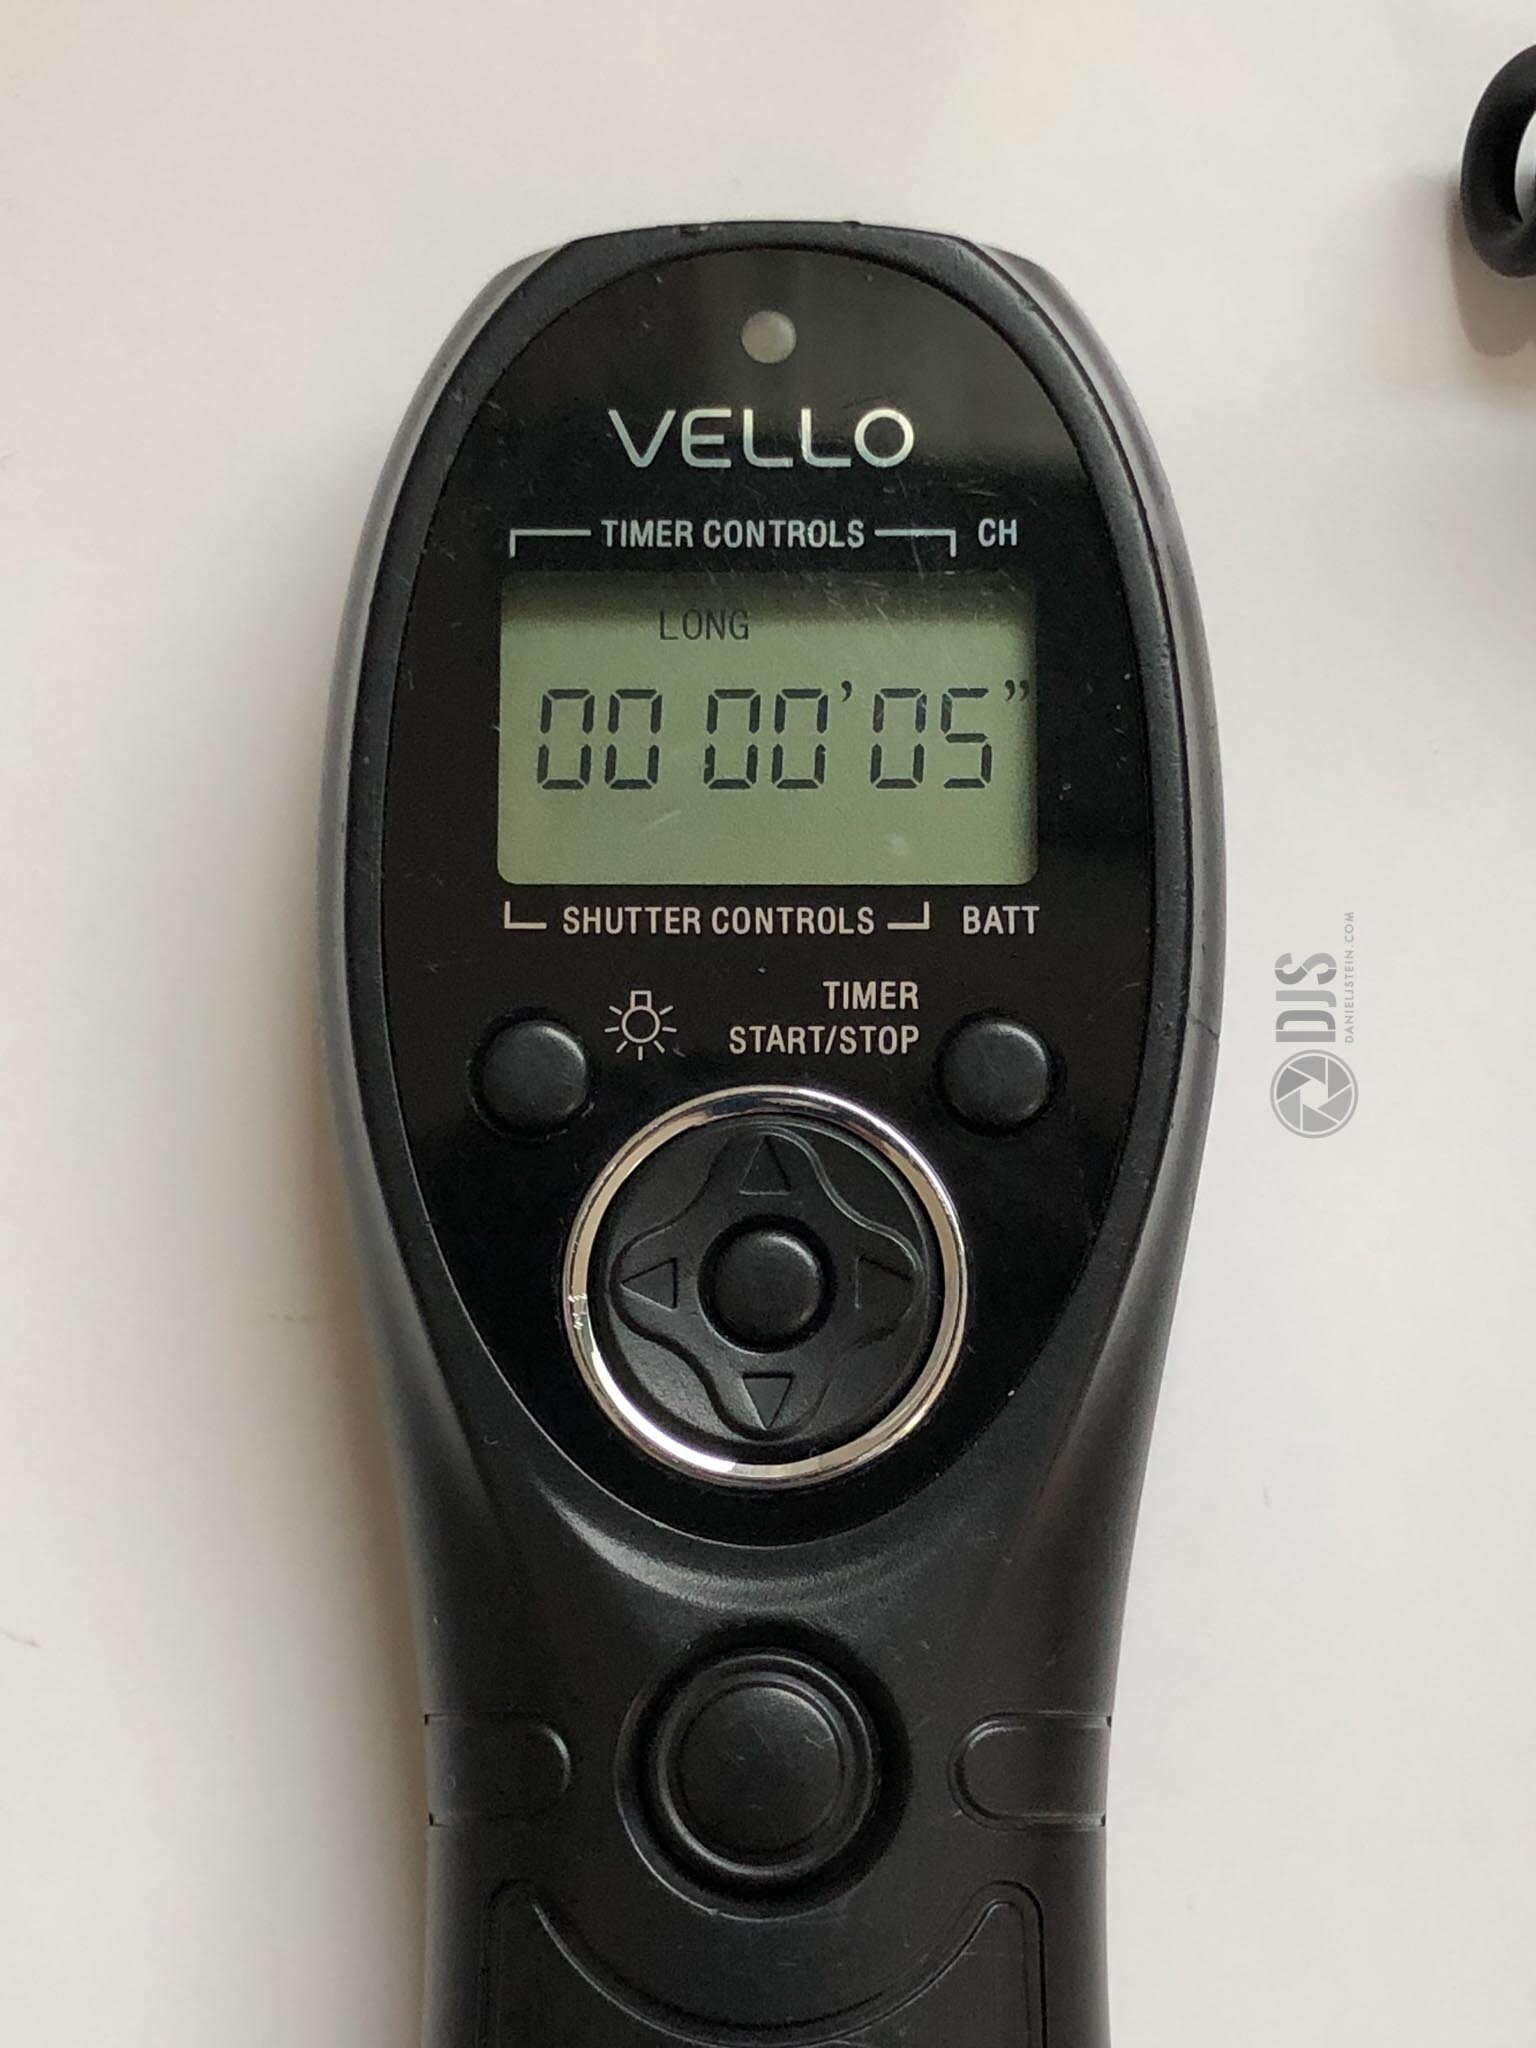
The next screen may show as “long” like my dog. He is long. This is your shutter speed. Dial it in according to the NPF rule.
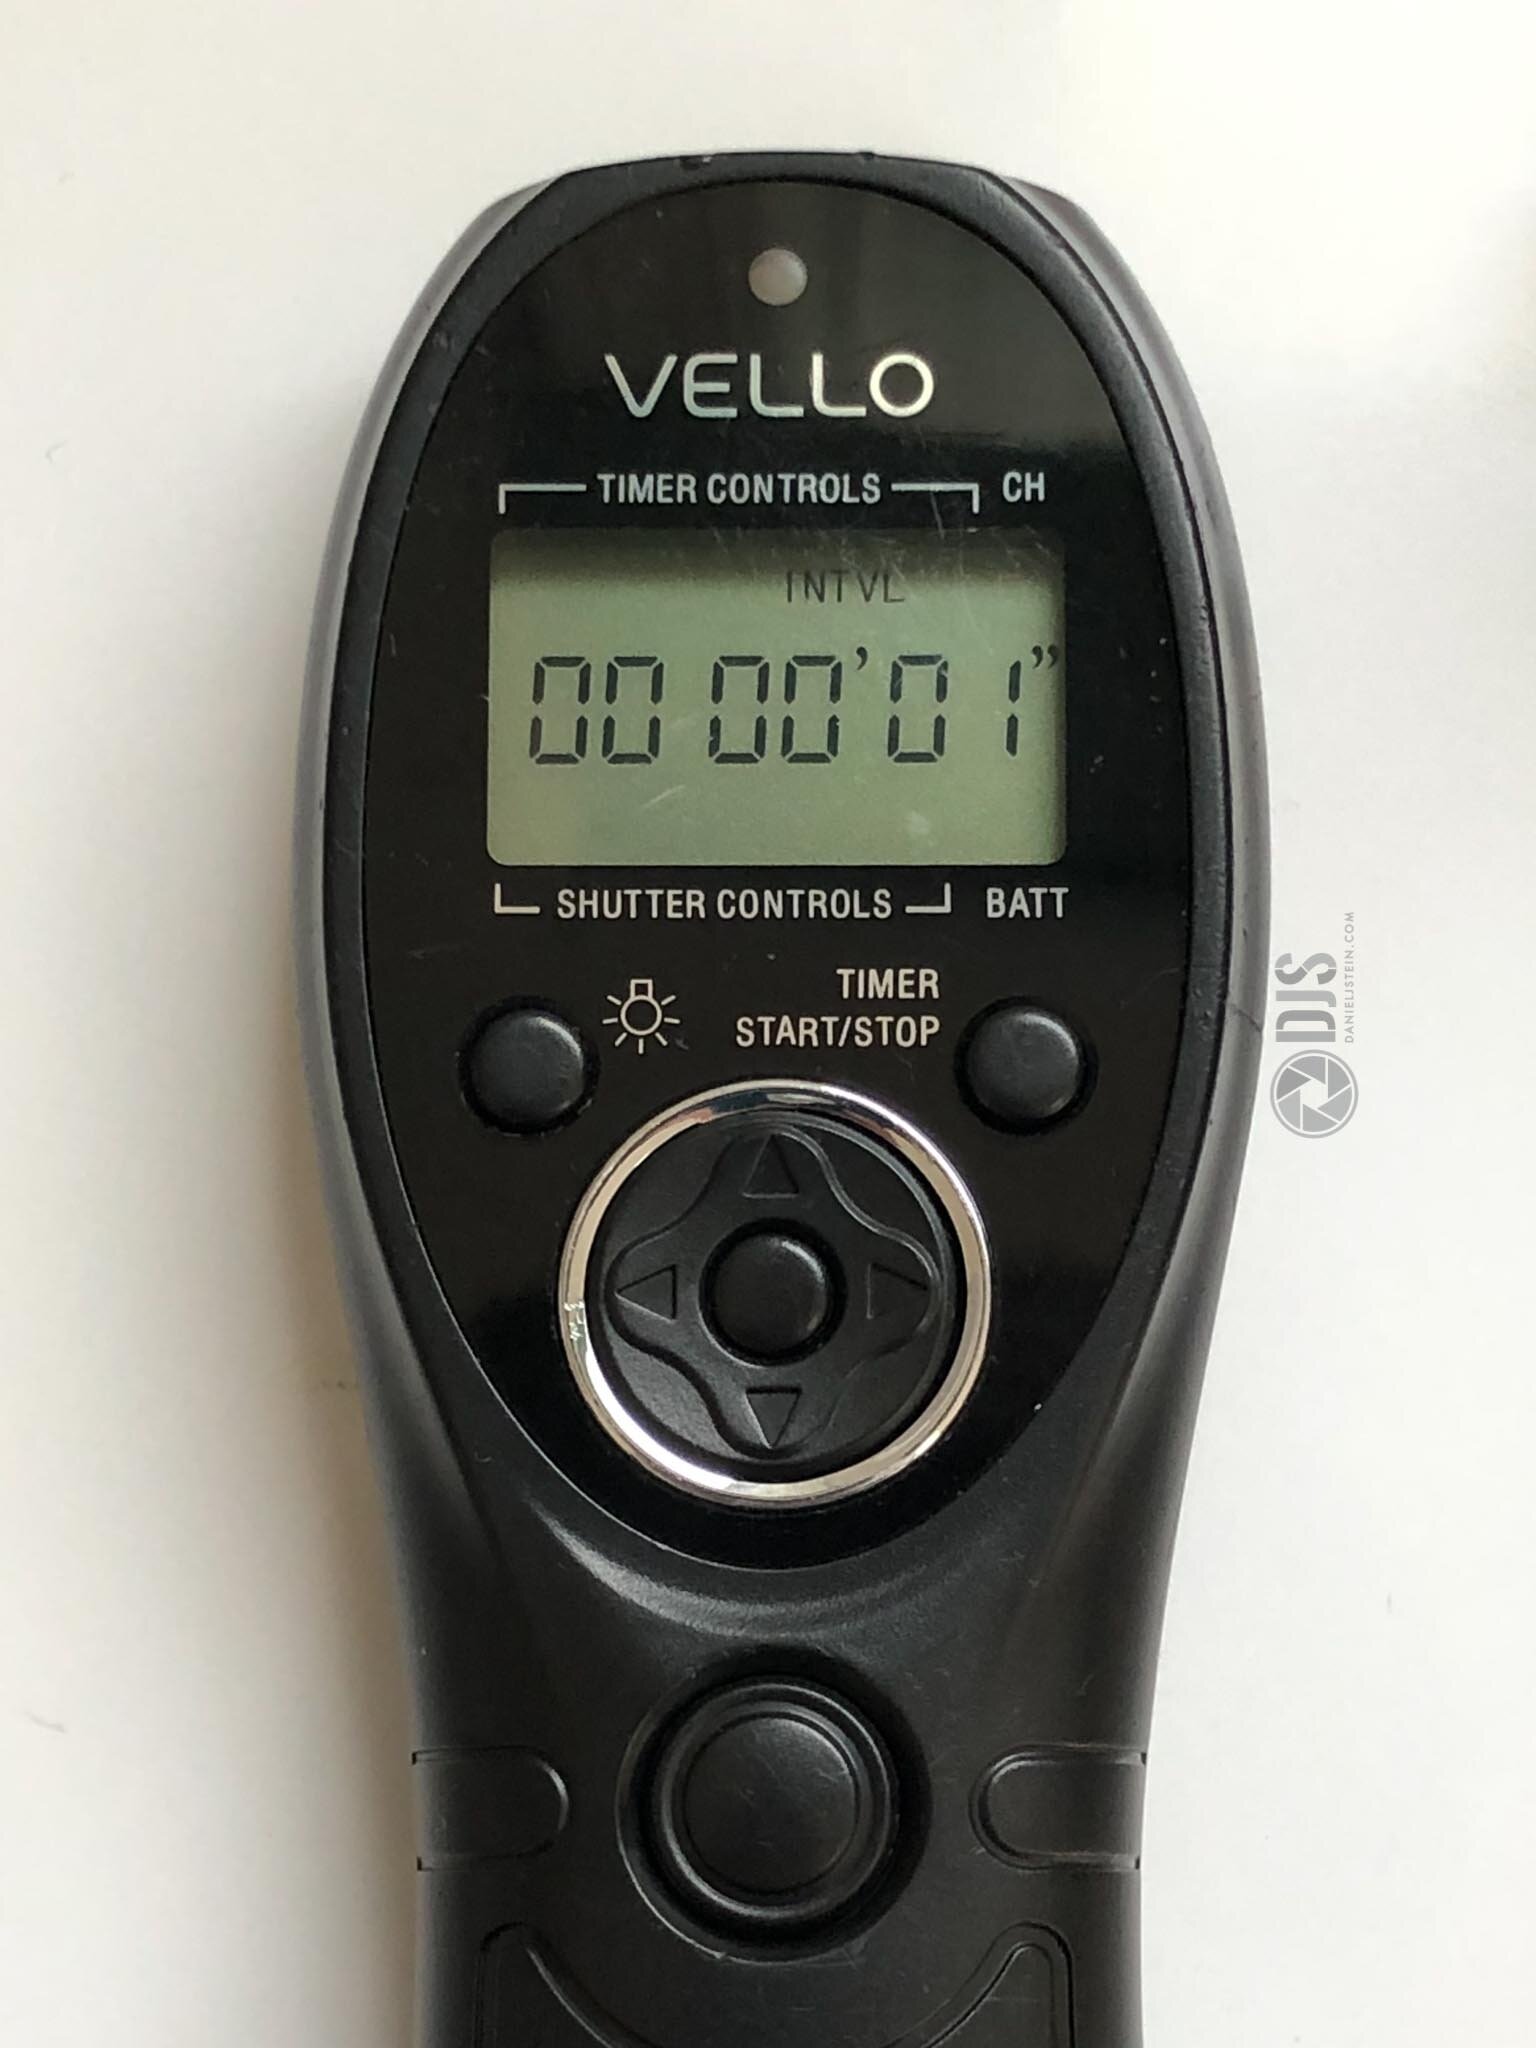
The following is the interval. This is the duration between each shot. We want this as short as possible for easier processing. I set mine to “01” for 1 second.
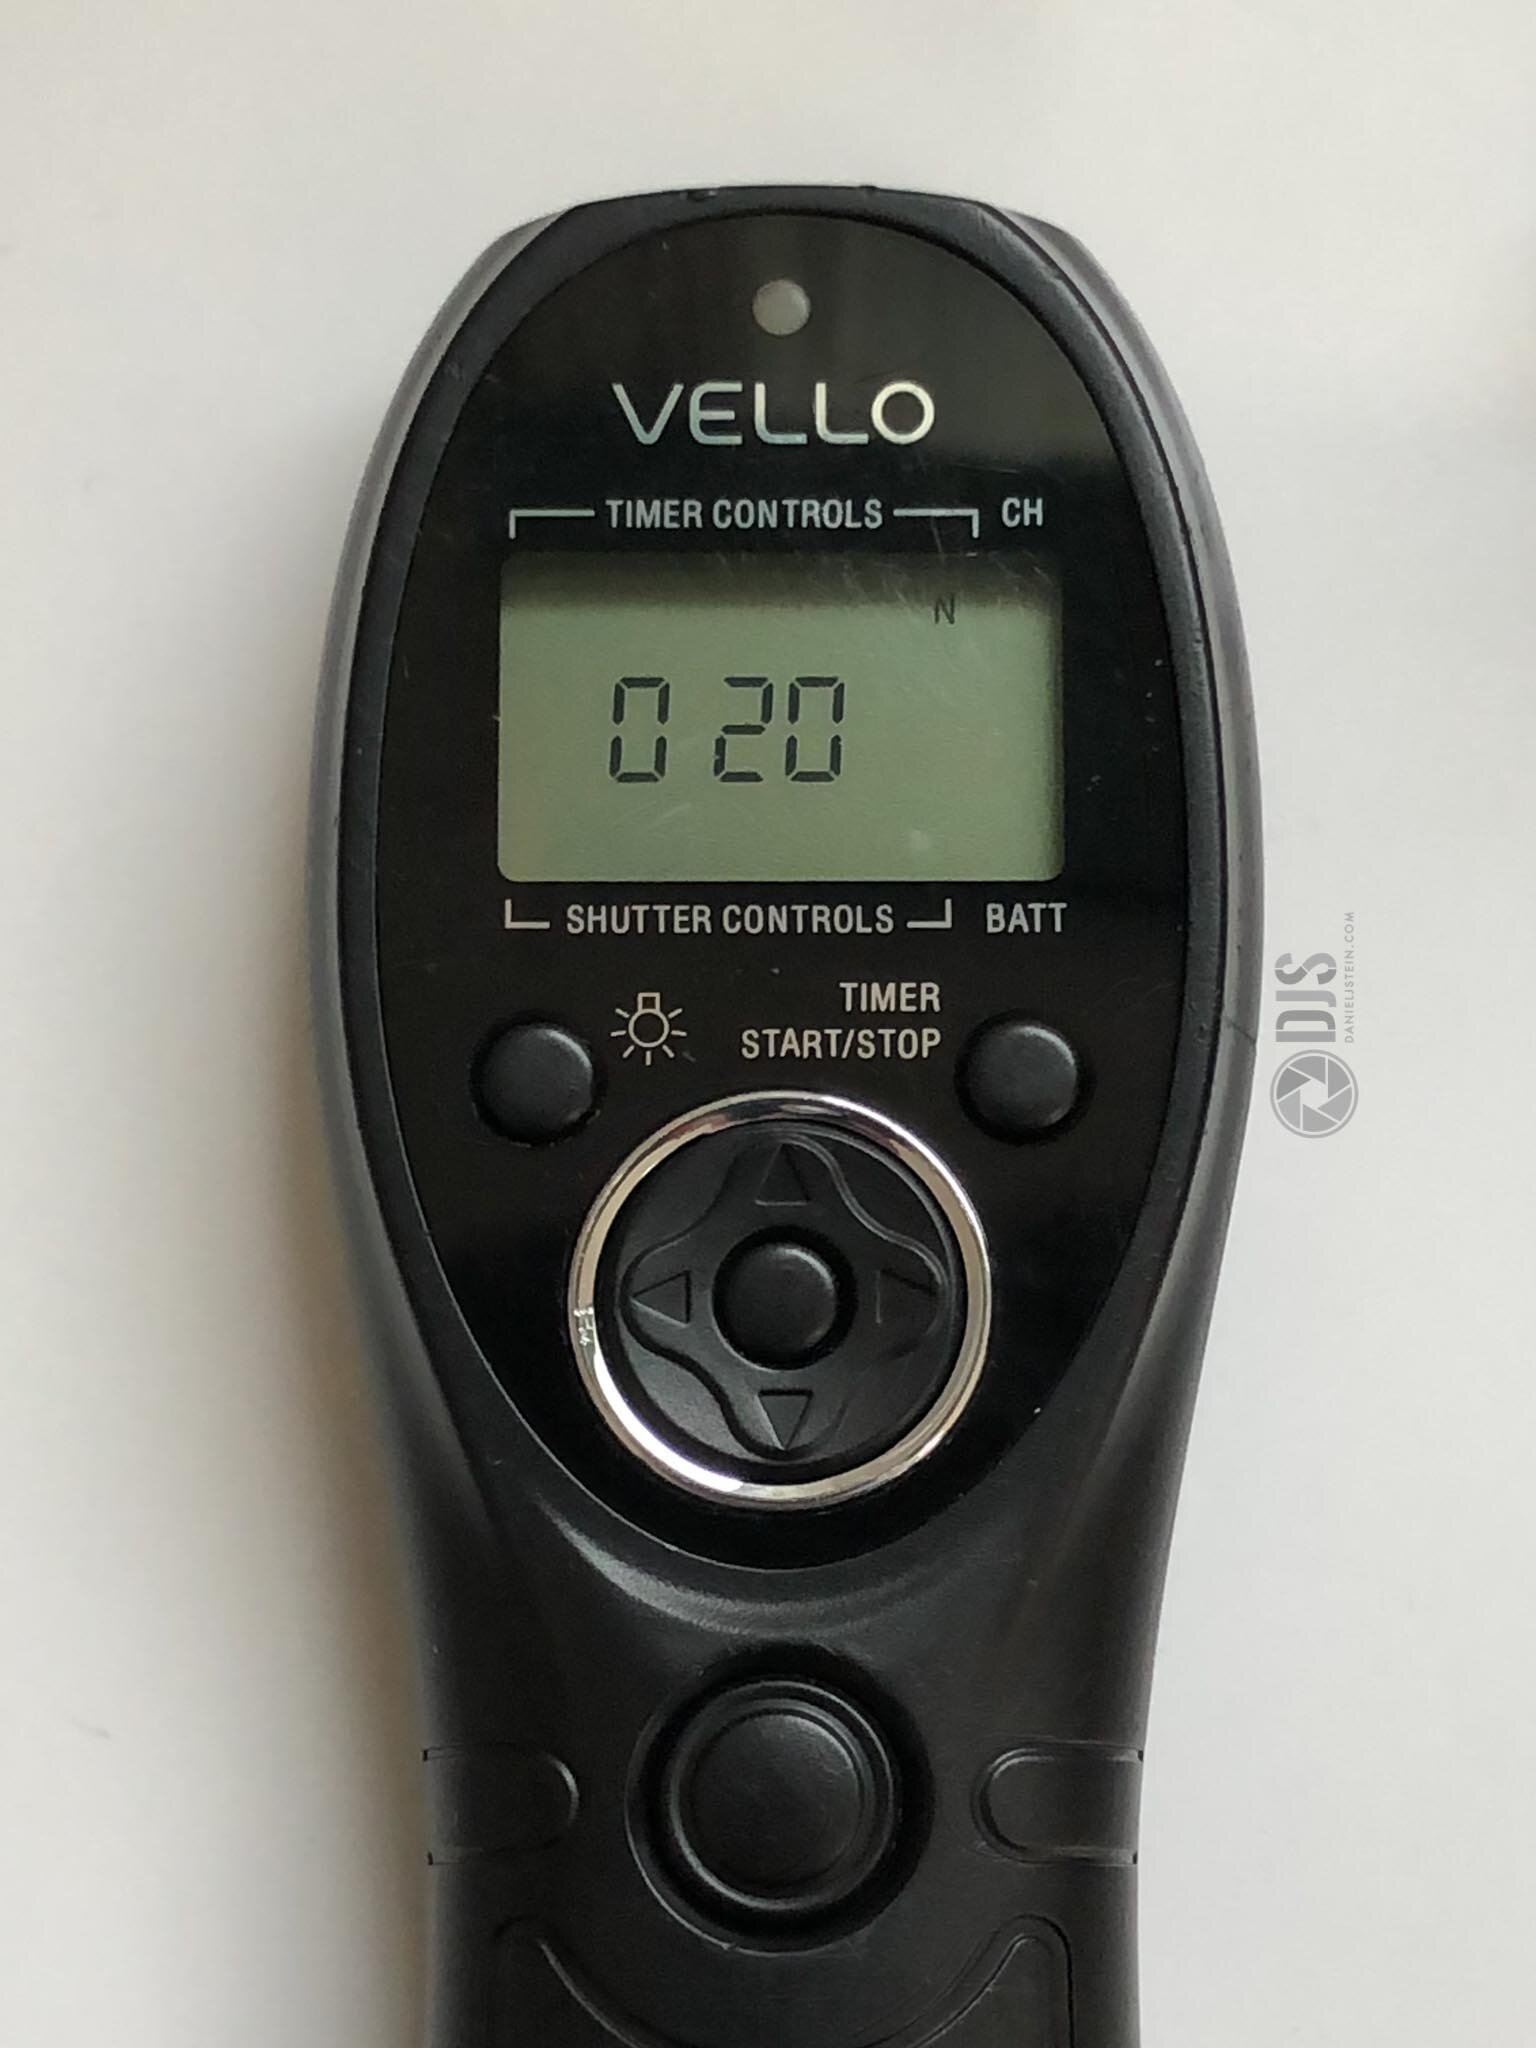
The final screen is marked as “n.” This is the number of shots to do. I will do 20 for this round, giving me a total of 100 seconds of data. Eh, should probably do more.
Press start and sit back while the technology does the work for you.
Method 2: Built-In
Built-in intervalometers work a little differently to external. We want the camera to have full control here, so first step is to dial in your shutter speed.
Ensure long exposure noise reduction and self-timer are both off.
Then dial in all your other settings, again ensure you are in focus.
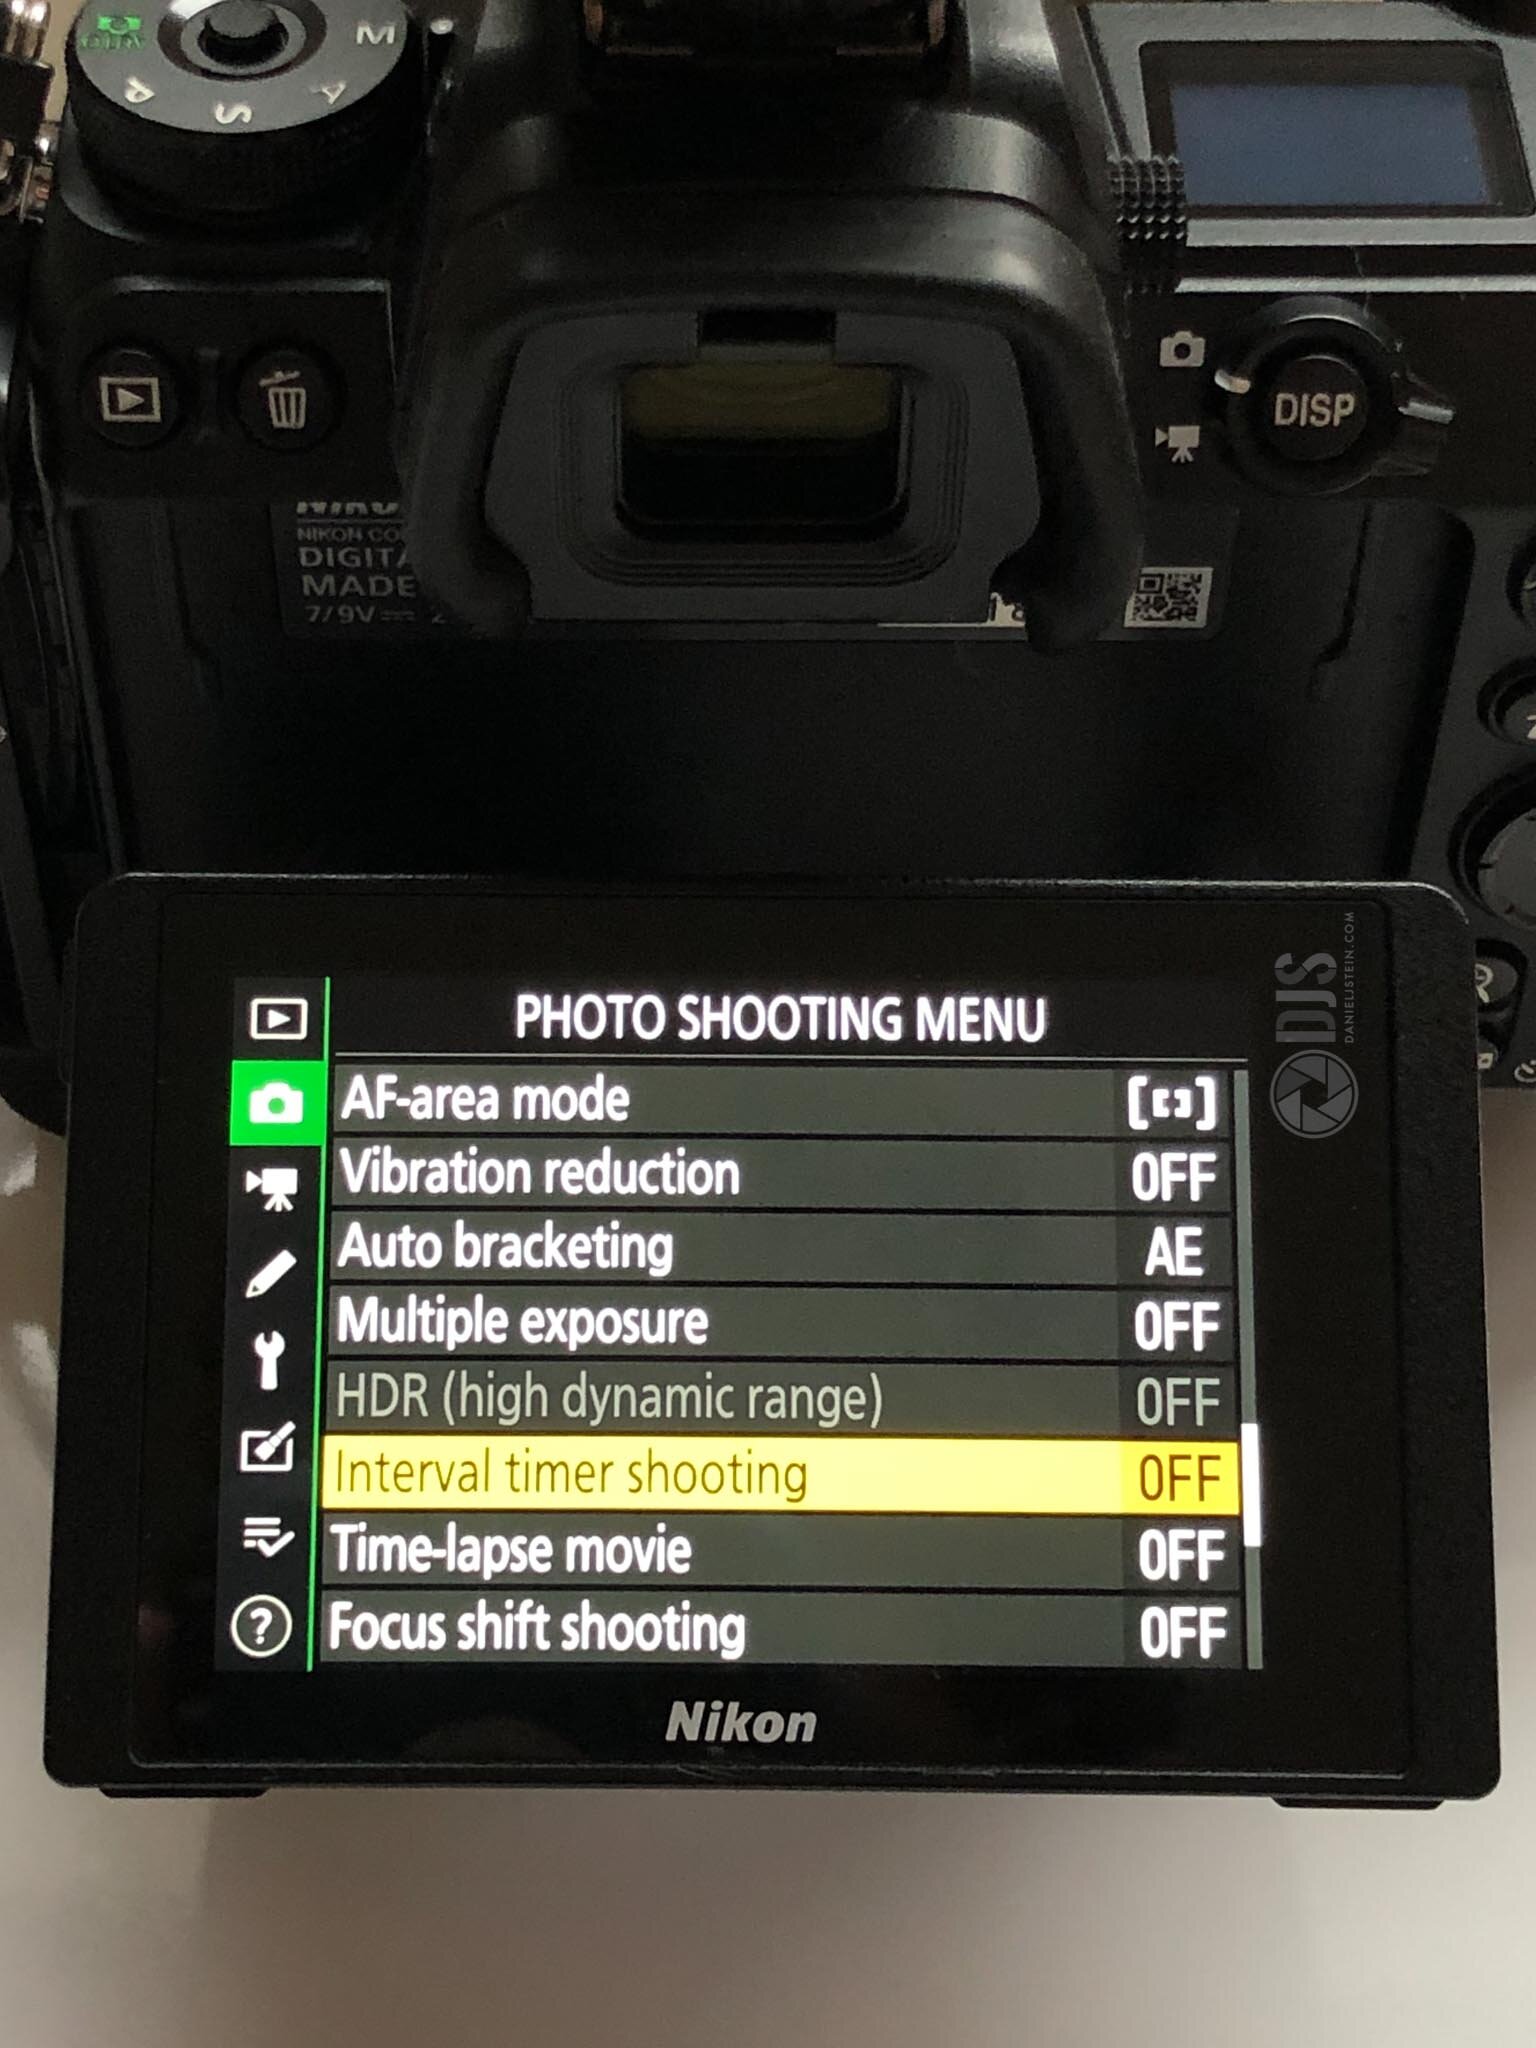
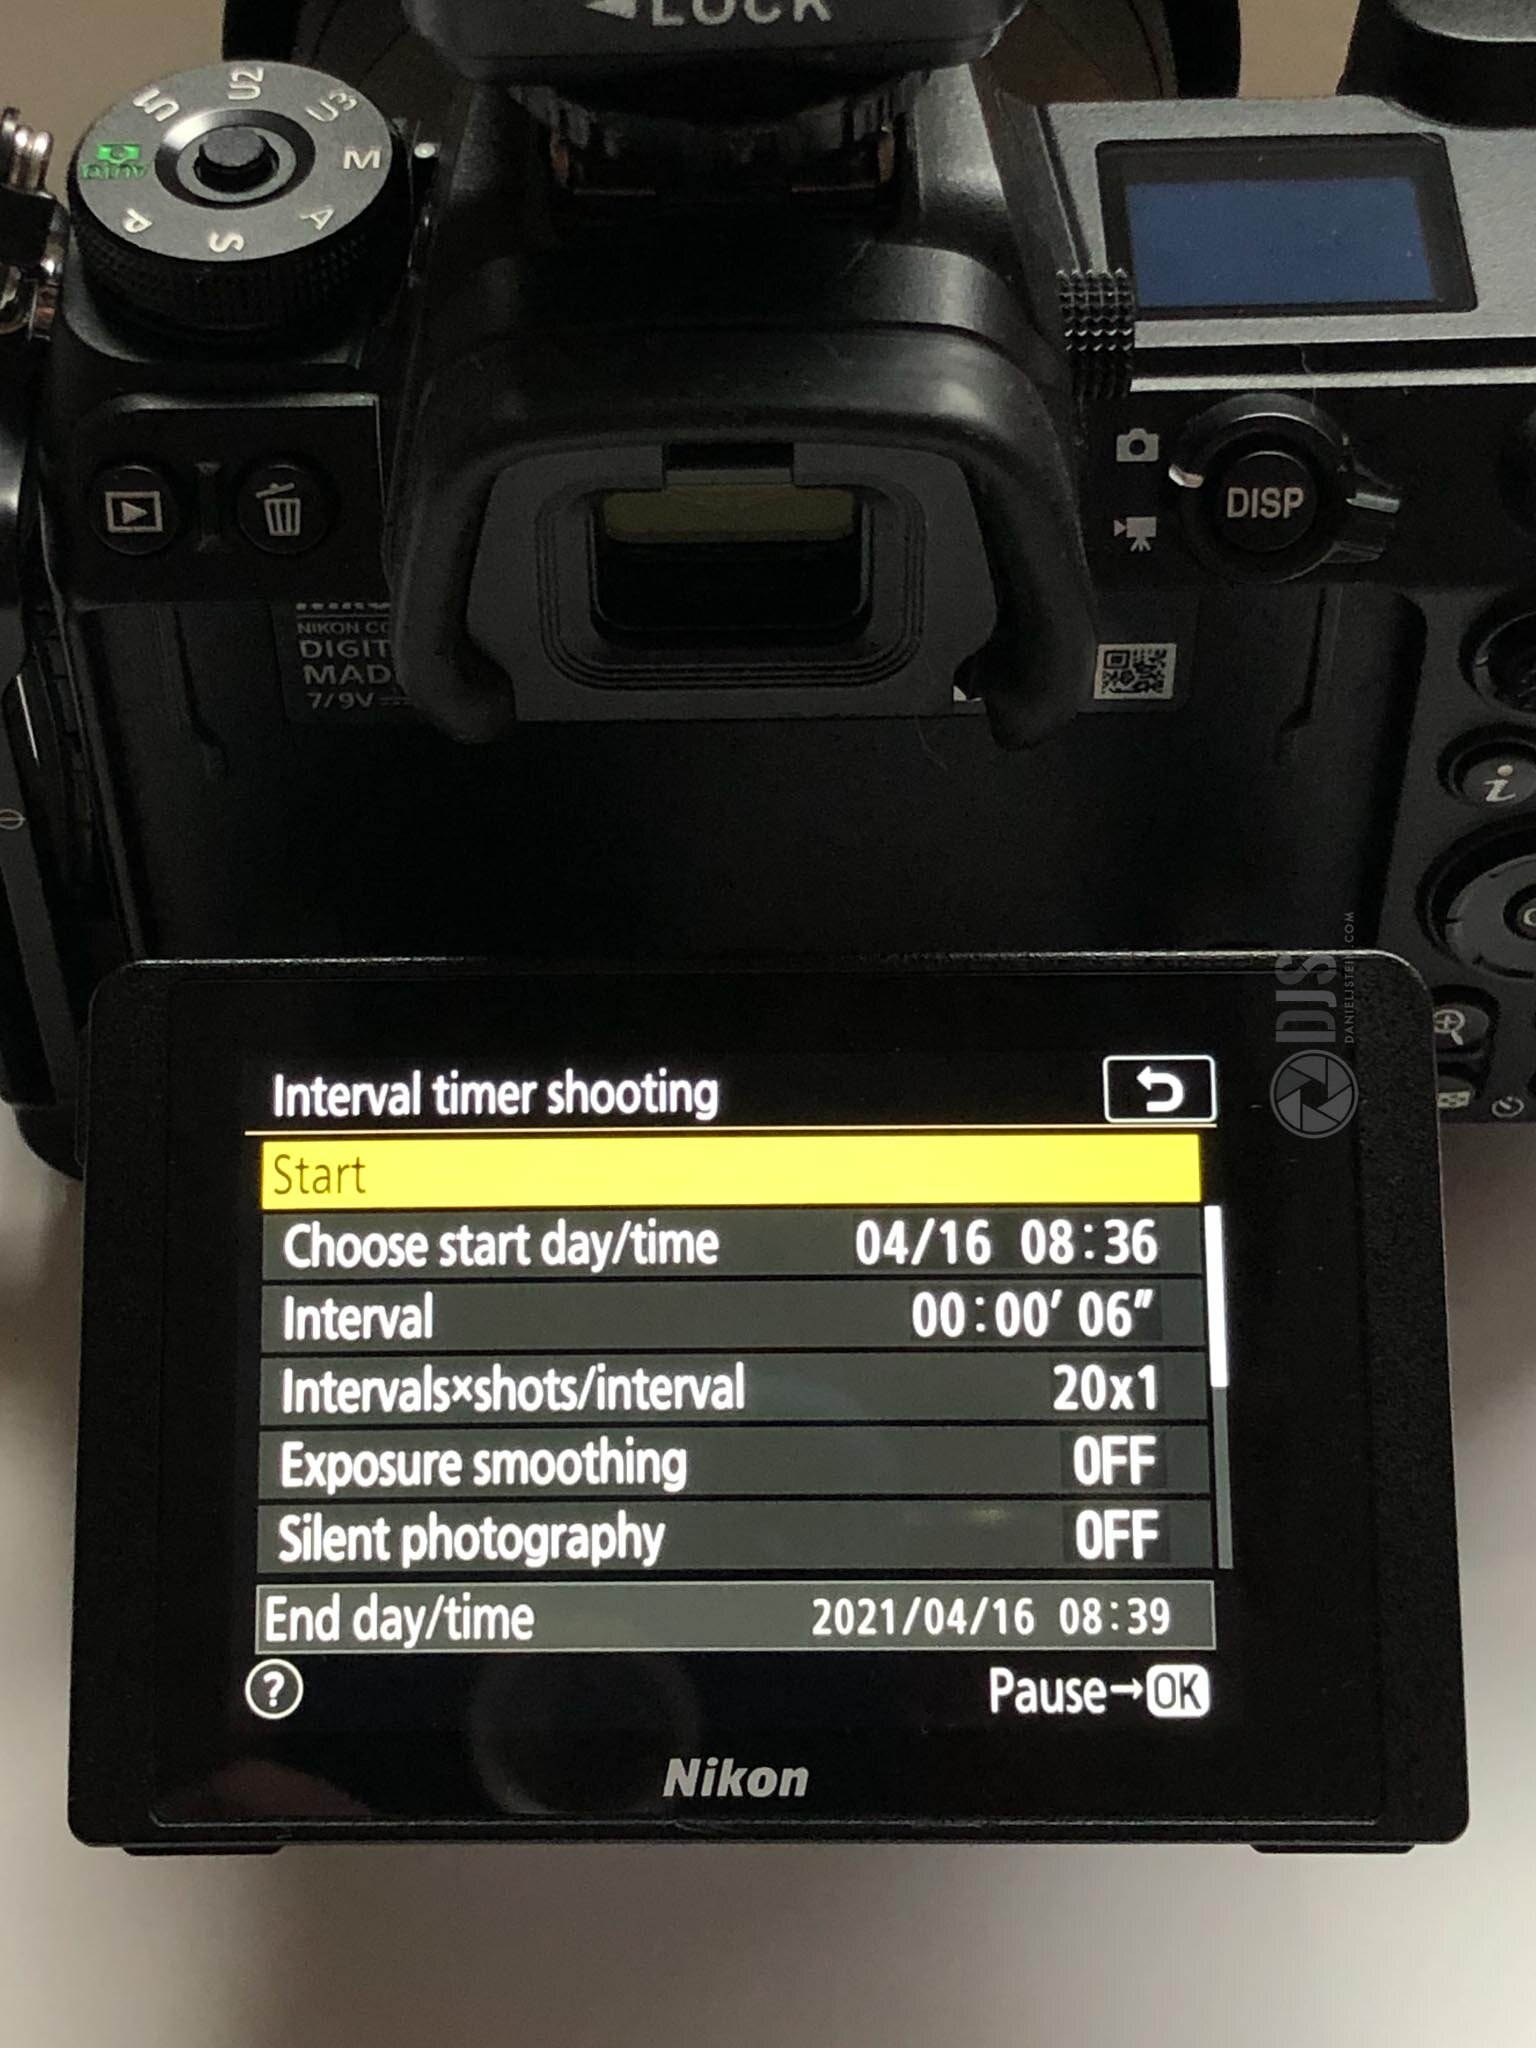
Navigate to where the interval timer function is in you camera.
Make sure the time is set to “now” if your camera has that option.
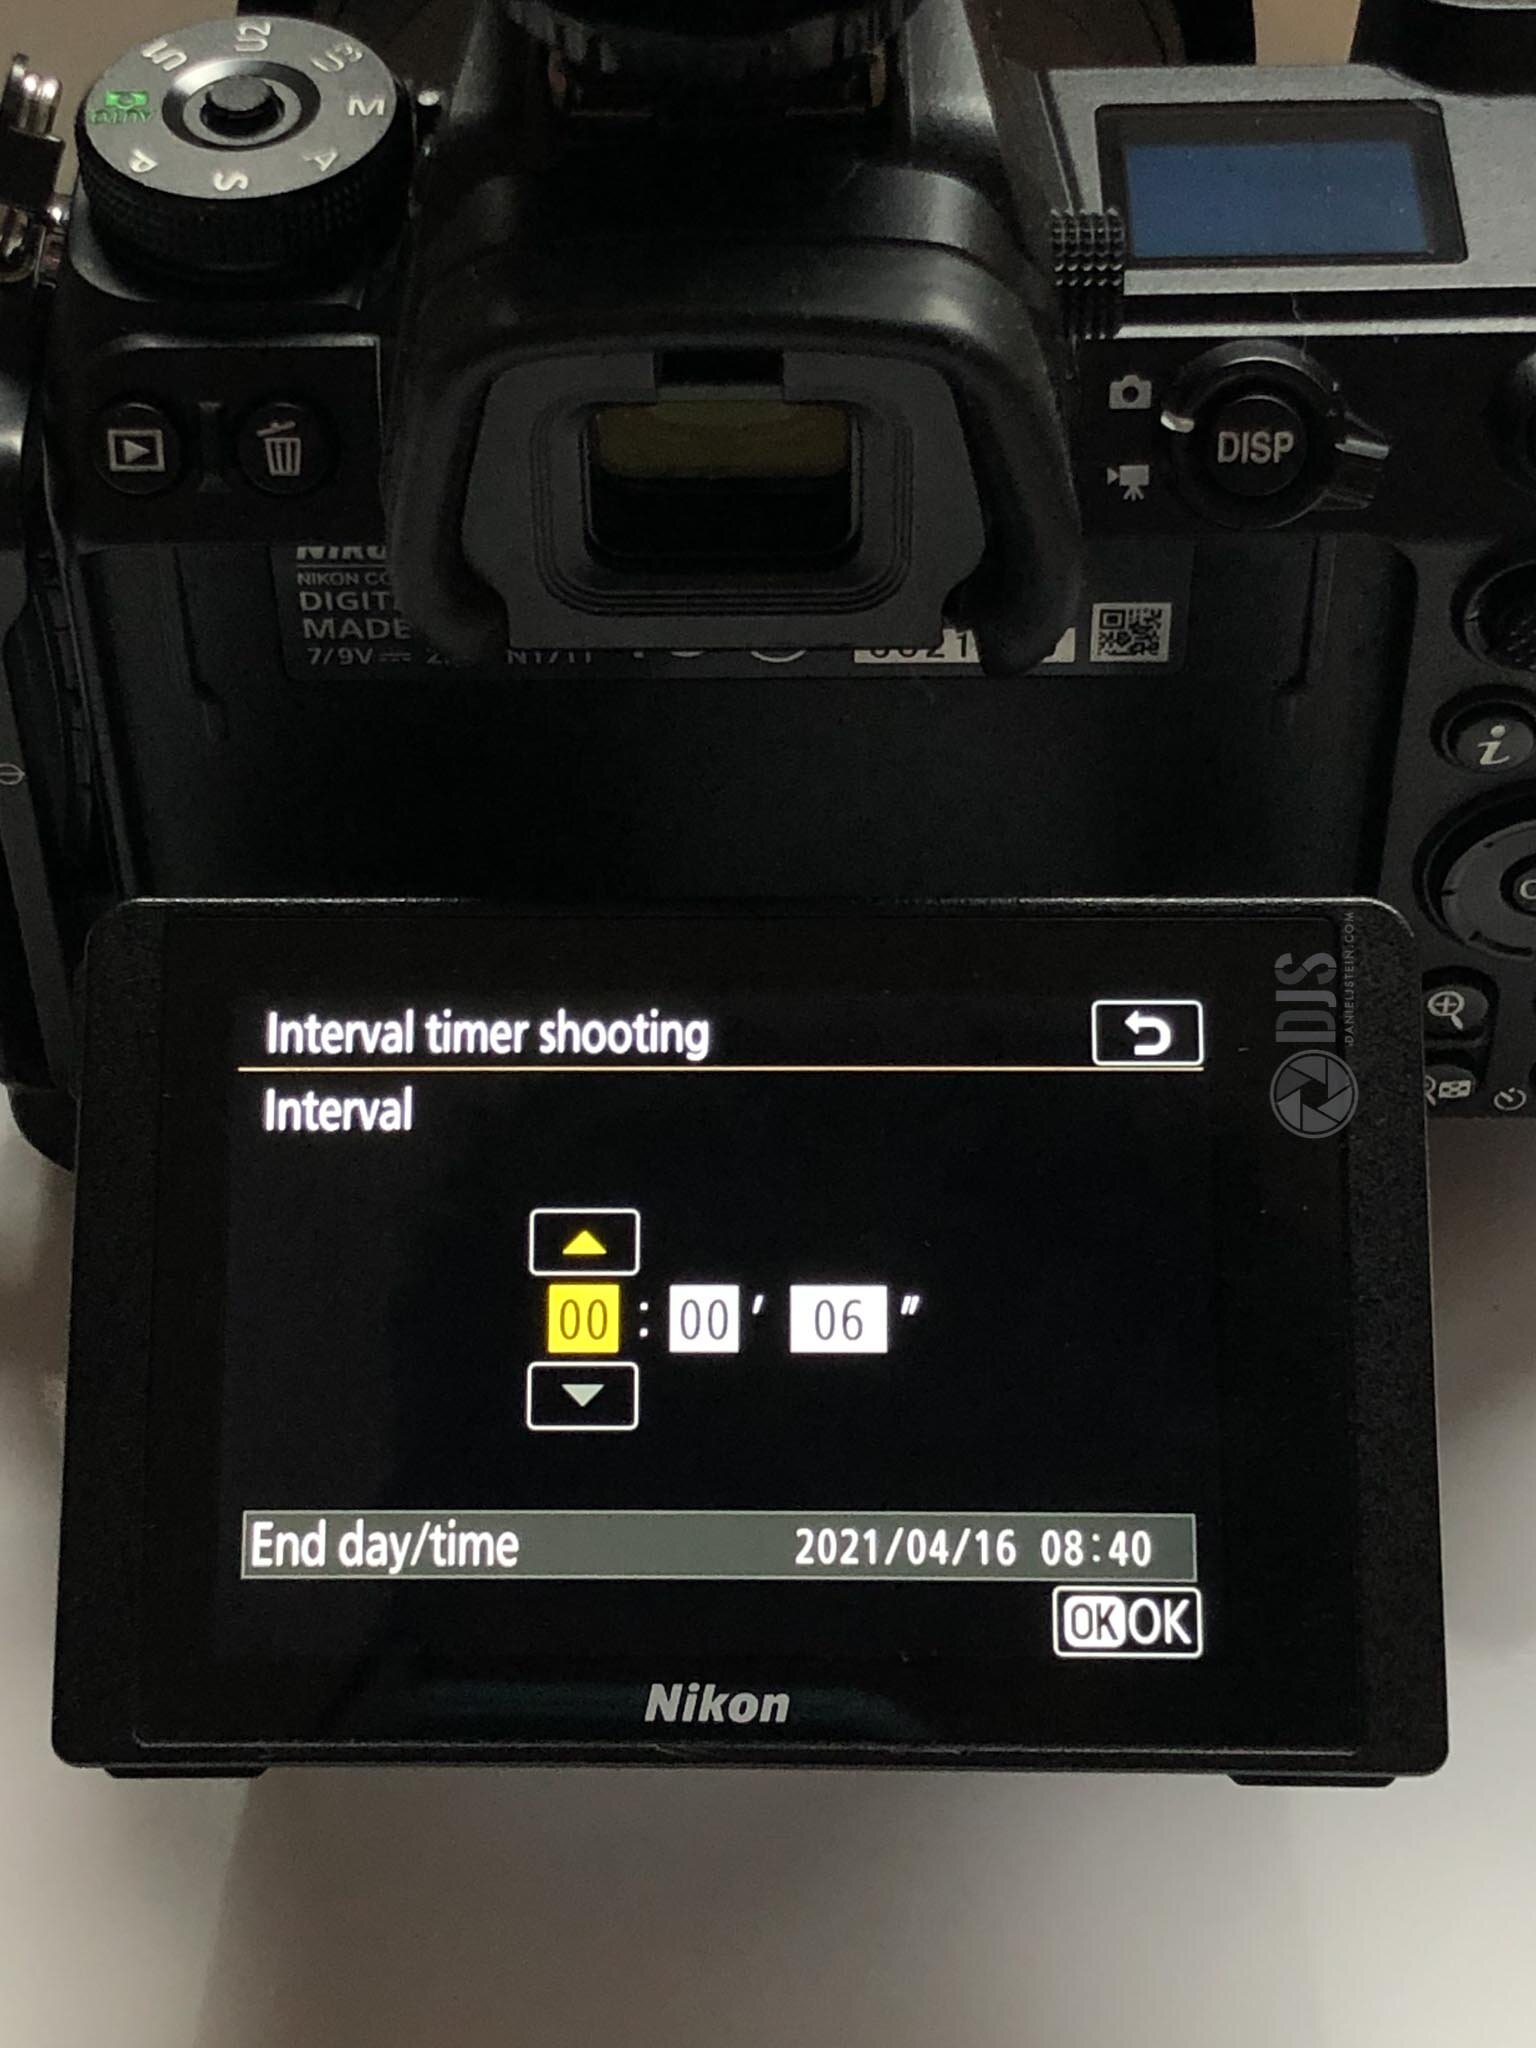
Programming the interval is a bit different here. Unlike with the remote where the shutter speed was separate from the time between each shot, here it is integrated and can be a little confusing. In other words, my shutter speed is 5 seconds, but I sill want a 1 second interval beteen each shot. This means the total interval needs to be set to “6 seconds”
Set the number of shots to do, in my case again, 20.
Processing
After the shoot it is time to process. I mean yeah that is normally how it works but you get what I mean. There are loads of different pieces of free and paid stacking softwares out there. I personally use StarryLandscapeStacker (SLS), which is a paid Mac application. I will be creating an additional tutorial to use the Windoge free equivalent, Sequator as well. Both pieces of software are very similar however so if you have a basic understanding of a processing workflow you may be able to easily transfer this tutorial over to that one.
First, we need to catalog everything in Lightroom or another similar raw image processor. While SLS can read RAW files, it is often easier to make some minor adjustments in something like LR or CaptureOne prior to loading into SLS.
According to the SLS user guide, it is best to lower the contrast all the way, as well as turn off any sort of lens and vignette corrections. You also need to turn off noise reduction and sharpening. My take: Turn off sharpening and noise reduction, yes. But as far as contrast goes I find that sometimes dropping it down all the way and then trying to add it back in again later creates strange artifacts in the image. I would just leave this at 0. For lens corrections, your mileage may vary. Sometimes I get unwanted results with them on, sometimes with them off. You will need to experiment with this. I would first start with them off.
I would also lower your highlights a bit and bump up the shadows a bit. I would adjust the exposure here as well if your image is too bright or too dark. Do not add any sort of clarity/texture/saturation adjustments however.
Select all your images and apply your adjustments.

Select all and apply basic adjustments.
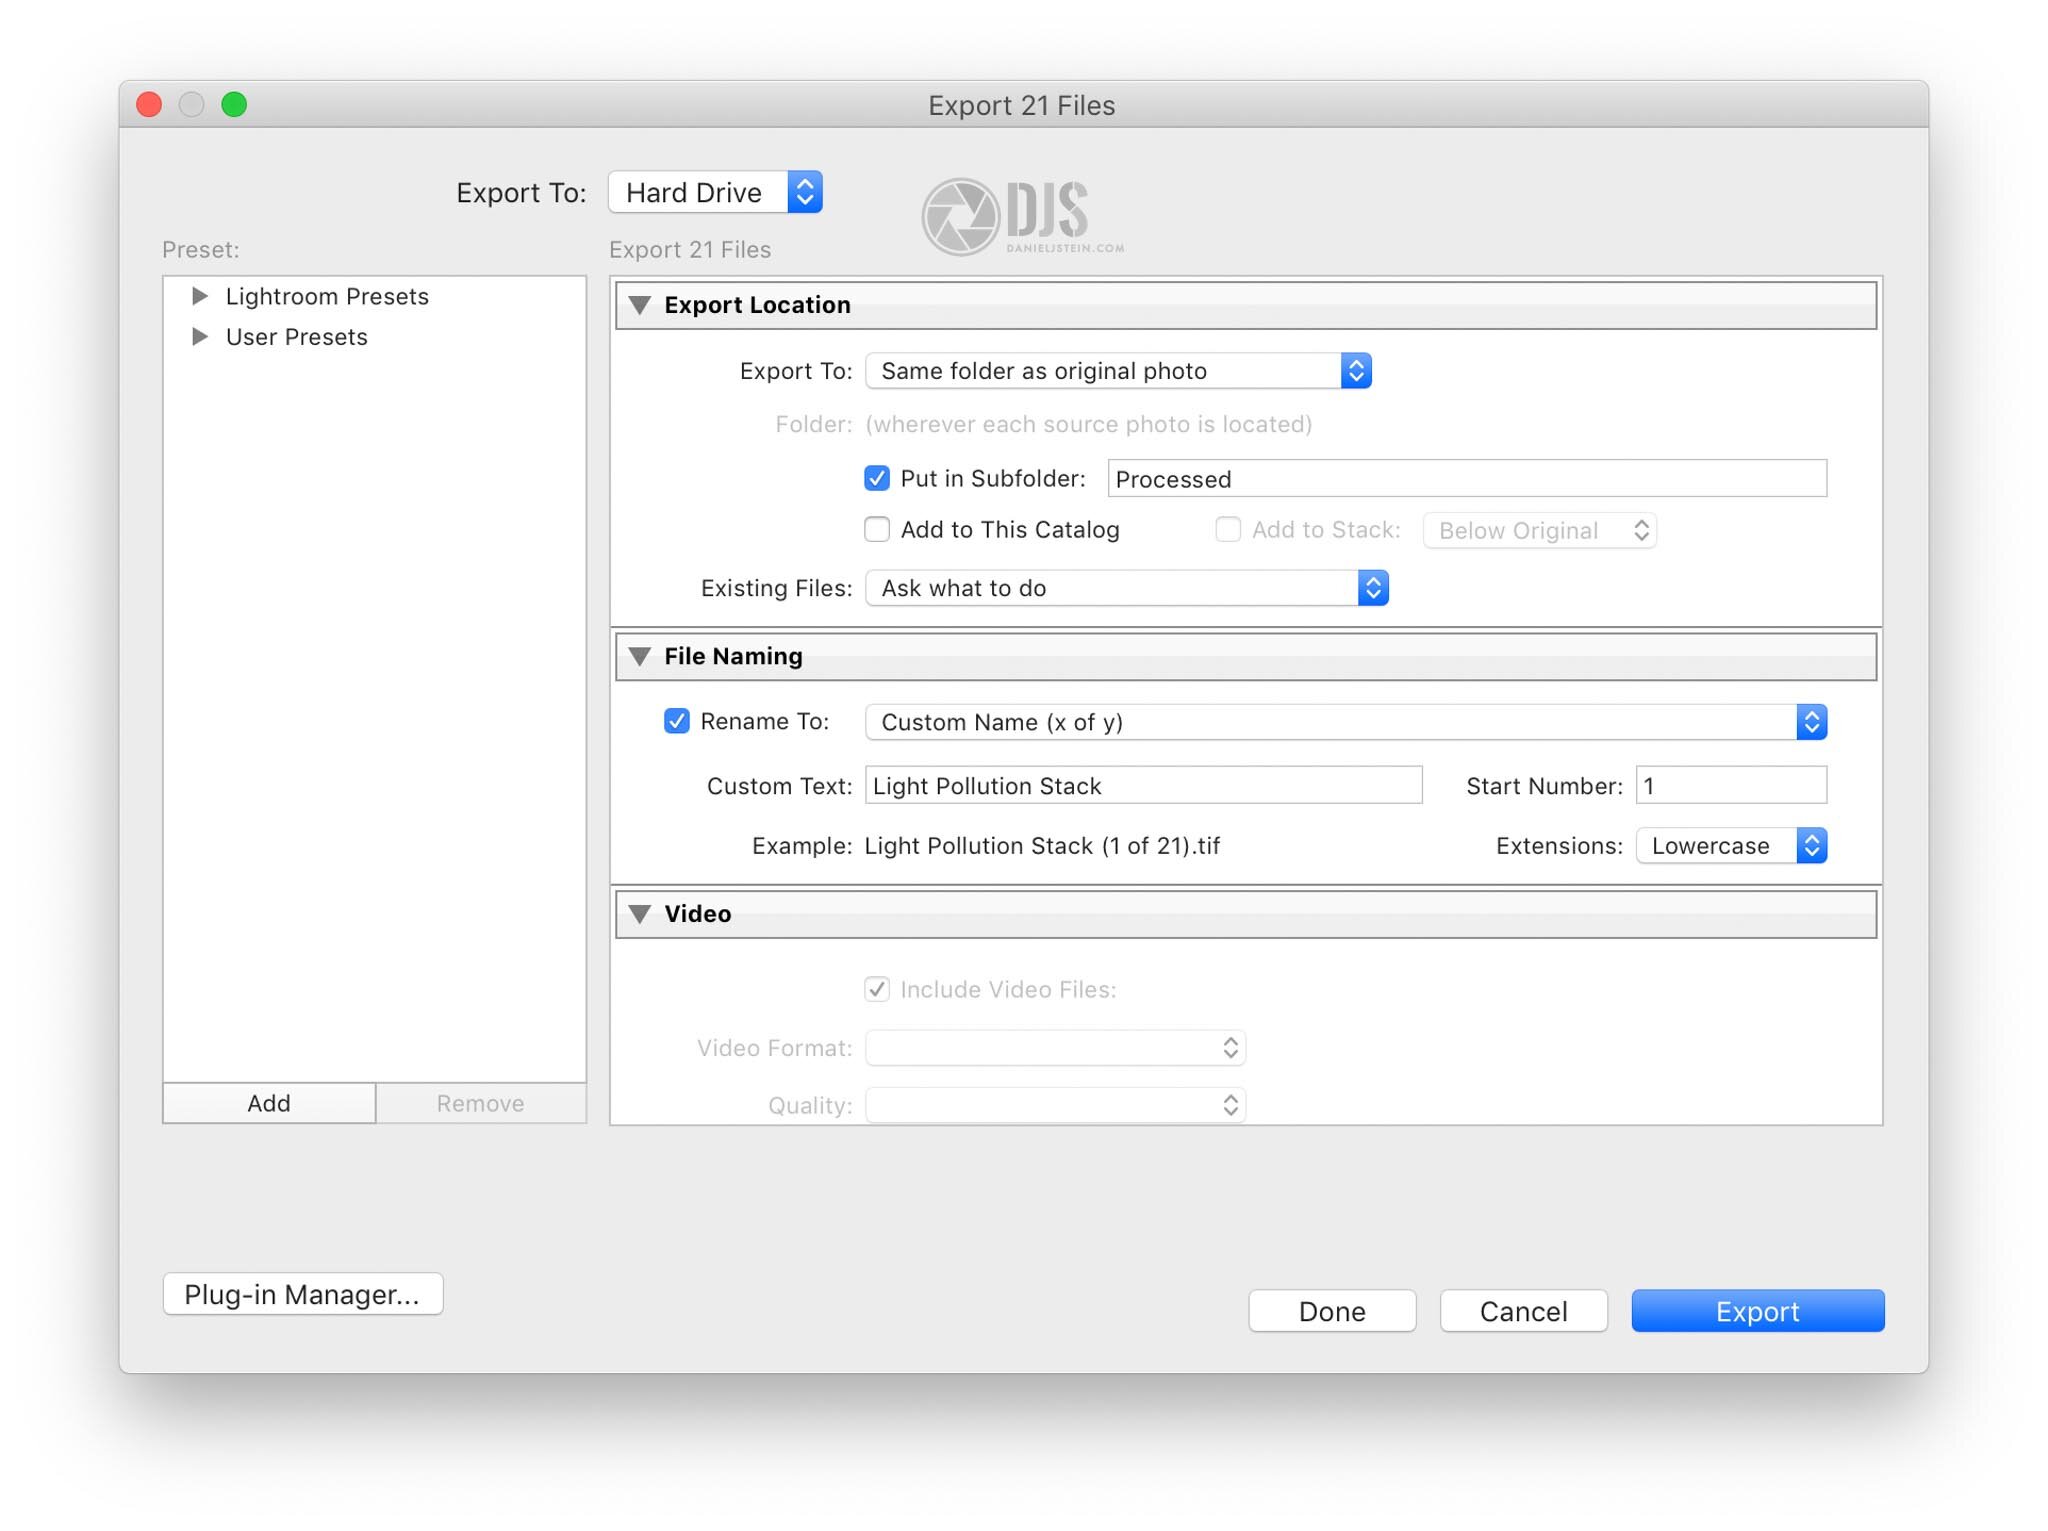
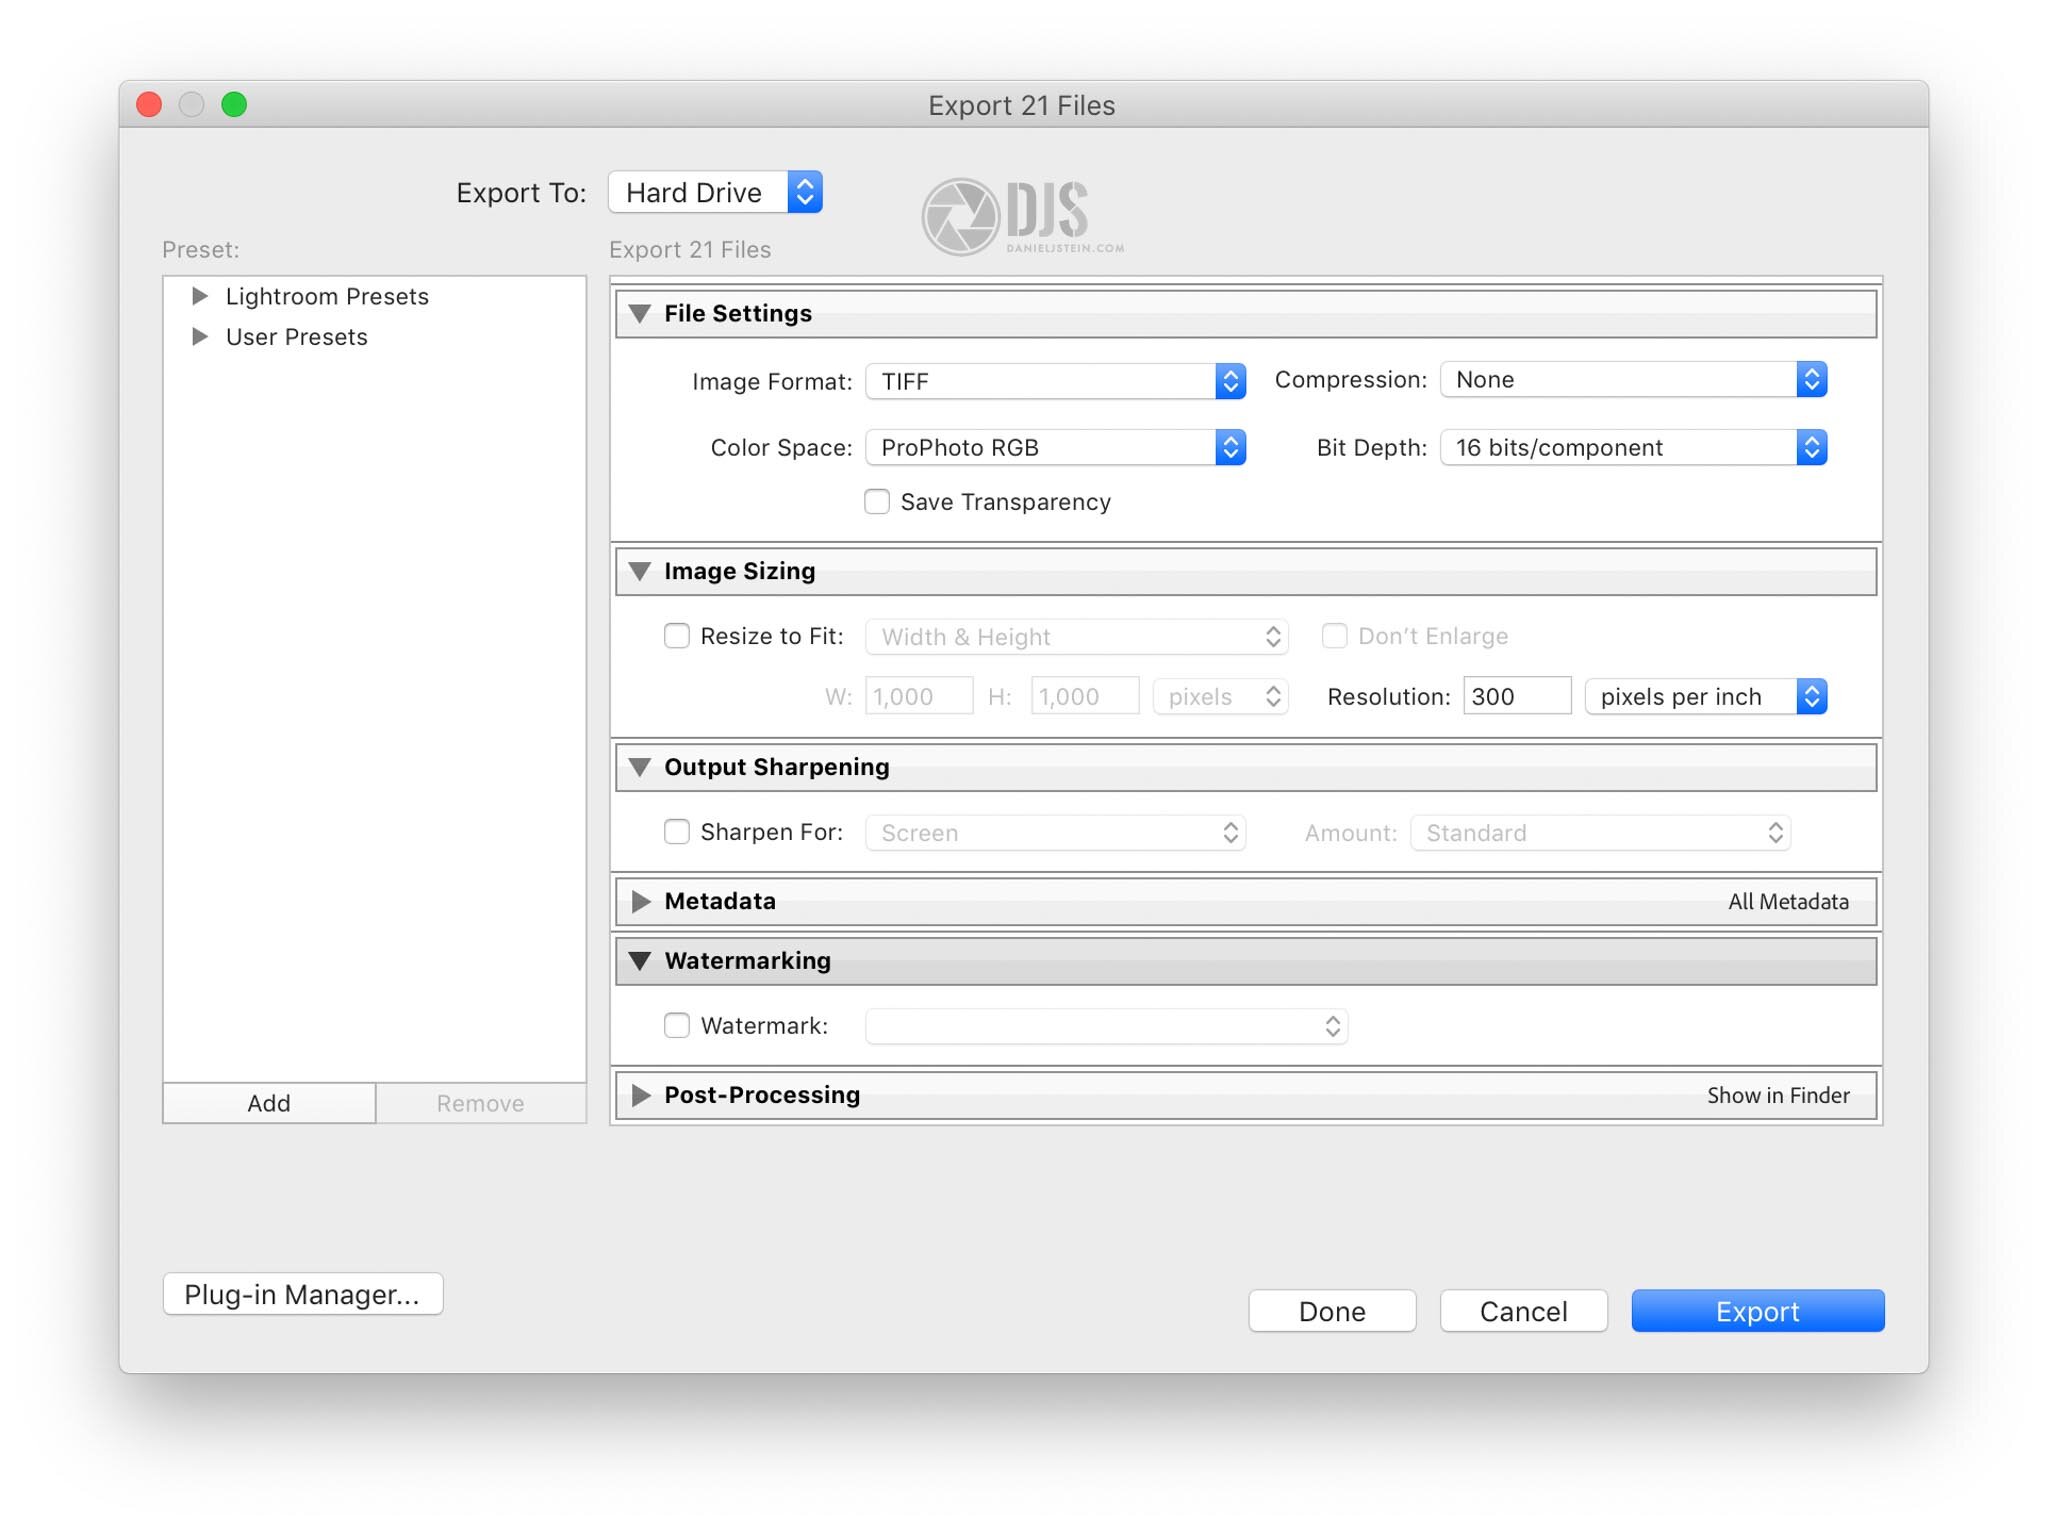
Export as 16 bit TIFFs in the ProphotoRGB color space. Do not resize your images! Below are my export settings. If I were you, group your set of shots in a folder. This makes file management much easier to work with.
Once complete, open up StarryLandscapeStacker and it will automatically prompt you to import your images. Locate the folder you made in the previous step and let em rip.

Locate your stuff and select all, then press open.
SLS will automatically analyze your shots. If it detects any discrepancies, it will prompt you. It may ask you to select dark/light/flat frames. Don’t worry about these for now. Everything here is considered a “light” frame. I will talk about these other frames in a future tut.
Once complete, you will notice red dottts all over your image. Red dots are what SLS uses to determine where the sky is and isn’t. With that in mind, you need to erase red dots where they are present in the foreground. Do this by clicking “erase red dots” over on the left. Wild, I know.
The next thing that needs to be done in order for the software to work properly is some red dots actually need to be drawn back in following the horizon. Do so by clicking add red dots on the left. Draw your dots following your horizon line. It doesn’t need to be perfect. What we are doing here is telling the software where the foreground stops and the sky begins. This will improve how it aligns and stacks your images.

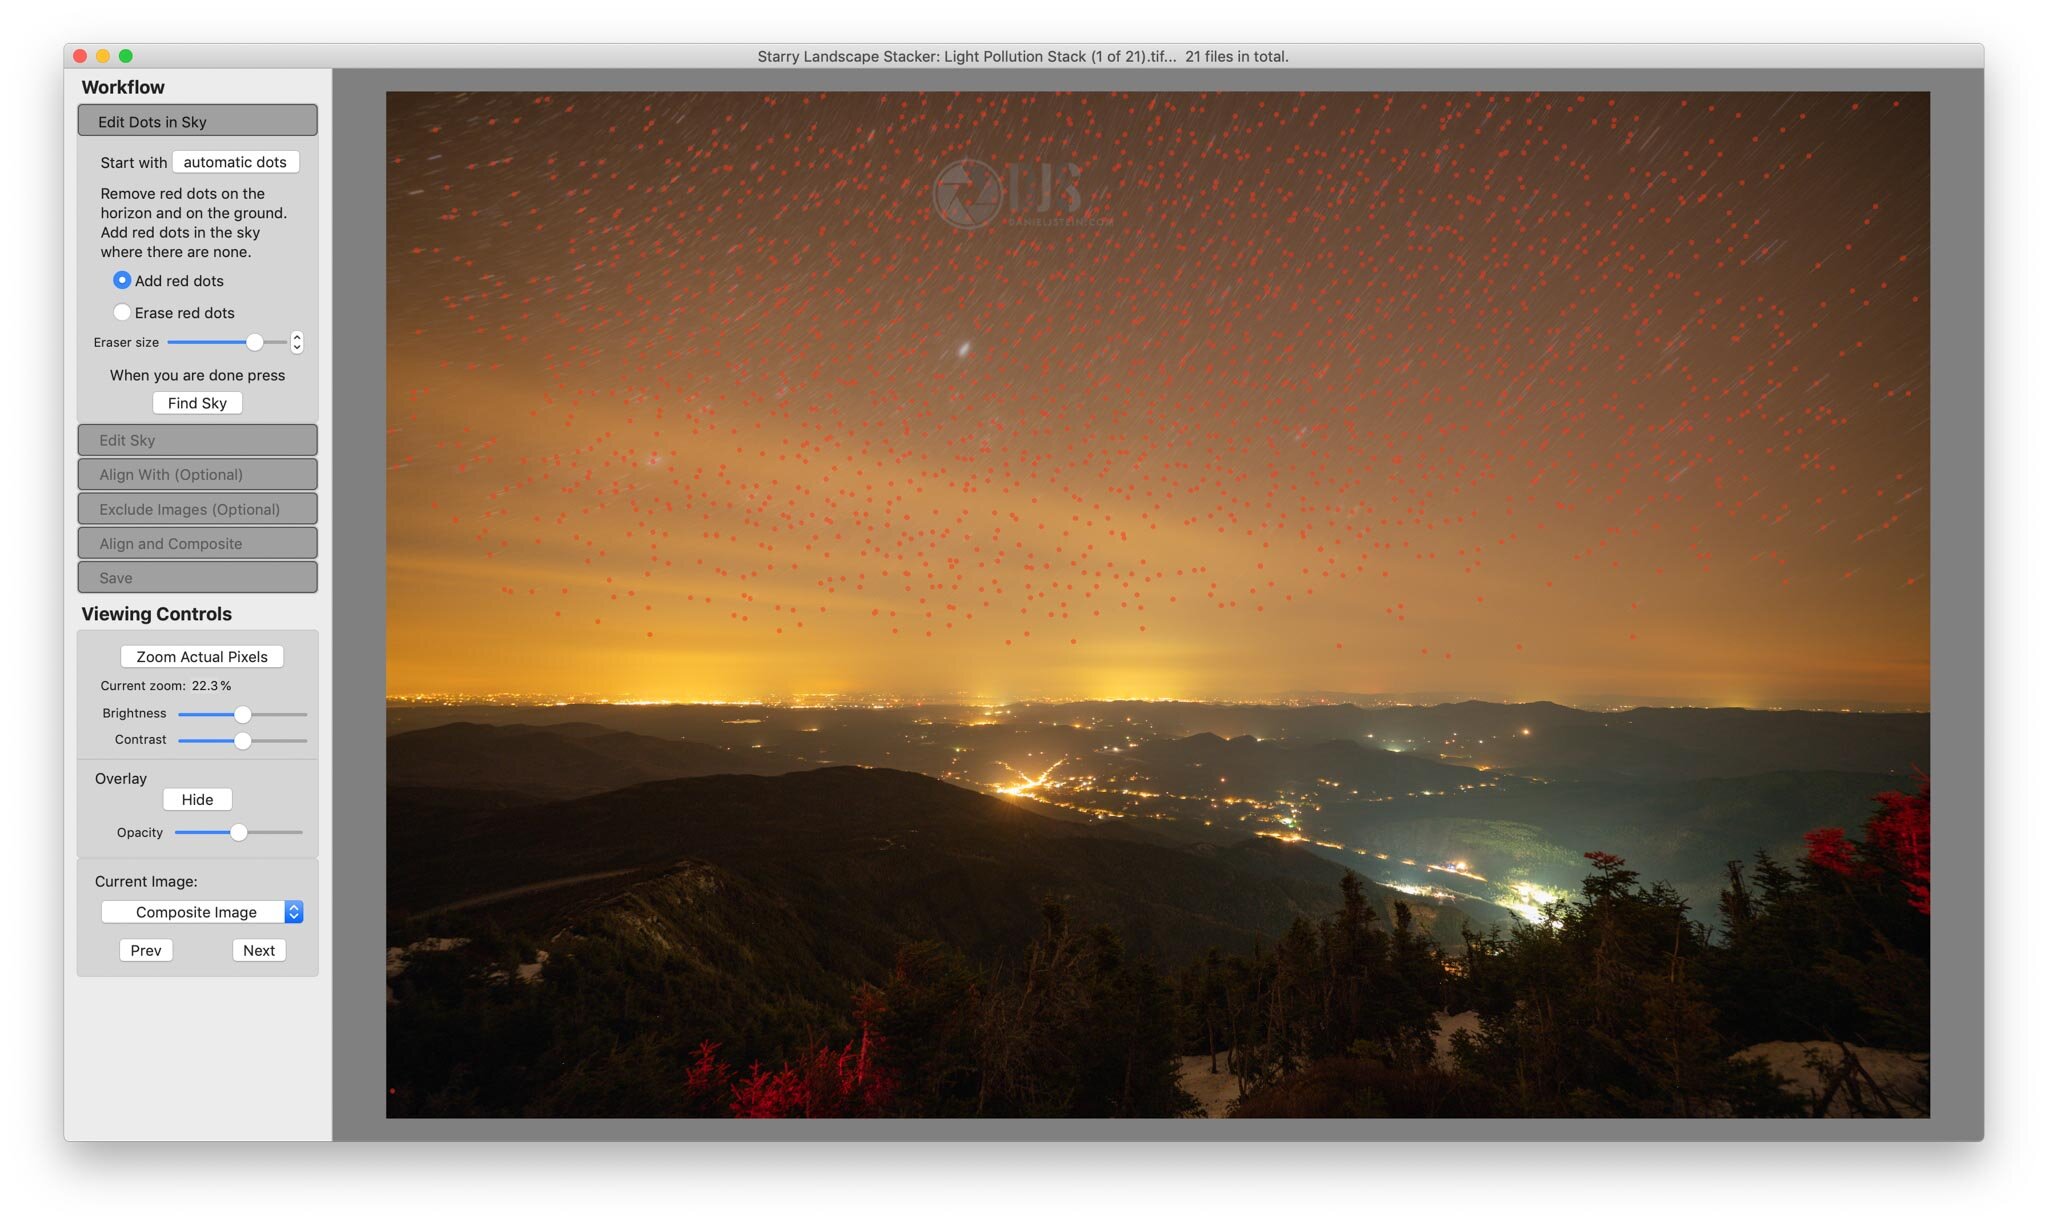

Now it is time to make the sky mask. Click the “Find Sky” button on the left and watch SLS do magic.
The mask will most likely not be clean right outta the box, so it needs to be cleaned up. At this point, we need to use the blue paint to make sure the entire sky is covered. Likewise, the ground needs to be completely blue free. Eifel 65 would not be proud of the ground. The sky on the other hand…
If you are familiar with Photoshop, the brush works similarly to the one found in there. You can use the brackets to increase or decrease the brush size. You can also increase or decrease the opacity of the blue overlay if that helps you clean up the mask.
In the end, only the sky should be blue. Try your best to clean up the horizon. It doesn’t need to be perfect (unlike my dog, who is perfect), there just needs to be absolutely no blue in the foreground. If you are not sure if you missed a spot, crank up the opacity of the blue. Missed a spot.

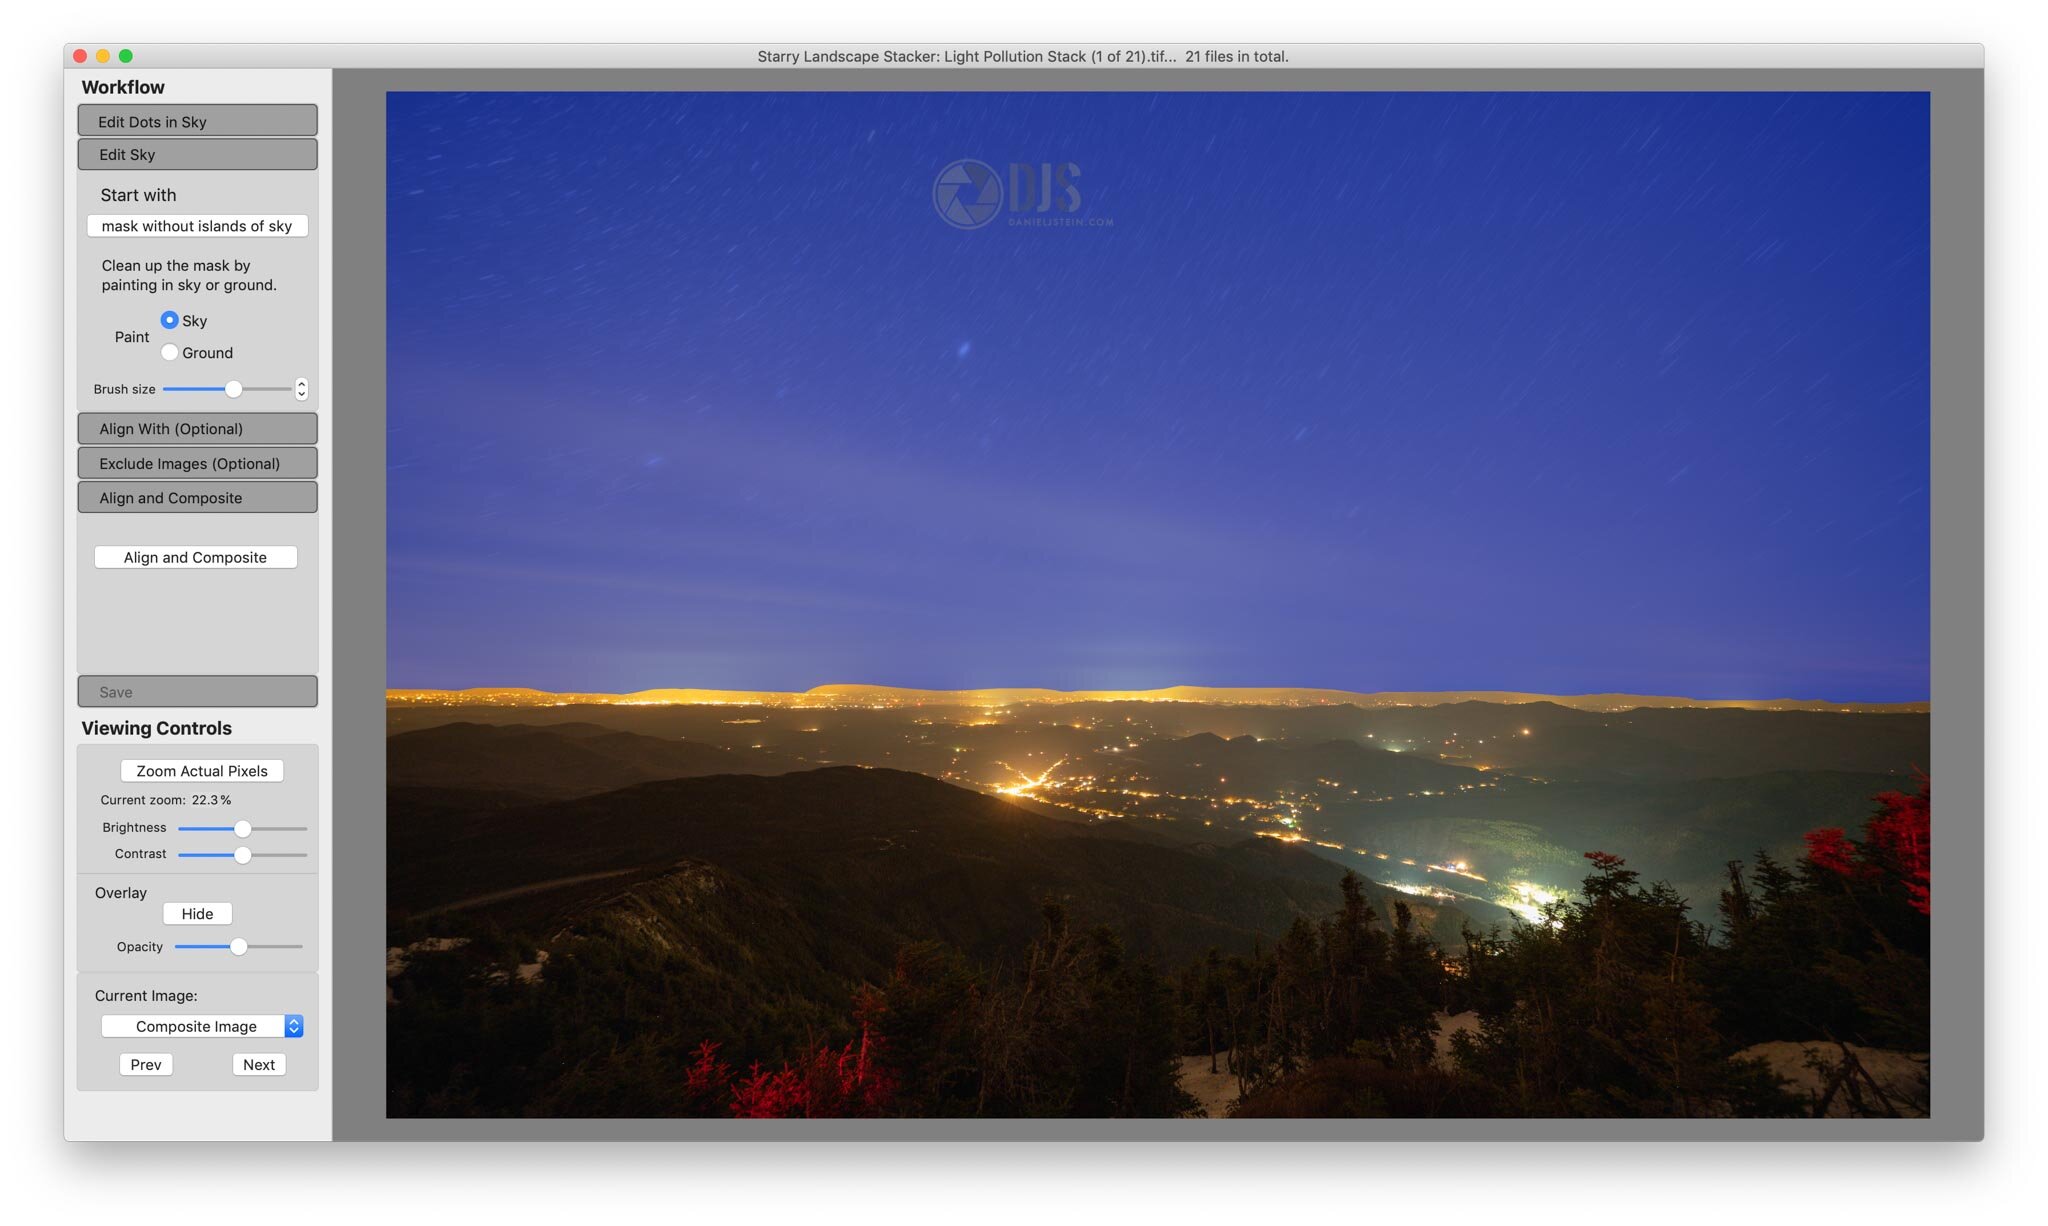
Once the mask is ready to rave, mash that “Align and Composite” button on the left and let the show begin.
At this point, SLS has used the mask to create two different photos which have been seamlessly blended together. The first is the sky photo, which has been aligned using the stars in each photo. Since the stars move relative to the Earth’s rotation, they need to be aligned.
The second image is the foreground which does not move. There is no need to align these images. Doing so relative to the star layer would actually cause it to be blurred. Thus, it is stacked separately.
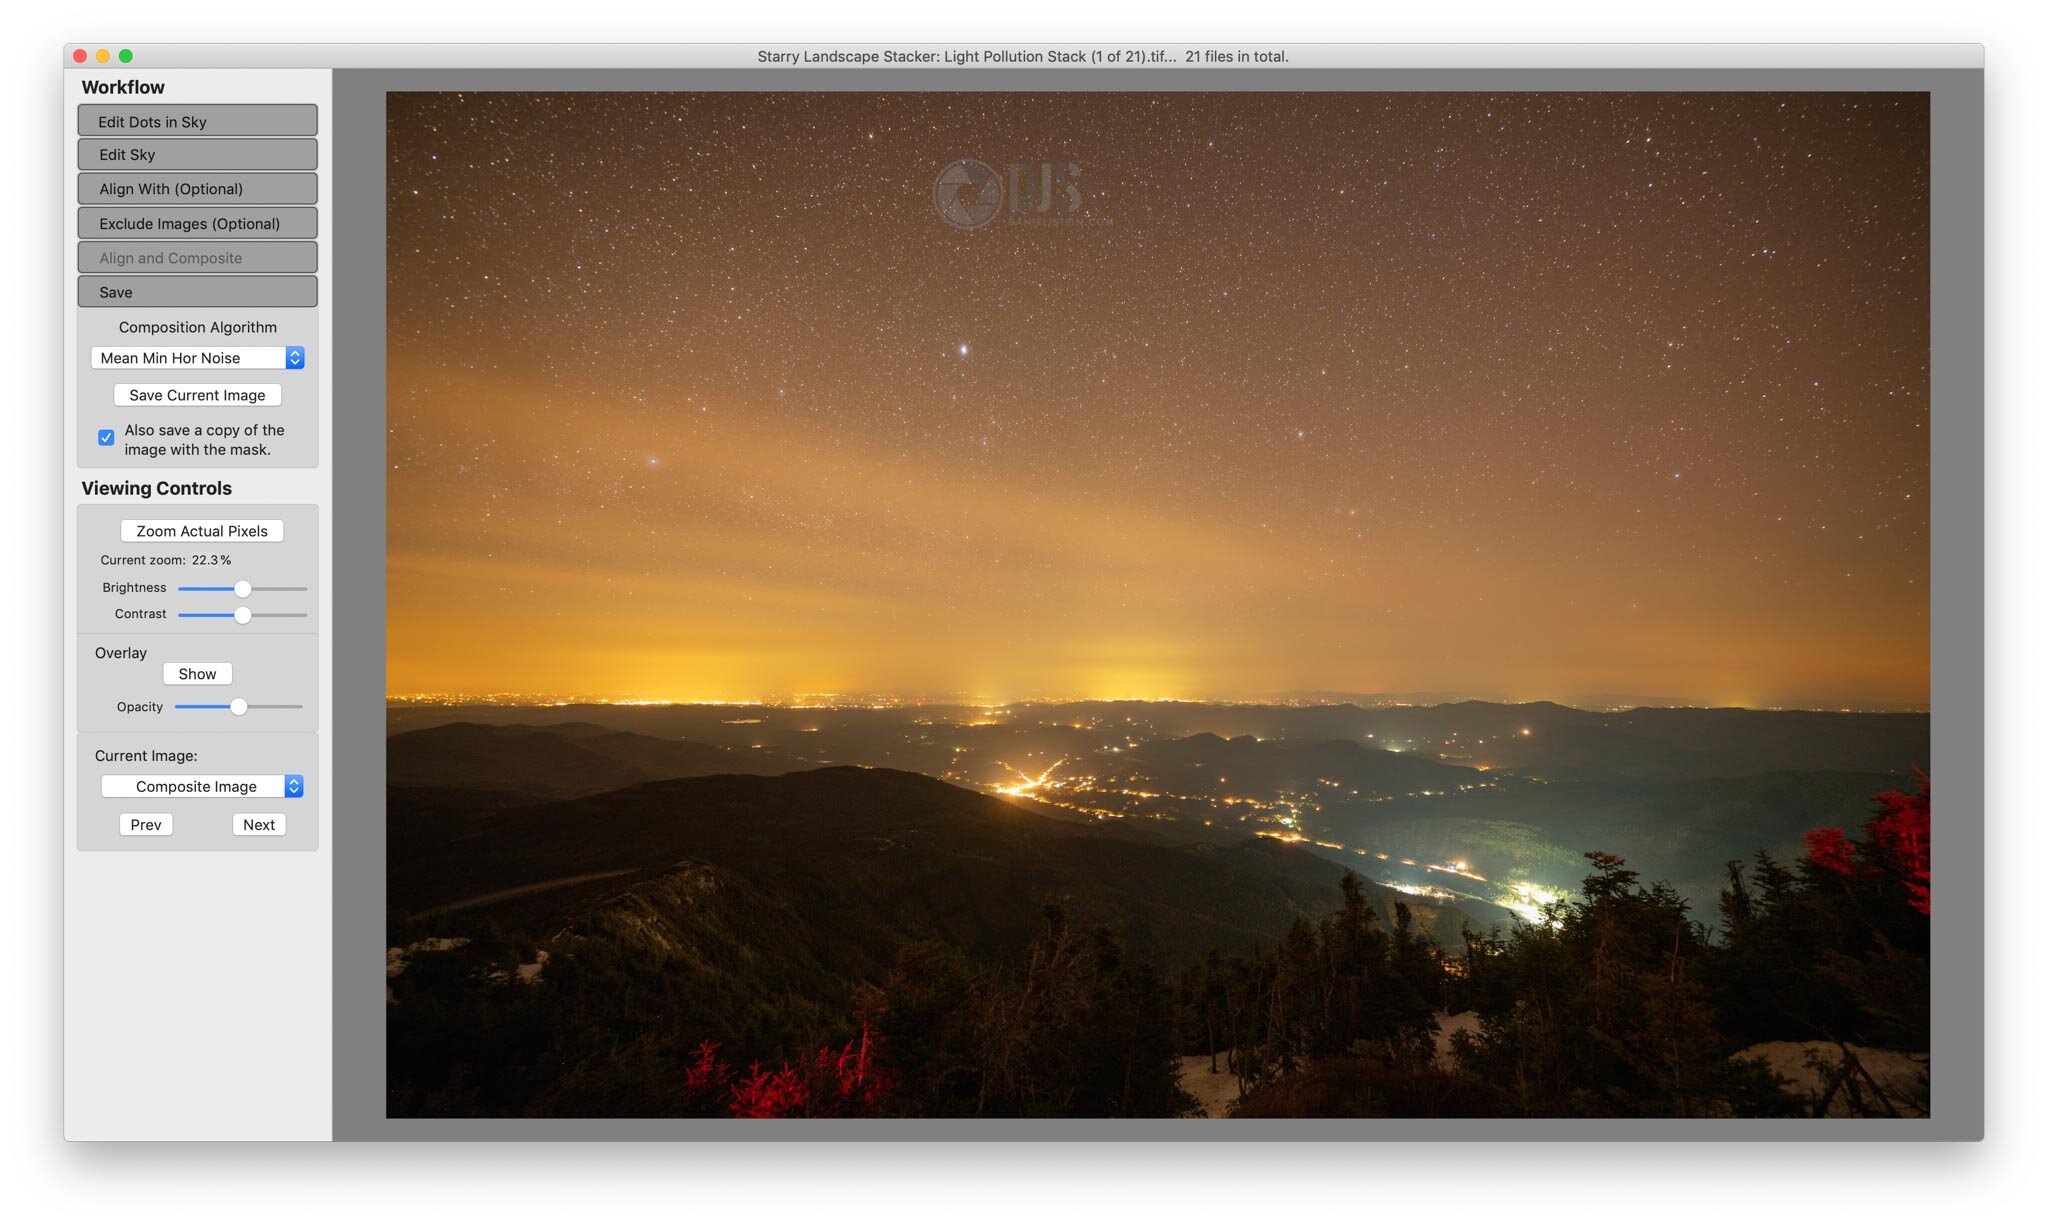
There is a lot going on in the background of this software. In my opinion I feel like it is crazy how quick and effective it is. 2021 man. (altho pretty sure this joint came out in 2014)
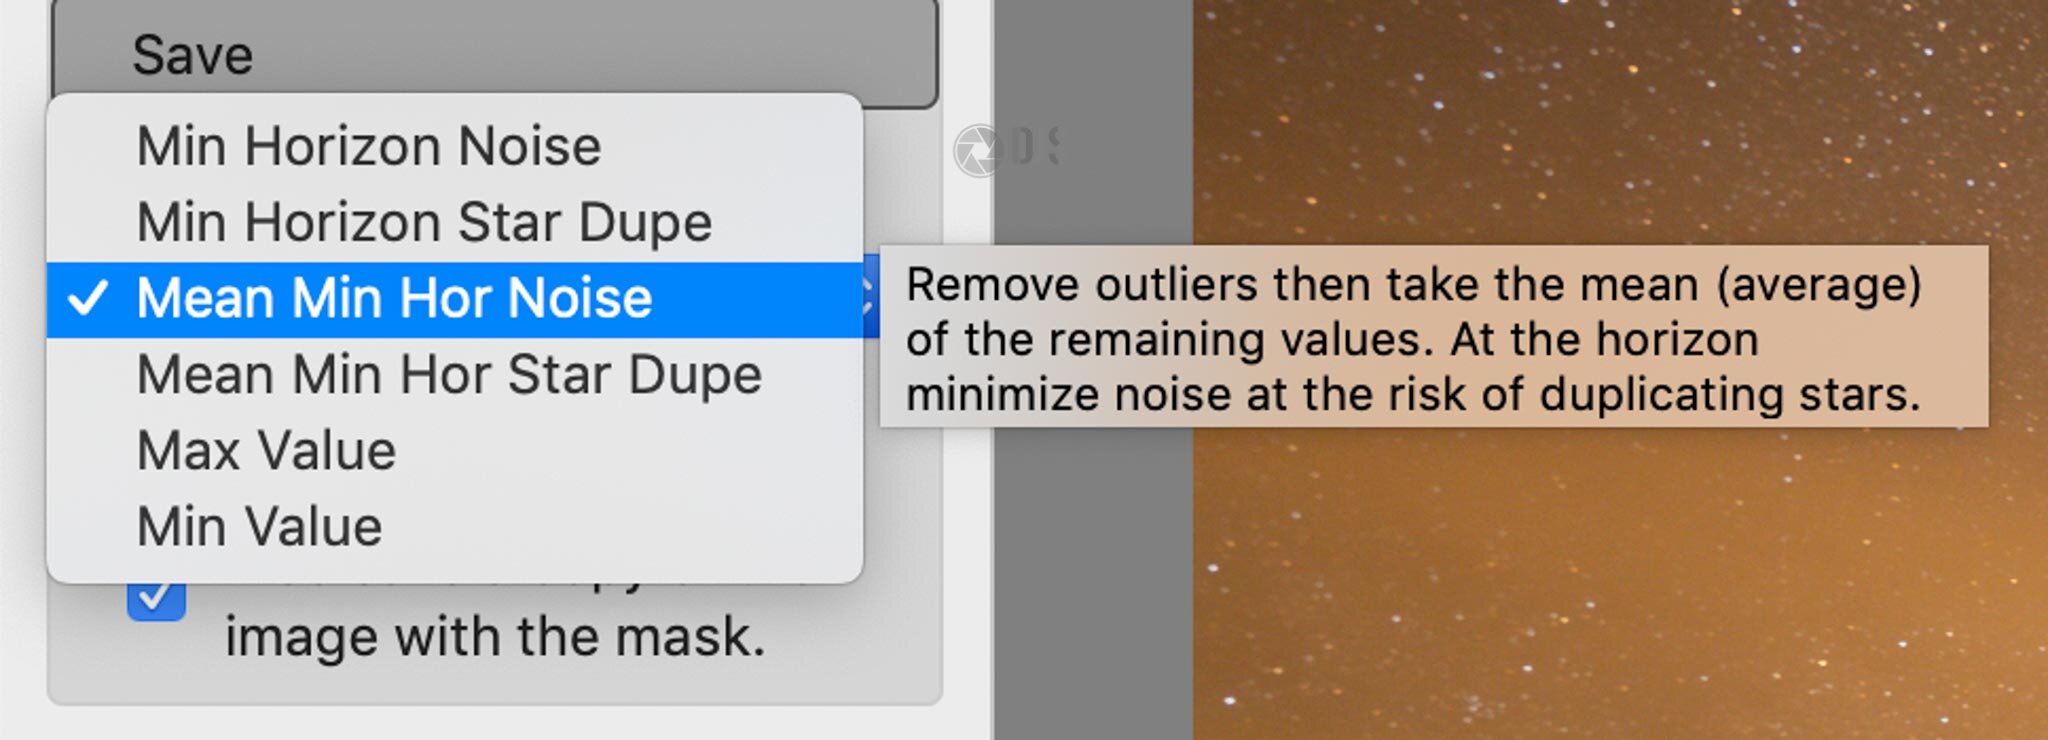
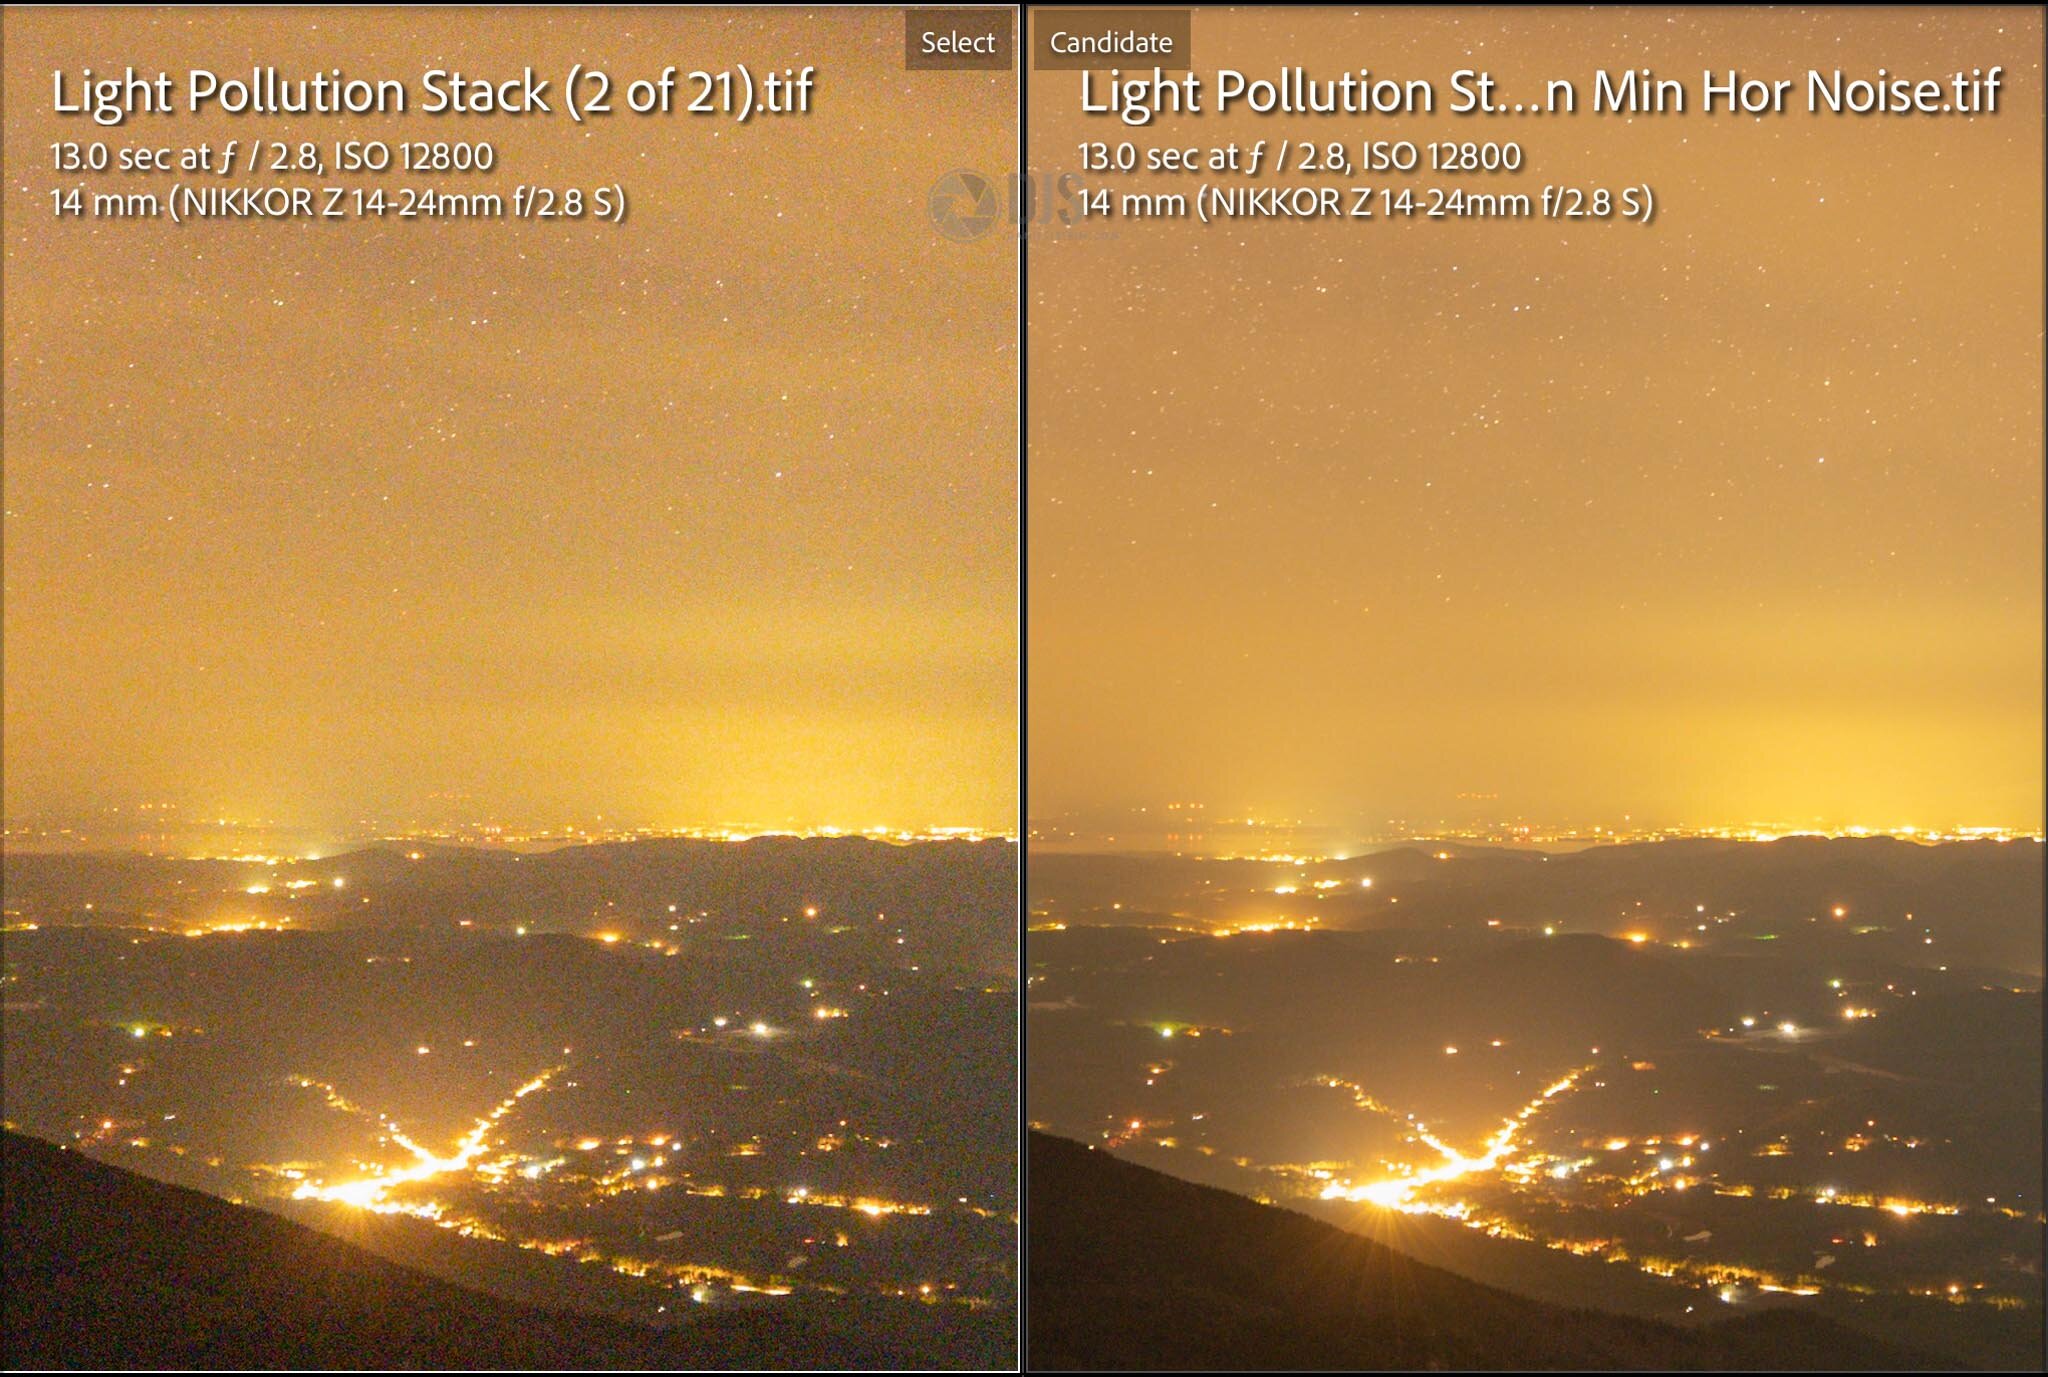
At this point, the software presents several algorithms you can choose from over on the left. If you hover over them, you will find a brief explanation of what they do. Play around with these and see which algo fits your image best. My take: I have had the best results with “Mean Min Horizon Noise,” and “Mean Min Horizon Star Dupe.” Again play around with these, your mileage may vary.
Use the “Z” key to zoom in 100% while messing with these. This can help determine which one works best.
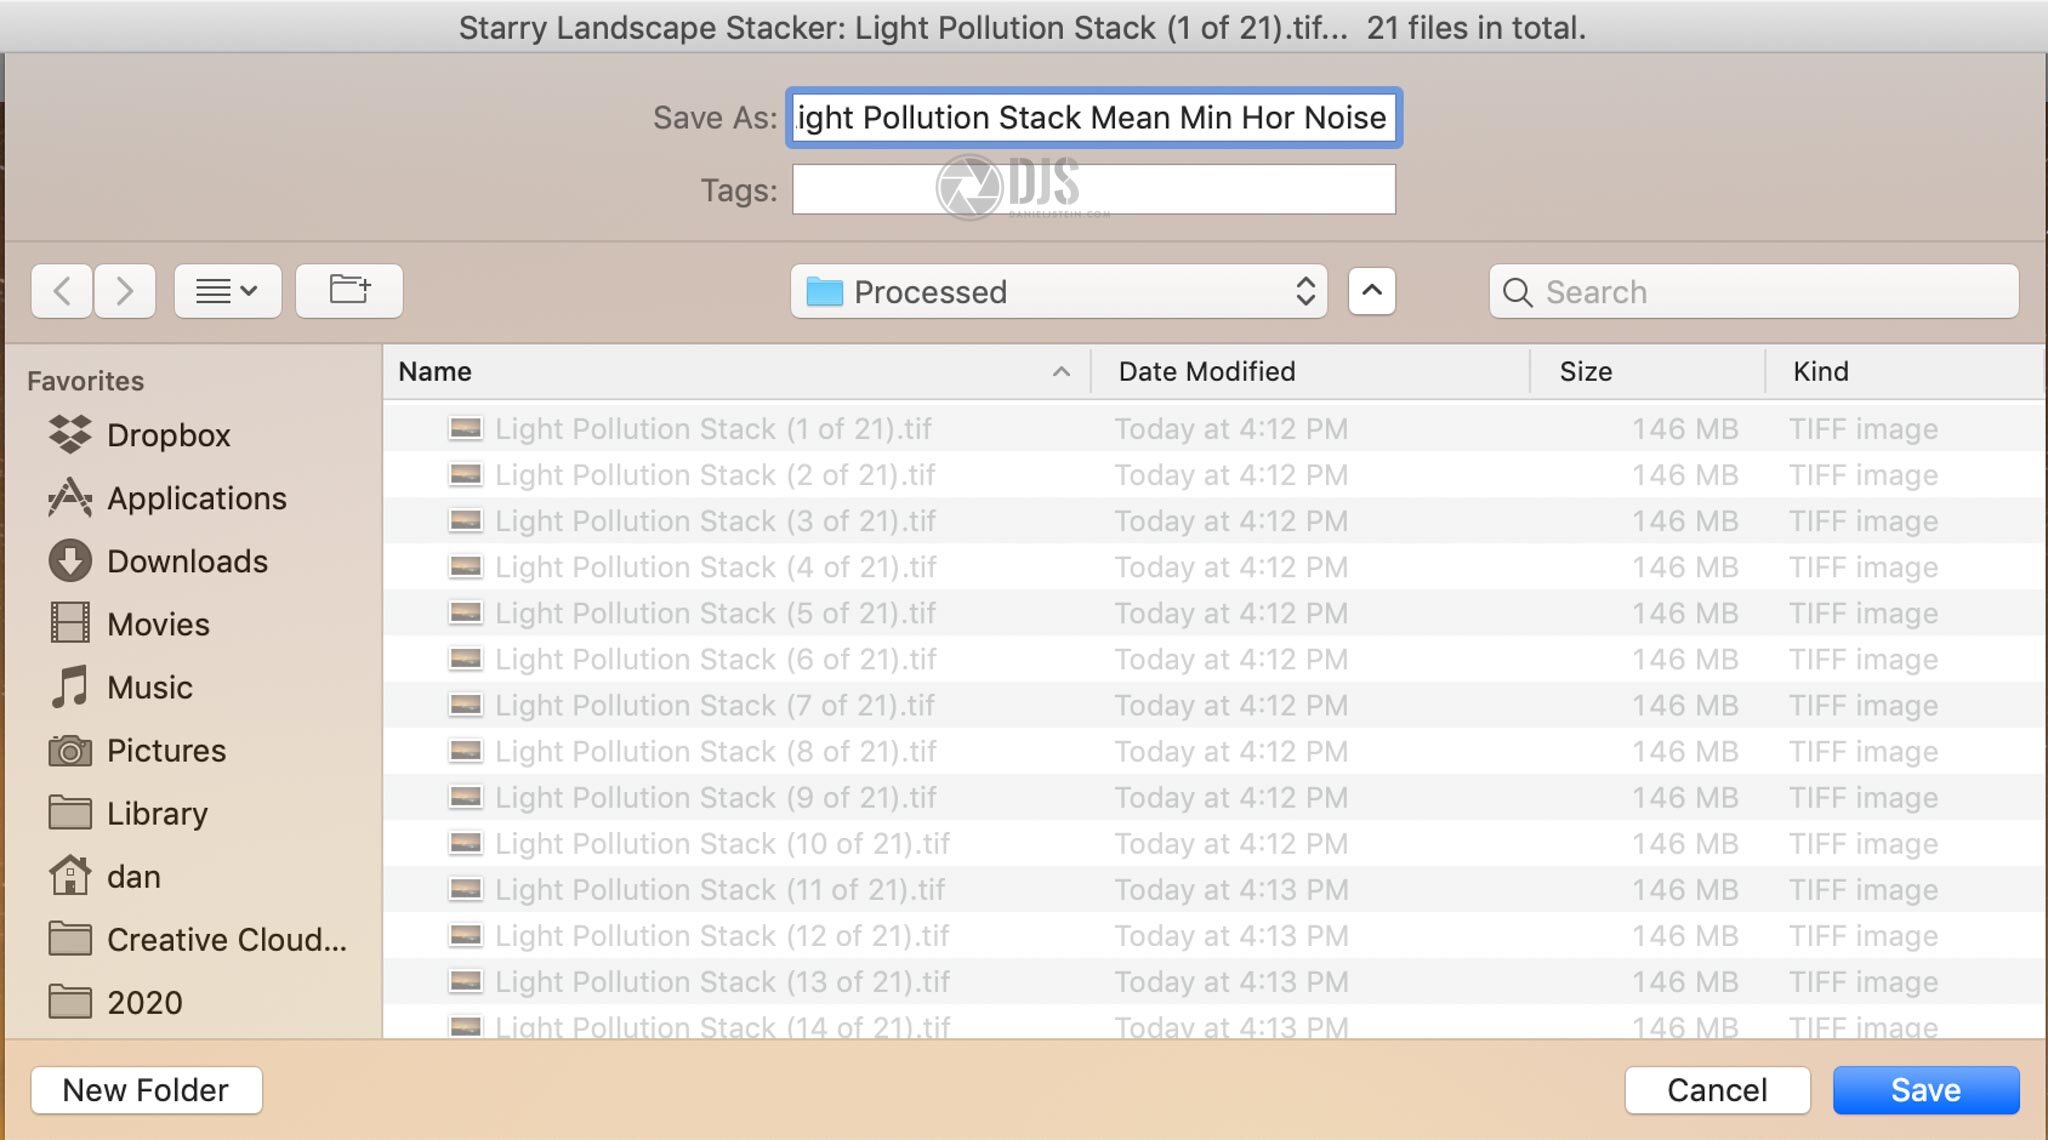
Once complete, press “Save the Current” image. You can also save the mask you created with the blue paint. This can be helpful if you are masking in a different foreground image, for example if you took a blue hour foreground shot.
Images will be saved as a 16-bit TIFF. Once you are done, continue with your edits by importing in an image editor of your choice.
Now look at that juicy detail!!!!!
Before vs. After stacking (wow)!
Let’s Recap
Okay so here is what we learned in boating school today kids.
Plan out your shot by taking quick test compositions of what you want to shoot.
Figure out how long it is going to take to shoot your stack. The more shots you shoot, the cleaner your image will be, but the longer it will take.
Use an external intervalometer or your camera’s built-in function to take your shots.
Once you get back to your computer, apply the same edits to each RAW file and export.
Open the files in StarryLandscapeStacker and let it work its magic.
Erase the dots in your foreground, and add dots in your sky and horizon where applicable.
Find the sky and refine the mask with your brush, ensuring nothing in your foreground is painted.
Composite your image and select an algorithm that works best for your shot.
Save your image and enjoy an astro image that has significantly less noise than a single exposure. Continue working with your shot in your processing software of choice.